Compare commits
1 Commits
| Author | SHA1 | Date | |
|---|---|---|---|
|
|
e2d579bf39 |
@@ -49,32 +49,3 @@ body:
|
||||
placeholder: diffusers version, platform, python version, ...
|
||||
validations:
|
||||
required: true
|
||||
- type: textarea
|
||||
id: who-can-help
|
||||
attributes:
|
||||
label: Who can help?
|
||||
description: |
|
||||
Your issue will be replied to more quickly if you can figure out the right person to tag with @
|
||||
If you know how to use git blame, that is the easiest way, otherwise, here is a rough guide of **who to tag**.
|
||||
|
||||
All issues are read by one of the core maintainers, so if you don't know who to tag, just leave this blank and
|
||||
a core maintainer will ping the right person.
|
||||
|
||||
Please tag fewer than 3 people.
|
||||
|
||||
General library related questions: @patrickvonplaten and @sayakpaul
|
||||
|
||||
Questions on the training examples: @williamberman, @sayakpaul, @yiyixuxu
|
||||
|
||||
Questions on memory optimizations, LoRA, float16, etc.: @williamberman, @patrickvonplaten, and @sayakpaul
|
||||
|
||||
Questions on schedulers: @patrickvonplaten and @williamberman
|
||||
|
||||
Questions on models and pipelines: @patrickvonplaten, @sayakpaul, and @williamberman
|
||||
|
||||
Questions on JAX- and MPS-related things: @pcuenca
|
||||
|
||||
Questions on audio pipelines: @patrickvonplaten, @kashif, and @sanchit-gandhi
|
||||
|
||||
Documentation: @stevhliu and @yiyixuxu
|
||||
placeholder: "@Username ..."
|
||||
|
||||
@@ -1,60 +0,0 @@
|
||||
# What does this PR do?
|
||||
|
||||
<!--
|
||||
Congratulations! You've made it this far! You're not quite done yet though.
|
||||
|
||||
Once merged, your PR is going to appear in the release notes with the title you set, so make sure it's a great title that fully reflects the extent of your awesome contribution.
|
||||
|
||||
Then, please replace this with a description of the change and which issue is fixed (if applicable). Please also include relevant motivation and context. List any dependencies (if any) that are required for this change.
|
||||
|
||||
Once you're done, someone will review your PR shortly (see the section "Who can review?" below to tag some potential reviewers). They may suggest changes to make the code even better. If no one reviewed your PR after a week has passed, don't hesitate to post a new comment @-mentioning the same persons---sometimes notifications get lost.
|
||||
-->
|
||||
|
||||
<!-- Remove if not applicable -->
|
||||
|
||||
Fixes # (issue)
|
||||
|
||||
|
||||
## Before submitting
|
||||
- [ ] This PR fixes a typo or improves the docs (you can dismiss the other checks if that's the case).
|
||||
- [ ] Did you read the [contributor guideline](https://github.com/huggingface/diffusers/blob/main/CONTRIBUTING.md)?
|
||||
- [ ] Did you read our [philosophy doc](https://github.com/huggingface/diffusers/blob/main/PHILOSOPHY.md) (important for complex PRs)?
|
||||
- [ ] Was this discussed/approved via a Github issue or the [forum](https://discuss.huggingface.co/)? Please add a link to it if that's the case.
|
||||
- [ ] Did you make sure to update the documentation with your changes? Here are the
|
||||
[documentation guidelines](https://github.com/huggingface/diffusers/tree/main/docs), and
|
||||
[here are tips on formatting docstrings](https://github.com/huggingface/transformers/tree/main/docs#writing-source-documentation).
|
||||
- [ ] Did you write any new necessary tests?
|
||||
|
||||
|
||||
## Who can review?
|
||||
|
||||
Anyone in the community is free to review the PR once the tests have passed. Feel free to tag
|
||||
members/contributors who may be interested in your PR.
|
||||
|
||||
<!-- Your PR will be replied to more quickly if you can figure out the right person to tag with @
|
||||
|
||||
If you know how to use git blame, that is the easiest way, otherwise, here is a rough guide of **who to tag**.
|
||||
Please tag fewer than 3 people.
|
||||
|
||||
Core library:
|
||||
|
||||
- Schedulers: @williamberman and @patrickvonplaten
|
||||
- Pipelines: @patrickvonplaten and @sayakpaul
|
||||
- Training examples: @sayakpaul and @patrickvonplaten
|
||||
- Docs: @stevenliu and @yiyixu
|
||||
- JAX and MPS: @pcuenca
|
||||
- Audio: @sanchit-gandhi
|
||||
- General functionalities: @patrickvonplaten and @sayakpaul
|
||||
|
||||
Integrations:
|
||||
|
||||
- deepspeed: HF Trainer/Accelerate: @pacman100
|
||||
|
||||
HF projects:
|
||||
|
||||
- accelerate: [different repo](https://github.com/huggingface/accelerate)
|
||||
- datasets: [different repo](https://github.com/huggingface/datasets)
|
||||
- transformers: [different repo](https://github.com/huggingface/transformers)
|
||||
- safetensors: [different repo](https://github.com/huggingface/safetensors)
|
||||
|
||||
-->
|
||||
@@ -5,19 +5,15 @@ on:
|
||||
branches:
|
||||
- main
|
||||
- doc-builder*
|
||||
- v*-release
|
||||
- v*-patch
|
||||
|
||||
jobs:
|
||||
build:
|
||||
build:
|
||||
uses: huggingface/doc-builder/.github/workflows/build_main_documentation.yml@main
|
||||
with:
|
||||
commit_sha: ${{ github.sha }}
|
||||
install_libgl1: true
|
||||
package: diffusers
|
||||
notebook_folder: diffusers_doc
|
||||
languages: en ko zh
|
||||
|
||||
languages: en ko
|
||||
secrets:
|
||||
token: ${{ secrets.HUGGINGFACE_PUSH }}
|
||||
hf_token: ${{ secrets.HF_DOC_BUILD_PUSH }}
|
||||
|
||||
@@ -9,10 +9,9 @@ concurrency:
|
||||
|
||||
jobs:
|
||||
build:
|
||||
uses: huggingface/doc-builder/.github/workflows/build_pr_documentation.yml@main
|
||||
uses: huggingface/doc-builder/.github/workflows/build_pr_documentation.yml@@test_xenova_regex_optim
|
||||
with:
|
||||
commit_sha: ${{ github.event.pull_request.head.sha }}
|
||||
pr_number: ${{ github.event.number }}
|
||||
install_libgl1: true
|
||||
package: diffusers
|
||||
languages: en ko zh
|
||||
languages: en ko
|
||||
|
||||
@@ -1,14 +1,13 @@
|
||||
name: Delete doc comment
|
||||
name: Delete dev documentation
|
||||
|
||||
on:
|
||||
workflow_run:
|
||||
workflows: ["Delete doc comment trigger"]
|
||||
types:
|
||||
- completed
|
||||
pull_request:
|
||||
types: [ closed ]
|
||||
|
||||
|
||||
jobs:
|
||||
delete:
|
||||
uses: huggingface/doc-builder/.github/workflows/delete_doc_comment.yml@main
|
||||
secrets:
|
||||
comment_bot_token: ${{ secrets.COMMENT_BOT_TOKEN }}
|
||||
with:
|
||||
pr_number: ${{ github.event.number }}
|
||||
package: diffusers
|
||||
|
||||
@@ -1,12 +0,0 @@
|
||||
name: Delete doc comment trigger
|
||||
|
||||
on:
|
||||
pull_request:
|
||||
types: [ closed ]
|
||||
|
||||
|
||||
jobs:
|
||||
delete:
|
||||
uses: huggingface/doc-builder/.github/workflows/delete_doc_comment_trigger.yml@main
|
||||
with:
|
||||
pr_number: ${{ github.event.number }}
|
||||
@@ -1,32 +0,0 @@
|
||||
name: Run dependency tests
|
||||
|
||||
on:
|
||||
pull_request:
|
||||
branches:
|
||||
- main
|
||||
push:
|
||||
branches:
|
||||
- main
|
||||
|
||||
concurrency:
|
||||
group: ${{ github.workflow }}-${{ github.head_ref || github.run_id }}
|
||||
cancel-in-progress: true
|
||||
|
||||
jobs:
|
||||
check_dependencies:
|
||||
runs-on: ubuntu-latest
|
||||
steps:
|
||||
- uses: actions/checkout@v3
|
||||
- name: Set up Python
|
||||
uses: actions/setup-python@v4
|
||||
with:
|
||||
python-version: "3.7"
|
||||
- name: Install dependencies
|
||||
run: |
|
||||
python -m pip install --upgrade pip
|
||||
pip install -e .
|
||||
pip install pytest
|
||||
- name: Check for soft dependencies
|
||||
run: |
|
||||
pytest tests/others/test_dependencies.py
|
||||
|
||||
@@ -4,9 +4,6 @@ on:
|
||||
pull_request:
|
||||
branches:
|
||||
- main
|
||||
push:
|
||||
branches:
|
||||
- ci-*
|
||||
|
||||
concurrency:
|
||||
group: ${{ github.workflow }}-${{ github.head_ref || github.run_id }}
|
||||
@@ -65,7 +62,7 @@ jobs:
|
||||
|
||||
- name: Install dependencies
|
||||
run: |
|
||||
apt-get update && apt-get install libsndfile1-dev libgl1 -y
|
||||
apt-get update && apt-get install libsndfile1-dev -y
|
||||
python -m pip install -e .[quality,test]
|
||||
|
||||
- name: Environment
|
||||
@@ -84,7 +81,7 @@ jobs:
|
||||
if: ${{ matrix.config.framework == 'pytorch_models' }}
|
||||
run: |
|
||||
python -m pytest -n 2 --max-worker-restart=0 --dist=loadfile \
|
||||
-s -v -k "not Flax and not Onnx and not Dependency" \
|
||||
-s -v -k "not Flax and not Onnx" \
|
||||
--make-reports=tests_${{ matrix.config.report }} \
|
||||
tests/models tests/schedulers tests/others
|
||||
|
||||
|
||||
@@ -17,7 +17,6 @@ jobs:
|
||||
run_slow_tests:
|
||||
strategy:
|
||||
fail-fast: false
|
||||
max-parallel: 1
|
||||
matrix:
|
||||
config:
|
||||
- name: Slow PyTorch CUDA tests on Ubuntu
|
||||
@@ -61,7 +60,6 @@ jobs:
|
||||
|
||||
- name: Install dependencies
|
||||
run: |
|
||||
apt-get update && apt-get install libsndfile1-dev libgl1 -y
|
||||
python -m pip install -e .[quality,test]
|
||||
|
||||
- name: Environment
|
||||
|
||||
@@ -60,7 +60,7 @@ jobs:
|
||||
|
||||
- name: Install dependencies
|
||||
run: |
|
||||
apt-get update && apt-get install libsndfile1-dev libgl1 -y
|
||||
apt-get update && apt-get install libsndfile1-dev -y
|
||||
python -m pip install -e .[quality,test]
|
||||
|
||||
- name: Environment
|
||||
|
||||
@@ -1,16 +0,0 @@
|
||||
name: Upload PR Documentation
|
||||
|
||||
on:
|
||||
workflow_run:
|
||||
workflows: ["Build PR Documentation"]
|
||||
types:
|
||||
- completed
|
||||
|
||||
jobs:
|
||||
build:
|
||||
uses: huggingface/doc-builder/.github/workflows/upload_pr_documentation.yml@main
|
||||
with:
|
||||
package_name: diffusers
|
||||
secrets:
|
||||
hf_token: ${{ secrets.HF_DOC_BUILD_PUSH }}
|
||||
comment_bot_token: ${{ secrets.COMMENT_BOT_TOKEN }}
|
||||
+5
-5
@@ -125,14 +125,14 @@ Awesome! Tell us what problem it solved for you.
|
||||
|
||||
You can open a feature request [here](https://github.com/huggingface/diffusers/issues/new?assignees=&labels=&template=feature_request.md&title=).
|
||||
|
||||
#### 2.3 Feedback.
|
||||
#### 2.3 Feedback.
|
||||
|
||||
Feedback about the library design and why it is good or not good helps the core maintainers immensely to build a user-friendly library. To understand the philosophy behind the current design philosophy, please have a look [here](https://huggingface.co/docs/diffusers/conceptual/philosophy). If you feel like a certain design choice does not fit with the current design philosophy, please explain why and how it should be changed. If a certain design choice follows the design philosophy too much, hence restricting use cases, explain why and how it should be changed.
|
||||
If a certain design choice is very useful for you, please also leave a note as this is great feedback for future design decisions.
|
||||
|
||||
You can open an issue about feedback [here](https://github.com/huggingface/diffusers/issues/new?assignees=&labels=&template=feedback.md&title=).
|
||||
|
||||
#### 2.4 Technical questions.
|
||||
#### 2.4 Technical questions.
|
||||
|
||||
Technical questions are mainly about why certain code of the library was written in a certain way, or what a certain part of the code does. Please make sure to link to the code in question and please provide detail on
|
||||
why this part of the code is difficult to understand.
|
||||
@@ -297,7 +297,7 @@ if you don't know yet what specific component you would like to add:
|
||||
- [Model or pipeline](https://github.com/huggingface/diffusers/issues?q=is%3Aopen+is%3Aissue+label%3A%22New+pipeline%2Fmodel%22)
|
||||
- [Scheduler](https://github.com/huggingface/diffusers/issues?q=is%3Aopen+is%3Aissue+label%3A%22New+scheduler%22)
|
||||
|
||||
Before adding any of the three components, it is strongly recommended that you give the [Philosophy guide](https://github.com/huggingface/diffusers/blob/main/PHILOSOPHY.md) a read to better understand the design of any of the three components. Please be aware that
|
||||
Before adding any of the three components, it is strongly recommended that you give the [Philosophy guide](https://github.com/huggingface/diffusers/issues?q=is%3Aopen+is%3Aissue+label%3A%22Good+second+issue%22) a read to better understand the design of any of the three components. Please be aware that
|
||||
we cannot merge model, scheduler, or pipeline additions that strongly diverge from our design philosophy
|
||||
as it will lead to API inconsistencies. If you fundamentally disagree with a design choice, please
|
||||
open a [Feedback issue](https://github.com/huggingface/diffusers/issues/new?assignees=&labels=&template=feedback.md&title=) instead so that it can be discussed whether a certain design
|
||||
@@ -394,8 +394,8 @@ passes. You should run the tests impacted by your changes like this:
|
||||
```bash
|
||||
$ pytest tests/<TEST_TO_RUN>.py
|
||||
```
|
||||
|
||||
Before you run the tests, please make sure you install the dependencies required for testing. You can do so
|
||||
|
||||
Before you run the tests, please make sure you install the dependencies required for testing. You can do so
|
||||
with this command:
|
||||
|
||||
```bash
|
||||
|
||||
+10
-10
@@ -27,18 +27,18 @@ In a nutshell, Diffusers is built to be a natural extension of PyTorch. Therefor
|
||||
|
||||
## Simple over easy
|
||||
|
||||
As PyTorch states, **explicit is better than implicit** and **simple is better than complex**. This design philosophy is reflected in multiple parts of the library:
|
||||
As PyTorch states, **explicit is better than implicit** and **simple is better than complex**. This design philosophy is reflected in multiple parts of the library:
|
||||
- We follow PyTorch's API with methods like [`DiffusionPipeline.to`](https://huggingface.co/docs/diffusers/main/en/api/diffusion_pipeline#diffusers.DiffusionPipeline.to) to let the user handle device management.
|
||||
- Raising concise error messages is preferred to silently correct erroneous input. Diffusers aims at teaching the user, rather than making the library as easy to use as possible.
|
||||
- Complex model vs. scheduler logic is exposed instead of magically handled inside. Schedulers/Samplers are separated from diffusion models with minimal dependencies on each other. This forces the user to write the unrolled denoising loop. However, the separation allows for easier debugging and gives the user more control over adapting the denoising process or switching out diffusion models or schedulers.
|
||||
- Separately trained components of the diffusion pipeline, *e.g.* the text encoder, the unet, and the variational autoencoder, each have their own model class. This forces the user to handle the interaction between the different model components, and the serialization format separates the model components into different files. However, this allows for easier debugging and customization. Dreambooth or textual inversion training
|
||||
is very simple thanks to diffusers' ability to separate single components of the diffusion pipeline.
|
||||
|
||||
## Tweakable, contributor-friendly over abstraction
|
||||
|
||||
For large parts of the library, Diffusers adopts an important design principle of the [Transformers library](https://github.com/huggingface/transformers), which is to prefer copy-pasted code over hasty abstractions. This design principle is very opinionated and stands in stark contrast to popular design principles such as [Don't repeat yourself (DRY)](https://en.wikipedia.org/wiki/Don%27t_repeat_yourself).
|
||||
In short, just like Transformers does for modeling files, diffusers prefers to keep an extremely low level of abstraction and very self-contained code for pipelines and schedulers.
|
||||
Functions, long code blocks, and even classes can be copied across multiple files which at first can look like a bad, sloppy design choice that makes the library unmaintainable.
|
||||
Functions, long code blocks, and even classes can be copied across multiple files which at first can look like a bad, sloppy design choice that makes the library unmaintainable.
|
||||
**However**, this design has proven to be extremely successful for Transformers and makes a lot of sense for community-driven, open-source machine learning libraries because:
|
||||
- Machine Learning is an extremely fast-moving field in which paradigms, model architectures, and algorithms are changing rapidly, which therefore makes it very difficult to define long-lasting code abstractions.
|
||||
- Machine Learning practitioners like to be able to quickly tweak existing code for ideation and research and therefore prefer self-contained code over one that contains many abstractions.
|
||||
@@ -47,10 +47,10 @@ Functions, long code blocks, and even classes can be copied across multiple file
|
||||
At Hugging Face, we call this design the **single-file policy** which means that almost all of the code of a certain class should be written in a single, self-contained file. To read more about the philosophy, you can have a look
|
||||
at [this blog post](https://huggingface.co/blog/transformers-design-philosophy).
|
||||
|
||||
In diffusers, we follow this philosophy for both pipelines and schedulers, but only partly for diffusion models. The reason we don't follow this design fully for diffusion models is because almost all diffusion pipelines, such
|
||||
In diffusers, we follow this philosophy for both pipelines and schedulers, but only partly for diffusion models. The reason we don't follow this design fully for diffusion models is because almost all diffusion pipelines, such
|
||||
as [DDPM](https://huggingface.co/docs/diffusers/v0.12.0/en/api/pipelines/ddpm), [Stable Diffusion](https://huggingface.co/docs/diffusers/v0.12.0/en/api/pipelines/stable_diffusion/overview#stable-diffusion-pipelines), [UnCLIP (Dalle-2)](https://huggingface.co/docs/diffusers/v0.12.0/en/api/pipelines/unclip#overview) and [Imagen](https://imagen.research.google/) all rely on the same diffusion model, the [UNet](https://huggingface.co/docs/diffusers/api/models#diffusers.UNet2DConditionModel).
|
||||
|
||||
Great, now you should have generally understood why 🧨 Diffusers is designed the way it is 🤗.
|
||||
Great, now you should have generally understood why 🧨 Diffusers is designed the way it is 🤗.
|
||||
We try to apply these design principles consistently across the library. Nevertheless, there are some minor exceptions to the philosophy or some unlucky design choices. If you have feedback regarding the design, we would ❤️ to hear it [directly on GitHub](https://github.com/huggingface/diffusers/issues/new?assignees=&labels=&template=feedback.md&title=).
|
||||
|
||||
## Design Philosophy in Details
|
||||
@@ -89,7 +89,7 @@ The following design principles are followed:
|
||||
- Models should by default have the highest precision and lowest performance setting.
|
||||
- To integrate new model checkpoints whose general architecture can be classified as an architecture that already exists in Diffusers, the existing model architecture shall be adapted to make it work with the new checkpoint. One should only create a new file if the model architecture is fundamentally different.
|
||||
- Models should be designed to be easily extendable to future changes. This can be achieved by limiting public function arguments, configuration arguments, and "foreseeing" future changes, *e.g.* it is usually better to add `string` "...type" arguments that can easily be extended to new future types instead of boolean `is_..._type` arguments. Only the minimum amount of changes shall be made to existing architectures to make a new model checkpoint work.
|
||||
- The model design is a difficult trade-off between keeping code readable and concise and supporting many model checkpoints. For most parts of the modeling code, classes shall be adapted for new model checkpoints, while there are some exceptions where it is preferred to add new classes to make sure the code is kept concise and
|
||||
readable longterm, such as [UNet blocks](https://github.com/huggingface/diffusers/blob/main/src/diffusers/models/unet_2d_blocks.py) and [Attention processors](https://github.com/huggingface/diffusers/blob/main/src/diffusers/models/cross_attention.py).
|
||||
|
||||
### Schedulers
|
||||
@@ -97,9 +97,9 @@ readable longterm, such as [UNet blocks](https://github.com/huggingface/diffuser
|
||||
Schedulers are responsible to guide the denoising process for inference as well as to define a noise schedule for training. They are designed as individual classes with loadable configuration files and strongly follow the **single-file policy**.
|
||||
|
||||
The following design principles are followed:
|
||||
- All schedulers are found in [`src/diffusers/schedulers`](https://github.com/huggingface/diffusers/tree/main/src/diffusers/schedulers).
|
||||
- Schedulers are **not** allowed to import from large utils files and shall be kept very self-contained.
|
||||
- One scheduler python file corresponds to one scheduler algorithm (as might be defined in a paper).
|
||||
- If schedulers share similar functionalities, we can make use of the `#Copied from` mechanism.
|
||||
- Schedulers all inherit from `SchedulerMixin` and `ConfigMixin`.
|
||||
- Schedulers can be easily swapped out with the [`ConfigMixin.from_config`](https://huggingface.co/docs/diffusers/main/en/api/configuration#diffusers.ConfigMixin.from_config) method as explained in detail [here](./using-diffusers/schedulers.mdx).
|
||||
|
||||
@@ -25,12 +25,12 @@
|
||||
|
||||
## Installation
|
||||
|
||||
We recommend installing 🤗 Diffusers in a virtual environment from PyPi or Conda. For more details about installing [PyTorch](https://pytorch.org/get-started/locally/) and [Flax](https://flax.readthedocs.io/en/latest/#installation), please refer to their official documentation.
|
||||
We recommend installing 🤗 Diffusers in a virtual environment from PyPi or Conda. For more details about installing [PyTorch](https://pytorch.org/get-started/locally/) and [Flax](https://flax.readthedocs.io/en/latest/installation.html), please refer to their official documentation.
|
||||
|
||||
### PyTorch
|
||||
|
||||
With `pip` (official package):
|
||||
|
||||
|
||||
```bash
|
||||
pip install --upgrade diffusers[torch]
|
||||
```
|
||||
@@ -107,7 +107,7 @@ Check out the [Quickstart](https://huggingface.co/docs/diffusers/quicktour) to l
|
||||
| [Training](https://huggingface.co/docs/diffusers/training/overview) | Guides for how to train a diffusion model for different tasks with different training techniques. |
|
||||
## Contribution
|
||||
|
||||
We ❤️ contributions from the open-source community!
|
||||
We ❤️ contributions from the open-source community!
|
||||
If you want to contribute to this library, please check out our [Contribution guide](https://github.com/huggingface/diffusers/blob/main/CONTRIBUTING.md).
|
||||
You can look out for [issues](https://github.com/huggingface/diffusers/issues) you'd like to tackle to contribute to the library.
|
||||
- See [Good first issues](https://github.com/huggingface/diffusers/issues?q=is%3Aopen+is%3Aissue+label%3A%22good+first+issue%22) for general opportunities to contribute
|
||||
@@ -128,7 +128,7 @@ just hang out ☕.
|
||||
</tr>
|
||||
<tr style="border-top: 2px solid black">
|
||||
<td>Unconditional Image Generation</td>
|
||||
<td><a href="https://huggingface.co/docs/diffusers/api/pipelines/ddpm"> DDPM </a></td>
|
||||
<td><a href="https://huggingface.co/docs/diffusers/api/pipelines/ddpm"> DDPM </a></td>
|
||||
<td><a href="https://huggingface.co/google/ddpm-ema-church-256"> google/ddpm-ema-church-256 </a></td>
|
||||
</tr>
|
||||
<tr style="border-top: 2px solid black">
|
||||
@@ -143,14 +143,9 @@ just hang out ☕.
|
||||
</tr>
|
||||
<tr>
|
||||
<td>Text-to-Image</td>
|
||||
<td><a href="https://huggingface.co/docs/diffusers/api/pipelines/if">DeepFloyd IF</a></td>
|
||||
<td><a href="https://huggingface.co/docs/diffusers/api/pipelines/if">if</a></td>
|
||||
<td><a href="https://huggingface.co/DeepFloyd/IF-I-XL-v1.0"> DeepFloyd/IF-I-XL-v1.0 </a></td>
|
||||
</tr>
|
||||
<tr>
|
||||
<td>Text-to-Image</td>
|
||||
<td><a href="https://huggingface.co/docs/diffusers/api/pipelines/kandinsky">Kandinsky</a></td>
|
||||
<td><a href="https://huggingface.co/kandinsky-community/kandinsky-2-2-decoder"> kandinsky-community/kandinsky-2-2-decoder </a></td>
|
||||
</tr>
|
||||
<tr style="border-top: 2px solid black">
|
||||
<td>Text-guided Image-to-Image</td>
|
||||
<td><a href="https://huggingface.co/docs/diffusers/api/pipelines/stable_diffusion/controlnet">Controlnet</a></td>
|
||||
@@ -158,7 +153,7 @@ just hang out ☕.
|
||||
</tr>
|
||||
<tr>
|
||||
<td>Text-guided Image-to-Image</td>
|
||||
<td><a href="https://huggingface.co/docs/diffusers/api/pipelines/pix2pix">Instruct Pix2Pix</a></td>
|
||||
<td><a href="https://huggingface.co/docs/diffusers/api/pipelines/stable_diffusion/pix2pix">Instruct Pix2Pix</a></td>
|
||||
<td><a href="https://huggingface.co/timbrooks/instruct-pix2pix"> timbrooks/instruct-pix2pix </a></td>
|
||||
</tr>
|
||||
<tr>
|
||||
@@ -190,13 +185,13 @@ just hang out ☕.
|
||||
|
||||
## Popular libraries using 🧨 Diffusers
|
||||
|
||||
- https://github.com/microsoft/TaskMatrix
|
||||
- https://github.com/invoke-ai/InvokeAI
|
||||
- https://github.com/apple/ml-stable-diffusion
|
||||
- https://github.com/Sanster/lama-cleaner
|
||||
- https://github.com/microsoft/TaskMatrix
|
||||
- https://github.com/invoke-ai/InvokeAI
|
||||
- https://github.com/apple/ml-stable-diffusion
|
||||
- https://github.com/Sanster/lama-cleaner
|
||||
- https://github.com/IDEA-Research/Grounded-Segment-Anything
|
||||
- https://github.com/ashawkey/stable-dreamfusion
|
||||
- https://github.com/deep-floyd/IF
|
||||
- https://github.com/ashawkey/stable-dreamfusion
|
||||
- https://github.com/deep-floyd/IF
|
||||
- https://github.com/bentoml/BentoML
|
||||
- https://github.com/bmaltais/kohya_ss
|
||||
- +3000 other amazing GitHub repositories 💪
|
||||
|
||||
@@ -14,7 +14,6 @@ RUN apt update && \
|
||||
libsndfile1-dev \
|
||||
python3.8 \
|
||||
python3-pip \
|
||||
libgl1 \
|
||||
python3.8-venv && \
|
||||
rm -rf /var/lib/apt/lists
|
||||
|
||||
@@ -28,7 +27,6 @@ RUN python3 -m pip install --no-cache-dir --upgrade pip && \
|
||||
torch \
|
||||
torchvision \
|
||||
torchaudio \
|
||||
invisible_watermark \
|
||||
--extra-index-url https://download.pytorch.org/whl/cpu && \
|
||||
python3 -m pip install --no-cache-dir \
|
||||
accelerate \
|
||||
@@ -42,4 +40,4 @@ RUN python3 -m pip install --no-cache-dir --upgrade pip && \
|
||||
tensorboard \
|
||||
transformers
|
||||
|
||||
CMD ["/bin/bash"]
|
||||
CMD ["/bin/bash"]
|
||||
@@ -12,7 +12,6 @@ RUN apt update && \
|
||||
curl \
|
||||
ca-certificates \
|
||||
libsndfile1-dev \
|
||||
libgl1 \
|
||||
python3.8 \
|
||||
python3-pip \
|
||||
python3.8-venv && \
|
||||
@@ -27,8 +26,7 @@ RUN python3 -m pip install --no-cache-dir --upgrade pip && \
|
||||
python3 -m pip install --no-cache-dir \
|
||||
torch \
|
||||
torchvision \
|
||||
torchaudio \
|
||||
invisible_watermark && \
|
||||
torchaudio && \
|
||||
python3 -m pip install --no-cache-dir \
|
||||
accelerate \
|
||||
datasets \
|
||||
|
||||
@@ -6,4 +6,4 @@ INSTALL_CONTENT = """
|
||||
# ! pip install git+https://github.com/huggingface/diffusers.git
|
||||
"""
|
||||
|
||||
notebook_first_cells = [{"type": "code", "content": INSTALL_CONTENT}]
|
||||
notebook_first_cells = [{"type": "code", "content": INSTALL_CONTENT}]
|
||||
+24
-70
@@ -50,8 +50,6 @@
|
||||
title: Distributed inference with multiple GPUs
|
||||
- local: using-diffusers/reusing_seeds
|
||||
title: Improve image quality with deterministic generation
|
||||
- local: using-diffusers/control_brightness
|
||||
title: Control image brightness
|
||||
- local: using-diffusers/reproducibility
|
||||
title: Create reproducible pipelines
|
||||
- local: using-diffusers/custom_pipeline_examples
|
||||
@@ -117,8 +115,6 @@
|
||||
title: Habana Gaudi
|
||||
- local: optimization/tome
|
||||
title: Token Merging
|
||||
- local: optimization/bentoml
|
||||
title: BentoML Integration
|
||||
title: Optimization/Special Hardware
|
||||
- sections:
|
||||
- local: conceptual/philosophy
|
||||
@@ -134,6 +130,8 @@
|
||||
title: Conceptual Guides
|
||||
- sections:
|
||||
- sections:
|
||||
- local: api/models
|
||||
title: Models
|
||||
- local: api/attnprocessor
|
||||
title: Attention Processor
|
||||
- local: api/diffusion_pipeline
|
||||
@@ -146,50 +144,16 @@
|
||||
title: Outputs
|
||||
- local: api/loaders
|
||||
title: Loaders
|
||||
- local: api/utilities
|
||||
title: Utilities
|
||||
- local: api/image_processor
|
||||
title: VAE Image Processor
|
||||
title: Main Classes
|
||||
- sections:
|
||||
- local: api/models/overview
|
||||
title: Overview
|
||||
- local: api/models/unet
|
||||
title: UNet1DModel
|
||||
- local: api/models/unet2d
|
||||
title: UNet2DModel
|
||||
- local: api/models/unet2d-cond
|
||||
title: UNet2DConditionModel
|
||||
- local: api/models/unet3d-cond
|
||||
title: UNet3DConditionModel
|
||||
- local: api/models/vq
|
||||
title: VQModel
|
||||
- local: api/models/autoencoderkl
|
||||
title: AutoencoderKL
|
||||
- local: api/models/asymmetricautoencoderkl
|
||||
title: AsymmetricAutoencoderKL
|
||||
- local: api/models/transformer2d
|
||||
title: Transformer2D
|
||||
- local: api/models/transformer_temporal
|
||||
title: Transformer Temporal
|
||||
- local: api/models/prior_transformer
|
||||
title: Prior Transformer
|
||||
- local: api/models/controlnet
|
||||
title: ControlNet
|
||||
title: Models
|
||||
- sections:
|
||||
- local: api/pipelines/overview
|
||||
title: Overview
|
||||
- local: api/pipelines/alt_diffusion
|
||||
title: AltDiffusion
|
||||
- local: api/pipelines/attend_and_excite
|
||||
title: Attend and Excite
|
||||
- local: api/pipelines/audio_diffusion
|
||||
title: Audio Diffusion
|
||||
- local: api/pipelines/audioldm
|
||||
title: AudioLDM
|
||||
- local: api/pipelines/consistency_models
|
||||
title: Consistency Models
|
||||
- local: api/pipelines/controlnet
|
||||
title: ControlNet
|
||||
- local: api/pipelines/cycle_diffusion
|
||||
@@ -200,38 +164,26 @@
|
||||
title: DDIM
|
||||
- local: api/pipelines/ddpm
|
||||
title: DDPM
|
||||
- local: api/pipelines/deepfloyd_if
|
||||
title: DeepFloyd IF
|
||||
- local: api/pipelines/diffedit
|
||||
title: DiffEdit
|
||||
- local: api/pipelines/dit
|
||||
title: DiT
|
||||
- local: api/pipelines/pix2pix
|
||||
title: InstructPix2Pix
|
||||
- local: api/pipelines/if
|
||||
title: IF
|
||||
- local: api/pipelines/kandinsky
|
||||
title: Kandinsky
|
||||
- local: api/pipelines/latent_diffusion
|
||||
title: Latent Diffusion
|
||||
- local: api/pipelines/panorama
|
||||
title: MultiDiffusion Panorama
|
||||
- local: api/pipelines/paint_by_example
|
||||
title: PaintByExample
|
||||
- local: api/pipelines/paradigms
|
||||
title: Parallel Sampling of Diffusion Models
|
||||
- local: api/pipelines/pix2pix_zero
|
||||
title: Pix2Pix Zero
|
||||
- local: api/pipelines/pndm
|
||||
title: PNDM
|
||||
- local: api/pipelines/repaint
|
||||
title: RePaint
|
||||
- local: api/pipelines/stable_diffusion_safe
|
||||
title: Safe Stable Diffusion
|
||||
- local: api/pipelines/score_sde_ve
|
||||
title: Score SDE VE
|
||||
- local: api/pipelines/self_attention_guidance
|
||||
title: Self-Attention Guidance
|
||||
- local: api/pipelines/semantic_stable_diffusion
|
||||
title: Semantic Guidance
|
||||
- local: api/pipelines/shap_e
|
||||
title: Shap-E
|
||||
- local: api/pipelines/spectrogram_diffusion
|
||||
title: Spectrogram Diffusion
|
||||
- sections:
|
||||
@@ -247,27 +199,31 @@
|
||||
title: Depth-to-Image
|
||||
- local: api/pipelines/stable_diffusion/image_variation
|
||||
title: Image-Variation
|
||||
- local: api/pipelines/stable_diffusion/stable_diffusion_safe
|
||||
title: Safe Stable Diffusion
|
||||
- local: api/pipelines/stable_diffusion/stable_diffusion_2
|
||||
title: Stable Diffusion 2
|
||||
- local: api/pipelines/stable_diffusion/stable_diffusion_xl
|
||||
title: Stable Diffusion XL
|
||||
- local: api/pipelines/stable_diffusion/latent_upscale
|
||||
title: Stable-Diffusion-Latent-Upscaler
|
||||
- local: api/pipelines/stable_diffusion/upscale
|
||||
title: Super-Resolution
|
||||
- local: api/pipelines/stable_diffusion/ldm3d_diffusion
|
||||
title: LDM3D Text-to-(RGB, Depth)
|
||||
- local: api/pipelines/stable_diffusion/adapter
|
||||
title: Stable Diffusion T2I-adapter
|
||||
- local: api/pipelines/stable_diffusion/latent_upscale
|
||||
title: Stable-Diffusion-Latent-Upscaler
|
||||
- local: api/pipelines/stable_diffusion/pix2pix
|
||||
title: InstructPix2Pix
|
||||
- local: api/pipelines/stable_diffusion/attend_and_excite
|
||||
title: Attend and Excite
|
||||
- local: api/pipelines/stable_diffusion/pix2pix_zero
|
||||
title: Pix2Pix Zero
|
||||
- local: api/pipelines/stable_diffusion/self_attention_guidance
|
||||
title: Self-Attention Guidance
|
||||
- local: api/pipelines/stable_diffusion/panorama
|
||||
title: MultiDiffusion Panorama
|
||||
- local: api/pipelines/stable_diffusion/model_editing
|
||||
title: Text-to-Image Model Editing
|
||||
- local: api/pipelines/stable_diffusion/diffedit
|
||||
title: DiffEdit
|
||||
title: Stable Diffusion
|
||||
- local: api/pipelines/stable_diffusion_2
|
||||
title: Stable Diffusion 2
|
||||
- local: api/pipelines/stable_unclip
|
||||
title: Stable unCLIP
|
||||
- local: api/pipelines/stochastic_karras_ve
|
||||
title: Stochastic Karras VE
|
||||
- local: api/pipelines/model_editing
|
||||
title: Text-to-Image Model Editing
|
||||
- local: api/pipelines/text_to_video
|
||||
title: Text-to-Video
|
||||
- local: api/pipelines/text_to_video_zero
|
||||
@@ -286,8 +242,6 @@
|
||||
- sections:
|
||||
- local: api/schedulers/overview
|
||||
title: Overview
|
||||
- local: api/schedulers/cm_stochastic_iterative
|
||||
title: Consistency Model Multistep Scheduler
|
||||
- local: api/schedulers/ddim
|
||||
title: DDIM
|
||||
- local: api/schedulers/ddim_inverse
|
||||
|
||||
@@ -11,9 +11,6 @@ An attention processor is a class for applying different types of attention mech
|
||||
## LoRAAttnProcessor
|
||||
[[autodoc]] models.attention_processor.LoRAAttnProcessor
|
||||
|
||||
## LoRAAttnProcessor2_0
|
||||
[[autodoc]] models.attention_processor.LoRAAttnProcessor2_0
|
||||
|
||||
## CustomDiffusionAttnProcessor
|
||||
[[autodoc]] models.attention_processor.CustomDiffusionAttnProcessor
|
||||
|
||||
|
||||
@@ -12,13 +12,8 @@ specific language governing permissions and limitations under the License.
|
||||
|
||||
# Configuration
|
||||
|
||||
Schedulers from [`~schedulers.scheduling_utils.SchedulerMixin`] and models from [`ModelMixin`] inherit from [`ConfigMixin`] which stores all the parameters that are passed to their respective `__init__` methods in a JSON-configuration file.
|
||||
|
||||
<Tip>
|
||||
|
||||
To use private or [gated](https://huggingface.co/docs/hub/models-gated#gated-models) models, log-in with `huggingface-cli login`.
|
||||
|
||||
</Tip>
|
||||
Schedulers from [`~schedulers.scheduling_utils.SchedulerMixin`] and models from [`ModelMixin`] inherit from [`ConfigMixin`] which conveniently takes care of storing all the parameters that are
|
||||
passed to their respective `__init__` methods in a JSON-configuration file.
|
||||
|
||||
## ConfigMixin
|
||||
|
||||
|
||||
@@ -12,25 +12,41 @@ specific language governing permissions and limitations under the License.
|
||||
|
||||
# Pipelines
|
||||
|
||||
The [`DiffusionPipeline`] is the quickest way to load any pretrained diffusion pipeline from the [Hub](https://huggingface.co/models?library=diffusers) for inference.
|
||||
The [`DiffusionPipeline`] is the easiest way to load any pretrained diffusion pipeline from the [Hub](https://huggingface.co/models?library=diffusers) and to use it in inference.
|
||||
|
||||
<Tip>
|
||||
|
||||
You shouldn't use the [`DiffusionPipeline`] class for training or finetuning a diffusion model. Individual
|
||||
components (for example, [`UNet2DModel`] and [`UNet2DConditionModel`]) of diffusion pipelines are usually trained individually, so we suggest directly working with them instead.
|
||||
|
||||
One should not use the Diffusion Pipeline class for training or fine-tuning a diffusion model. Individual
|
||||
components of diffusion pipelines are usually trained individually, so we suggest to directly work
|
||||
with [`UNetModel`] and [`UNetConditionModel`].
|
||||
|
||||
</Tip>
|
||||
|
||||
The pipeline type (for example [`StableDiffusionPipeline`]) of any diffusion pipeline loaded with [`~DiffusionPipeline.from_pretrained`] is automatically
|
||||
detected and pipeline components are loaded and passed to the `__init__` function of the pipeline.
|
||||
Any diffusion pipeline that is loaded with [`~DiffusionPipeline.from_pretrained`] will automatically
|
||||
detect the pipeline type, *e.g.* [`StableDiffusionPipeline`] and consequently load each component of the
|
||||
pipeline and pass them into the `__init__` function of the pipeline, *e.g.* [`~StableDiffusionPipeline.__init__`].
|
||||
|
||||
Any pipeline object can be saved locally with [`~DiffusionPipeline.save_pretrained`].
|
||||
|
||||
## DiffusionPipeline
|
||||
|
||||
[[autodoc]] DiffusionPipeline
|
||||
- all
|
||||
- __call__
|
||||
- device
|
||||
- to
|
||||
- components
|
||||
|
||||
## ImagePipelineOutput
|
||||
By default diffusion pipelines return an object of class
|
||||
|
||||
[[autodoc]] pipelines.ImagePipelineOutput
|
||||
|
||||
## AudioPipelineOutput
|
||||
By default diffusion pipelines return an object of class
|
||||
|
||||
[[autodoc]] pipelines.AudioPipelineOutput
|
||||
|
||||
## ImageTextPipelineOutput
|
||||
By default diffusion pipelines return an object of class
|
||||
|
||||
[[autodoc]] ImageTextPipelineOutput
|
||||
|
||||
@@ -1,27 +0,0 @@
|
||||
<!--Copyright 2023 The HuggingFace Team. All rights reserved.
|
||||
|
||||
Licensed under the Apache License, Version 2.0 (the "License"); you may not use this file except in compliance with
|
||||
the License. You may obtain a copy of the License at
|
||||
|
||||
http://www.apache.org/licenses/LICENSE-2.0
|
||||
|
||||
Unless required by applicable law or agreed to in writing, software distributed under the License is distributed on
|
||||
an "AS IS" BASIS, WITHOUT WARRANTIES OR CONDITIONS OF ANY KIND, either express or implied. See the License for the
|
||||
specific language governing permissions and limitations under the License.
|
||||
-->
|
||||
|
||||
# VAE Image Processor
|
||||
|
||||
The [`VaeImageProcessor`] provides a unified API for [`StableDiffusionPipeline`]'s to prepare image inputs for VAE encoding and post-processing outputs once they're decoded. This includes transformations such as resizing, normalization, and conversion between PIL Image, PyTorch, and NumPy arrays.
|
||||
|
||||
All pipelines with [`VaeImageProcessor`] accepts PIL Image, PyTorch tensor, or NumPy arrays as image inputs and returns outputs based on the `output_type` argument by the user. You can pass encoded image latents directly to the pipeline and return latents from the pipeline as a specific output with the `output_type` argument (for example `output_type="pt"`). This allows you to take the generated latents from one pipeline and pass it to another pipeline as input without leaving the latent space. It also makes it much easier to use multiple pipelines together by passing PyTorch tensors directly between different pipelines.
|
||||
|
||||
## VaeImageProcessor
|
||||
|
||||
[[autodoc]] image_processor.VaeImageProcessor
|
||||
|
||||
## VaeImageProcessorLDM3D
|
||||
|
||||
The [`VaeImageProcessorLDM3D`] accepts RGB and depth inputs and returns RGB and depth outputs.
|
||||
|
||||
[[autodoc]] image_processor.VaeImageProcessorLDM3D
|
||||
@@ -12,34 +12,31 @@ specific language governing permissions and limitations under the License.
|
||||
|
||||
# Loaders
|
||||
|
||||
Adapters (textual inversion, LoRA, hypernetworks) allow you to modify a diffusion model to generate images in a specific style without training or finetuning the entire model. The adapter weights are typically only a tiny fraction of the pretrained model's which making them very portable. 🤗 Diffusers provides an easy-to-use `LoaderMixin` API to load adapter weights.
|
||||
There are many ways to train adapter neural networks for diffusion models, such as
|
||||
- [Textual Inversion](./training/text_inversion.mdx)
|
||||
- [LoRA](https://github.com/cloneofsimo/lora)
|
||||
- [Hypernetworks](https://arxiv.org/abs/1609.09106)
|
||||
|
||||
<Tip warning={true}>
|
||||
Such adapter neural networks often only consist of a fraction of the number of weights compared
|
||||
to the pretrained model and as such are very portable. The Diffusers library offers an easy-to-use
|
||||
API to load such adapter neural networks via the [`loaders.py` module](https://github.com/huggingface/diffusers/blob/main/src/diffusers/loaders.py).
|
||||
|
||||
🧪 The `LoaderMixins` are highly experimental and prone to future changes. To use private or [gated](https://huggingface.co/docs/hub/models-gated#gated-models) models, log-in with `huggingface-cli login`.
|
||||
**Note**: This module is still highly experimental and prone to future changes.
|
||||
|
||||
</Tip>
|
||||
## LoaderMixins
|
||||
|
||||
## UNet2DConditionLoadersMixin
|
||||
### UNet2DConditionLoadersMixin
|
||||
|
||||
[[autodoc]] loaders.UNet2DConditionLoadersMixin
|
||||
|
||||
## TextualInversionLoaderMixin
|
||||
### TextualInversionLoaderMixin
|
||||
|
||||
[[autodoc]] loaders.TextualInversionLoaderMixin
|
||||
|
||||
## LoraLoaderMixin
|
||||
### LoraLoaderMixin
|
||||
|
||||
[[autodoc]] loaders.LoraLoaderMixin
|
||||
|
||||
## FromSingleFileMixin
|
||||
### FromCkptMixin
|
||||
|
||||
[[autodoc]] loaders.FromSingleFileMixin
|
||||
|
||||
## FromOriginalControlnetMixin
|
||||
|
||||
[[autodoc]] loaders.FromOriginalControlnetMixin
|
||||
|
||||
## FromOriginalVAEMixin
|
||||
|
||||
[[autodoc]] loaders.FromOriginalVAEMixin
|
||||
[[autodoc]] loaders.FromCkptMixin
|
||||
|
||||
@@ -12,9 +12,12 @@ specific language governing permissions and limitations under the License.
|
||||
|
||||
# Logging
|
||||
|
||||
🤗 Diffusers has a centralized logging system to easily manage the verbosity of the library. The default verbosity is set to `WARNING`.
|
||||
🧨 Diffusers has a centralized logging system, so that you can setup the verbosity of the library easily.
|
||||
|
||||
To change the verbosity level, use one of the direct setters. For instance, to change the verbosity to the `INFO` level.
|
||||
Currently the default verbosity of the library is `WARNING`.
|
||||
|
||||
To change the level of verbosity, just use one of the direct setters. For instance, here is how to change the verbosity
|
||||
to the INFO level.
|
||||
|
||||
```python
|
||||
import diffusers
|
||||
@@ -30,7 +33,7 @@ DIFFUSERS_VERBOSITY=error ./myprogram.py
|
||||
```
|
||||
|
||||
Additionally, some `warnings` can be disabled by setting the environment variable
|
||||
`DIFFUSERS_NO_ADVISORY_WARNINGS` to a true value, like `1`. This disables any warning logged by
|
||||
`DIFFUSERS_NO_ADVISORY_WARNINGS` to a true value, like *1*. This will disable any warning that is logged using
|
||||
[`logger.warning_advice`]. For example:
|
||||
|
||||
```bash
|
||||
@@ -49,21 +52,20 @@ logger.warning("WARN")
|
||||
```
|
||||
|
||||
|
||||
All methods of the logging module are documented below. The main methods are
|
||||
All the methods of this logging module are documented below, the main ones are
|
||||
[`logging.get_verbosity`] to get the current level of verbosity in the logger and
|
||||
[`logging.set_verbosity`] to set the verbosity to the level of your choice.
|
||||
[`logging.set_verbosity`] to set the verbosity to the level of your choice. In order (from the least
|
||||
verbose to the most verbose), those levels (with their corresponding int values in parenthesis) are:
|
||||
|
||||
In order from the least verbose to the most verbose:
|
||||
- `diffusers.logging.CRITICAL` or `diffusers.logging.FATAL` (int value, 50): only report the most
|
||||
critical errors.
|
||||
- `diffusers.logging.ERROR` (int value, 40): only report errors.
|
||||
- `diffusers.logging.WARNING` or `diffusers.logging.WARN` (int value, 30): only reports error and
|
||||
warnings. This is the default level used by the library.
|
||||
- `diffusers.logging.INFO` (int value, 20): reports error, warnings and basic information.
|
||||
- `diffusers.logging.DEBUG` (int value, 10): report all information.
|
||||
|
||||
| Method | Integer value | Description |
|
||||
|----------------------------------------------------------:|--------------:|----------------------------------------------------:|
|
||||
| `diffusers.logging.CRITICAL` or `diffusers.logging.FATAL` | 50 | only report the most critical errors |
|
||||
| `diffusers.logging.ERROR` | 40 | only report errors |
|
||||
| `diffusers.logging.WARNING` or `diffusers.logging.WARN` | 30 | only report errors and warnings (default) |
|
||||
| `diffusers.logging.INFO` | 20 | only report errors, warnings, and basic information |
|
||||
| `diffusers.logging.DEBUG` | 10 | report all information |
|
||||
|
||||
By default, `tqdm` progress bars are displayed during model download. [`logging.disable_progress_bar`] and [`logging.enable_progress_bar`] are used to enable or disable this behavior.
|
||||
By default, `tqdm` progress bars will be displayed during model download. [`logging.disable_progress_bar`] and [`logging.enable_progress_bar`] can be used to suppress or unsuppress this behavior.
|
||||
|
||||
## Base setters
|
||||
|
||||
|
||||
@@ -0,0 +1,107 @@
|
||||
<!--Copyright 2023 The HuggingFace Team. All rights reserved.
|
||||
|
||||
Licensed under the Apache License, Version 2.0 (the "License"); you may not use this file except in compliance with
|
||||
the License. You may obtain a copy of the License at
|
||||
|
||||
http://www.apache.org/licenses/LICENSE-2.0
|
||||
|
||||
Unless required by applicable law or agreed to in writing, software distributed under the License is distributed on
|
||||
an "AS IS" BASIS, WITHOUT WARRANTIES OR CONDITIONS OF ANY KIND, either express or implied. See the License for the
|
||||
specific language governing permissions and limitations under the License.
|
||||
-->
|
||||
|
||||
# Models
|
||||
|
||||
Diffusers contains pretrained models for popular algorithms and modules for creating the next set of diffusion models.
|
||||
The primary function of these models is to denoise an input sample, by modeling the distribution \\(p_{\theta}(x_{t-1}|x_{t})\\).
|
||||
The models are built on the base class ['ModelMixin'] that is a `torch.nn.module` with basic functionality for saving and loading models both locally and from the HuggingFace hub.
|
||||
|
||||
## ModelMixin
|
||||
[[autodoc]] ModelMixin
|
||||
|
||||
## UNet2DOutput
|
||||
[[autodoc]] models.unet_2d.UNet2DOutput
|
||||
|
||||
## UNet2DModel
|
||||
[[autodoc]] UNet2DModel
|
||||
|
||||
## UNet1DOutput
|
||||
[[autodoc]] models.unet_1d.UNet1DOutput
|
||||
|
||||
## UNet1DModel
|
||||
[[autodoc]] UNet1DModel
|
||||
|
||||
## UNet2DConditionOutput
|
||||
[[autodoc]] models.unet_2d_condition.UNet2DConditionOutput
|
||||
|
||||
## UNet2DConditionModel
|
||||
[[autodoc]] UNet2DConditionModel
|
||||
|
||||
## UNet3DConditionOutput
|
||||
[[autodoc]] models.unet_3d_condition.UNet3DConditionOutput
|
||||
|
||||
## UNet3DConditionModel
|
||||
[[autodoc]] UNet3DConditionModel
|
||||
|
||||
## DecoderOutput
|
||||
[[autodoc]] models.vae.DecoderOutput
|
||||
|
||||
## VQEncoderOutput
|
||||
[[autodoc]] models.vq_model.VQEncoderOutput
|
||||
|
||||
## VQModel
|
||||
[[autodoc]] VQModel
|
||||
|
||||
## AutoencoderKLOutput
|
||||
[[autodoc]] models.autoencoder_kl.AutoencoderKLOutput
|
||||
|
||||
## AutoencoderKL
|
||||
[[autodoc]] AutoencoderKL
|
||||
|
||||
## Transformer2DModel
|
||||
[[autodoc]] Transformer2DModel
|
||||
|
||||
## Transformer2DModelOutput
|
||||
[[autodoc]] models.transformer_2d.Transformer2DModelOutput
|
||||
|
||||
## TransformerTemporalModel
|
||||
[[autodoc]] models.transformer_temporal.TransformerTemporalModel
|
||||
|
||||
## Transformer2DModelOutput
|
||||
[[autodoc]] models.transformer_temporal.TransformerTemporalModelOutput
|
||||
|
||||
## PriorTransformer
|
||||
[[autodoc]] models.prior_transformer.PriorTransformer
|
||||
|
||||
## PriorTransformerOutput
|
||||
[[autodoc]] models.prior_transformer.PriorTransformerOutput
|
||||
|
||||
## ControlNetOutput
|
||||
[[autodoc]] models.controlnet.ControlNetOutput
|
||||
|
||||
## ControlNetModel
|
||||
[[autodoc]] ControlNetModel
|
||||
|
||||
## FlaxModelMixin
|
||||
[[autodoc]] FlaxModelMixin
|
||||
|
||||
## FlaxUNet2DConditionOutput
|
||||
[[autodoc]] models.unet_2d_condition_flax.FlaxUNet2DConditionOutput
|
||||
|
||||
## FlaxUNet2DConditionModel
|
||||
[[autodoc]] FlaxUNet2DConditionModel
|
||||
|
||||
## FlaxDecoderOutput
|
||||
[[autodoc]] models.vae_flax.FlaxDecoderOutput
|
||||
|
||||
## FlaxAutoencoderKLOutput
|
||||
[[autodoc]] models.vae_flax.FlaxAutoencoderKLOutput
|
||||
|
||||
## FlaxAutoencoderKL
|
||||
[[autodoc]] FlaxAutoencoderKL
|
||||
|
||||
## FlaxControlNetOutput
|
||||
[[autodoc]] models.controlnet_flax.FlaxControlNetOutput
|
||||
|
||||
## FlaxControlNetModel
|
||||
[[autodoc]] FlaxControlNetModel
|
||||
@@ -1,55 +0,0 @@
|
||||
# AsymmetricAutoencoderKL
|
||||
|
||||
Improved larger variational autoencoder (VAE) model with KL loss for inpainting task: [Designing a Better Asymmetric VQGAN for StableDiffusion](https://arxiv.org/abs/2306.04632) by Zixin Zhu, Xuelu Feng, Dongdong Chen, Jianmin Bao, Le Wang, Yinpeng Chen, Lu Yuan, Gang Hua.
|
||||
|
||||
The abstract from the paper is:
|
||||
|
||||
*StableDiffusion is a revolutionary text-to-image generator that is causing a stir in the world of image generation and editing. Unlike traditional methods that learn a diffusion model in pixel space, StableDiffusion learns a diffusion model in the latent space via a VQGAN, ensuring both efficiency and quality. It not only supports image generation tasks, but also enables image editing for real images, such as image inpainting and local editing. However, we have observed that the vanilla VQGAN used in StableDiffusion leads to significant information loss, causing distortion artifacts even in non-edited image regions. To this end, we propose a new asymmetric VQGAN with two simple designs. Firstly, in addition to the input from the encoder, the decoder contains a conditional branch that incorporates information from task-specific priors, such as the unmasked image region in inpainting. Secondly, the decoder is much heavier than the encoder, allowing for more detailed recovery while only slightly increasing the total inference cost. The training cost of our asymmetric VQGAN is cheap, and we only need to retrain a new asymmetric decoder while keeping the vanilla VQGAN encoder and StableDiffusion unchanged. Our asymmetric VQGAN can be widely used in StableDiffusion-based inpainting and local editing methods. Extensive experiments demonstrate that it can significantly improve the inpainting and editing performance, while maintaining the original text-to-image capability. The code is available at https://github.com/buxiangzhiren/Asymmetric_VQGAN*
|
||||
|
||||
Evaluation results can be found in section 4.1 of the original paper.
|
||||
|
||||
## Available checkpoints
|
||||
|
||||
* [https://huggingface.co/cross-attention/asymmetric-autoencoder-kl-x-1-5](https://huggingface.co/cross-attention/asymmetric-autoencoder-kl-x-1-5)
|
||||
* [https://huggingface.co/cross-attention/asymmetric-autoencoder-kl-x-2](https://huggingface.co/cross-attention/asymmetric-autoencoder-kl-x-2)
|
||||
|
||||
## Example Usage
|
||||
|
||||
```python
|
||||
from io import BytesIO
|
||||
from PIL import Image
|
||||
import requests
|
||||
from diffusers import AsymmetricAutoencoderKL, StableDiffusionInpaintPipeline
|
||||
|
||||
|
||||
def download_image(url: str) -> Image.Image:
|
||||
response = requests.get(url)
|
||||
return Image.open(BytesIO(response.content)).convert("RGB")
|
||||
|
||||
|
||||
prompt = "a photo of a person"
|
||||
img_url = "https://huggingface.co/datasets/hf-internal-testing/diffusers-images/resolve/main/repaint/celeba_hq_256.png"
|
||||
mask_url = "https://huggingface.co/datasets/hf-internal-testing/diffusers-images/resolve/main/repaint/mask_256.png"
|
||||
|
||||
image = download_image(img_url).resize((256, 256))
|
||||
mask_image = download_image(mask_url).resize((256, 256))
|
||||
|
||||
pipe = StableDiffusionInpaintPipeline.from_pretrained("runwayml/stable-diffusion-inpainting")
|
||||
pipe.vae = AsymmetricAutoencoderKL.from_pretrained("cross-attention/asymmetric-autoencoder-kl-x-1-5")
|
||||
pipe.to("cuda")
|
||||
|
||||
image = pipe(prompt=prompt, image=image, mask_image=mask_image).images[0]
|
||||
image.save("image.jpeg")
|
||||
```
|
||||
|
||||
## AsymmetricAutoencoderKL
|
||||
|
||||
[[autodoc]] models.autoencoder_asym_kl.AsymmetricAutoencoderKL
|
||||
|
||||
## AutoencoderKLOutput
|
||||
|
||||
[[autodoc]] models.autoencoder_kl.AutoencoderKLOutput
|
||||
|
||||
## DecoderOutput
|
||||
|
||||
[[autodoc]] models.vae.DecoderOutput
|
||||
@@ -1,43 +0,0 @@
|
||||
# AutoencoderKL
|
||||
|
||||
The variational autoencoder (VAE) model with KL loss was introduced in [Auto-Encoding Variational Bayes](https://arxiv.org/abs/1312.6114v11) by Diederik P. Kingma and Max Welling. The model is used in 🤗 Diffusers to encode images into latents and to decode latent representations into images.
|
||||
|
||||
The abstract from the paper is:
|
||||
|
||||
*How can we perform efficient inference and learning in directed probabilistic models, in the presence of continuous latent variables with intractable posterior distributions, and large datasets? We introduce a stochastic variational inference and learning algorithm that scales to large datasets and, under some mild differentiability conditions, even works in the intractable case. Our contributions are two-fold. First, we show that a reparameterization of the variational lower bound yields a lower bound estimator that can be straightforwardly optimized using standard stochastic gradient methods. Second, we show that for i.i.d. datasets with continuous latent variables per datapoint, posterior inference can be made especially efficient by fitting an approximate inference model (also called a recognition model) to the intractable posterior using the proposed lower bound estimator. Theoretical advantages are reflected in experimental results.*
|
||||
|
||||
## Loading from the original format
|
||||
|
||||
By default the [`AutoencoderKL`] should be loaded with [`~ModelMixin.from_pretrained`], but it can also be loaded
|
||||
from the original format using [`FromOriginalVAEMixin.from_single_file`] as follows:
|
||||
|
||||
```py
|
||||
from diffusers import AutoencoderKL
|
||||
|
||||
url = "https://huggingface.co/stabilityai/sd-vae-ft-mse-original/blob/main/vae-ft-mse-840000-ema-pruned.safetensors" # can also be local file
|
||||
model = AutoencoderKL.from_single_file(url)
|
||||
```
|
||||
|
||||
## AutoencoderKL
|
||||
|
||||
[[autodoc]] AutoencoderKL
|
||||
|
||||
## AutoencoderKLOutput
|
||||
|
||||
[[autodoc]] models.autoencoder_kl.AutoencoderKLOutput
|
||||
|
||||
## DecoderOutput
|
||||
|
||||
[[autodoc]] models.vae.DecoderOutput
|
||||
|
||||
## FlaxAutoencoderKL
|
||||
|
||||
[[autodoc]] FlaxAutoencoderKL
|
||||
|
||||
## FlaxAutoencoderKLOutput
|
||||
|
||||
[[autodoc]] models.vae_flax.FlaxAutoencoderKLOutput
|
||||
|
||||
## FlaxDecoderOutput
|
||||
|
||||
[[autodoc]] models.vae_flax.FlaxDecoderOutput
|
||||
@@ -1,38 +0,0 @@
|
||||
# ControlNet
|
||||
|
||||
The ControlNet model was introduced in [Adding Conditional Control to Text-to-Image Diffusion Models](https://huggingface.co/papers/2302.05543) by Lvmin Zhang and Maneesh Agrawala. It provides a greater degree of control over text-to-image generation by conditioning the model on additional inputs such as edge maps, depth maps, segmentation maps, and keypoints for pose detection.
|
||||
|
||||
The abstract from the paper is:
|
||||
|
||||
*We present a neural network structure, ControlNet, to control pretrained large diffusion models to support additional input conditions. The ControlNet learns task-specific conditions in an end-to-end way, and the learning is robust even when the training dataset is small (< 50k). Moreover, training a ControlNet is as fast as fine-tuning a diffusion model, and the model can be trained on a personal devices. Alternatively, if powerful computation clusters are available, the model can scale to large amounts (millions to billions) of data. We report that large diffusion models like Stable Diffusion can be augmented with ControlNets to enable conditional inputs like edge maps, segmentation maps, keypoints, etc. This may enrich the methods to control large diffusion models and further facilitate related applications.*
|
||||
|
||||
## Loading from the original format
|
||||
|
||||
By default the [`ControlNetModel`] should be loaded with [`~ModelMixin.from_pretrained`], but it can also be loaded
|
||||
from the original format using [`FromOriginalControlnetMixin.from_single_file`] as follows:
|
||||
|
||||
```py
|
||||
from diffusers import StableDiffusionControlnetPipeline, ControlNetModel
|
||||
|
||||
url = "https://huggingface.co/lllyasviel/ControlNet-v1-1/blob/main/control_v11p_sd15_canny.pth" # can also be a local path
|
||||
controlnet = ControlNetModel.from_single_file(url)
|
||||
|
||||
url = "https://huggingface.co/runwayml/stable-diffusion-v1-5/blob/main/v1-5-pruned.safetensors" # can also be a local path
|
||||
pipe = StableDiffusionControlnetPipeline.from_single_file(url, controlnet=controlnet)
|
||||
```
|
||||
|
||||
## ControlNetModel
|
||||
|
||||
[[autodoc]] ControlNetModel
|
||||
|
||||
## ControlNetOutput
|
||||
|
||||
[[autodoc]] models.controlnet.ControlNetOutput
|
||||
|
||||
## FlaxControlNetModel
|
||||
|
||||
[[autodoc]] FlaxControlNetModel
|
||||
|
||||
## FlaxControlNetOutput
|
||||
|
||||
[[autodoc]] models.controlnet_flax.FlaxControlNetOutput
|
||||
@@ -1,12 +0,0 @@
|
||||
# Models
|
||||
|
||||
🤗 Diffusers provides pretrained models for popular algorithms and modules to create custom diffusion systems. The primary function of models is to denoise an input sample as modeled by the distribution \\(p_{\theta}(x_{t-1}|x_{t})\\).
|
||||
|
||||
All models are built from the base [`ModelMixin`] class which is a [`torch.nn.module`](https://pytorch.org/docs/stable/generated/torch.nn.Module.html) providing basic functionality for saving and loading models, locally and from the Hugging Face Hub.
|
||||
|
||||
## ModelMixin
|
||||
[[autodoc]] ModelMixin
|
||||
|
||||
## FlaxModelMixin
|
||||
|
||||
[[autodoc]] FlaxModelMixin
|
||||
@@ -1,16 +0,0 @@
|
||||
# Prior Transformer
|
||||
|
||||
The Prior Transformer was originally introduced in [Hierarchical Text-Conditional Image Generation with CLIP Latents
|
||||
](https://huggingface.co/papers/2204.06125) by Ramesh et al. It is used to predict CLIP image embeddings from CLIP text embeddings; image embeddings are predicted through a denoising diffusion process.
|
||||
|
||||
The abstract from the paper is:
|
||||
|
||||
*Contrastive models like CLIP have been shown to learn robust representations of images that capture both semantics and style. To leverage these representations for image generation, we propose a two-stage model: a prior that generates a CLIP image embedding given a text caption, and a decoder that generates an image conditioned on the image embedding. We show that explicitly generating image representations improves image diversity with minimal loss in photorealism and caption similarity. Our decoders conditioned on image representations can also produce variations of an image that preserve both its semantics and style, while varying the non-essential details absent from the image representation. Moreover, the joint embedding space of CLIP enables language-guided image manipulations in a zero-shot fashion. We use diffusion models for the decoder and experiment with both autoregressive and diffusion models for the prior, finding that the latter are computationally more efficient and produce higher-quality samples.*
|
||||
|
||||
## PriorTransformer
|
||||
|
||||
[[autodoc]] PriorTransformer
|
||||
|
||||
## PriorTransformerOutput
|
||||
|
||||
[[autodoc]] models.prior_transformer.PriorTransformerOutput
|
||||
@@ -1,29 +0,0 @@
|
||||
# Transformer2D
|
||||
|
||||
A Transformer model for image-like data from [CompVis](https://huggingface.co/CompVis) that is based on the [Vision Transformer](https://huggingface.co/papers/2010.11929) introduced by Dosovitskiy et al. The [`Transformer2DModel`] accepts discrete (classes of vector embeddings) or continuous (actual embeddings) inputs.
|
||||
|
||||
When the input is **continuous**:
|
||||
|
||||
1. Project the input and reshape it to `(batch_size, sequence_length, feature_dimension)`.
|
||||
2. Apply the Transformer blocks in the standard way.
|
||||
3. Reshape to image.
|
||||
|
||||
When the input is **discrete**:
|
||||
|
||||
<Tip>
|
||||
|
||||
It is assumed one of the input classes is the masked latent pixel. The predicted classes of the unnoised image don't contain a prediction for the masked pixel because the unnoised image cannot be masked.
|
||||
|
||||
</Tip>
|
||||
|
||||
1. Convert input (classes of latent pixels) to embeddings and apply positional embeddings.
|
||||
2. Apply the Transformer blocks in the standard way.
|
||||
3. Predict classes of unnoised image.
|
||||
|
||||
## Transformer2DModel
|
||||
|
||||
[[autodoc]] Transformer2DModel
|
||||
|
||||
## Transformer2DModelOutput
|
||||
|
||||
[[autodoc]] models.transformer_2d.Transformer2DModelOutput
|
||||
@@ -1,11 +0,0 @@
|
||||
# Transformer Temporal
|
||||
|
||||
A Transformer model for video-like data.
|
||||
|
||||
## TransformerTemporalModel
|
||||
|
||||
[[autodoc]] models.transformer_temporal.TransformerTemporalModel
|
||||
|
||||
## TransformerTemporalModelOutput
|
||||
|
||||
[[autodoc]] models.transformer_temporal.TransformerTemporalModelOutput
|
||||
@@ -1,13 +0,0 @@
|
||||
# UNet1DModel
|
||||
|
||||
The [UNet](https://huggingface.co/papers/1505.04597) model was originally introduced by Ronneberger et al for biomedical image segmentation, but it is also commonly used in 🤗 Diffusers because it outputs images that are the same size as the input. It is one of the most important components of a diffusion system because it facilitates the actual diffusion process. There are several variants of the UNet model in 🤗 Diffusers, depending on it's number of dimensions and whether it is a conditional model or not. This is a 1D UNet model.
|
||||
|
||||
The abstract from the paper is:
|
||||
|
||||
*There is large consent that successful training of deep networks requires many thousand annotated training samples. In this paper, we present a network and training strategy that relies on the strong use of data augmentation to use the available annotated samples more efficiently. The architecture consists of a contracting path to capture context and a symmetric expanding path that enables precise localization. We show that such a network can be trained end-to-end from very few images and outperforms the prior best method (a sliding-window convolutional network) on the ISBI challenge for segmentation of neuronal structures in electron microscopic stacks. Using the same network trained on transmitted light microscopy images (phase contrast and DIC) we won the ISBI cell tracking challenge 2015 in these categories by a large margin. Moreover, the network is fast. Segmentation of a 512x512 image takes less than a second on a recent GPU. The full implementation (based on Caffe) and the trained networks are available at http://lmb.informatik.uni-freiburg.de/people/ronneber/u-net.*
|
||||
|
||||
## UNet1DModel
|
||||
[[autodoc]] UNet1DModel
|
||||
|
||||
## UNet1DOutput
|
||||
[[autodoc]] models.unet_1d.UNet1DOutput
|
||||
@@ -1,19 +0,0 @@
|
||||
# UNet2DConditionModel
|
||||
|
||||
The [UNet](https://huggingface.co/papers/1505.04597) model was originally introduced by Ronneberger et al for biomedical image segmentation, but it is also commonly used in 🤗 Diffusers because it outputs images that are the same size as the input. It is one of the most important components of a diffusion system because it facilitates the actual diffusion process. There are several variants of the UNet model in 🤗 Diffusers, depending on it's number of dimensions and whether it is a conditional model or not. This is a 2D UNet conditional model.
|
||||
|
||||
The abstract from the paper is:
|
||||
|
||||
*There is large consent that successful training of deep networks requires many thousand annotated training samples. In this paper, we present a network and training strategy that relies on the strong use of data augmentation to use the available annotated samples more efficiently. The architecture consists of a contracting path to capture context and a symmetric expanding path that enables precise localization. We show that such a network can be trained end-to-end from very few images and outperforms the prior best method (a sliding-window convolutional network) on the ISBI challenge for segmentation of neuronal structures in electron microscopic stacks. Using the same network trained on transmitted light microscopy images (phase contrast and DIC) we won the ISBI cell tracking challenge 2015 in these categories by a large margin. Moreover, the network is fast. Segmentation of a 512x512 image takes less than a second on a recent GPU. The full implementation (based on Caffe) and the trained networks are available at http://lmb.informatik.uni-freiburg.de/people/ronneber/u-net.*
|
||||
|
||||
## UNet2DConditionModel
|
||||
[[autodoc]] UNet2DConditionModel
|
||||
|
||||
## UNet2DConditionOutput
|
||||
[[autodoc]] models.unet_2d_condition.UNet2DConditionOutput
|
||||
|
||||
## FlaxUNet2DConditionModel
|
||||
[[autodoc]] models.unet_2d_condition_flax.FlaxUNet2DConditionModel
|
||||
|
||||
## FlaxUNet2DConditionOutput
|
||||
[[autodoc]] models.unet_2d_condition_flax.FlaxUNet2DConditionOutput
|
||||
@@ -1,13 +0,0 @@
|
||||
# UNet2DModel
|
||||
|
||||
The [UNet](https://huggingface.co/papers/1505.04597) model was originally introduced by Ronneberger et al for biomedical image segmentation, but it is also commonly used in 🤗 Diffusers because it outputs images that are the same size as the input. It is one of the most important components of a diffusion system because it facilitates the actual diffusion process. There are several variants of the UNet model in 🤗 Diffusers, depending on it's number of dimensions and whether it is a conditional model or not. This is a 2D UNet model.
|
||||
|
||||
The abstract from the paper is:
|
||||
|
||||
*There is large consent that successful training of deep networks requires many thousand annotated training samples. In this paper, we present a network and training strategy that relies on the strong use of data augmentation to use the available annotated samples more efficiently. The architecture consists of a contracting path to capture context and a symmetric expanding path that enables precise localization. We show that such a network can be trained end-to-end from very few images and outperforms the prior best method (a sliding-window convolutional network) on the ISBI challenge for segmentation of neuronal structures in electron microscopic stacks. Using the same network trained on transmitted light microscopy images (phase contrast and DIC) we won the ISBI cell tracking challenge 2015 in these categories by a large margin. Moreover, the network is fast. Segmentation of a 512x512 image takes less than a second on a recent GPU. The full implementation (based on Caffe) and the trained networks are available at http://lmb.informatik.uni-freiburg.de/people/ronneber/u-net.*
|
||||
|
||||
## UNet2DModel
|
||||
[[autodoc]] UNet2DModel
|
||||
|
||||
## UNet2DOutput
|
||||
[[autodoc]] models.unet_2d.UNet2DOutput
|
||||
@@ -1,13 +0,0 @@
|
||||
# UNet3DConditionModel
|
||||
|
||||
The [UNet](https://huggingface.co/papers/1505.04597) model was originally introduced by Ronneberger et al for biomedical image segmentation, but it is also commonly used in 🤗 Diffusers because it outputs images that are the same size as the input. It is one of the most important components of a diffusion system because it facilitates the actual diffusion process. There are several variants of the UNet model in 🤗 Diffusers, depending on it's number of dimensions and whether it is a conditional model or not. This is a 3D UNet conditional model.
|
||||
|
||||
The abstract from the paper is:
|
||||
|
||||
*There is large consent that successful training of deep networks requires many thousand annotated training samples. In this paper, we present a network and training strategy that relies on the strong use of data augmentation to use the available annotated samples more efficiently. The architecture consists of a contracting path to capture context and a symmetric expanding path that enables precise localization. We show that such a network can be trained end-to-end from very few images and outperforms the prior best method (a sliding-window convolutional network) on the ISBI challenge for segmentation of neuronal structures in electron microscopic stacks. Using the same network trained on transmitted light microscopy images (phase contrast and DIC) we won the ISBI cell tracking challenge 2015 in these categories by a large margin. Moreover, the network is fast. Segmentation of a 512x512 image takes less than a second on a recent GPU. The full implementation (based on Caffe) and the trained networks are available at http://lmb.informatik.uni-freiburg.de/people/ronneber/u-net.*
|
||||
|
||||
## UNet3DConditionModel
|
||||
[[autodoc]] UNet3DConditionModel
|
||||
|
||||
## UNet3DConditionOutput
|
||||
[[autodoc]] models.unet_3d_condition.UNet3DConditionOutput
|
||||
@@ -1,15 +0,0 @@
|
||||
# VQModel
|
||||
|
||||
The VQ-VAE model was introduced in [Neural Discrete Representation Learning](https://huggingface.co/papers/1711.00937) by Aaron van den Oord, Oriol Vinyals and Koray Kavukcuoglu. The model is used in 🤗 Diffusers to decode latent representations into images. Unlike [`AutoencoderKL`], the [`VQModel`] works in a quantized latent space.
|
||||
|
||||
The abstract from the paper is:
|
||||
|
||||
*Learning useful representations without supervision remains a key challenge in machine learning. In this paper, we propose a simple yet powerful generative model that learns such discrete representations. Our model, the Vector Quantised-Variational AutoEncoder (VQ-VAE), differs from VAEs in two key ways: the encoder network outputs discrete, rather than continuous, codes; and the prior is learnt rather than static. In order to learn a discrete latent representation, we incorporate ideas from vector quantisation (VQ). Using the VQ method allows the model to circumvent issues of "posterior collapse" -- where the latents are ignored when they are paired with a powerful autoregressive decoder -- typically observed in the VAE framework. Pairing these representations with an autoregressive prior, the model can generate high quality images, videos, and speech as well as doing high quality speaker conversion and unsupervised learning of phonemes, providing further evidence of the utility of the learnt representations.*
|
||||
|
||||
## VQModel
|
||||
|
||||
[[autodoc]] VQModel
|
||||
|
||||
## VQEncoderOutput
|
||||
|
||||
[[autodoc]] models.vq_model.VQEncoderOutput
|
||||
@@ -10,11 +10,13 @@ an "AS IS" BASIS, WITHOUT WARRANTIES OR CONDITIONS OF ANY KIND, either express o
|
||||
specific language governing permissions and limitations under the License.
|
||||
-->
|
||||
|
||||
# Outputs
|
||||
# BaseOutputs
|
||||
|
||||
All models outputs are subclasses of [`~utils.BaseOutput`], data structures containing all the information returned by the model. The outputs can also be used as tuples or dictionaries.
|
||||
All models have outputs that are instances of subclasses of [`~utils.BaseOutput`]. Those are
|
||||
data structures containing all the information returned by the model, but that can also be used as tuples or
|
||||
dictionaries.
|
||||
|
||||
For example:
|
||||
Let's see how this looks in an example:
|
||||
|
||||
```python
|
||||
from diffusers import DDIMPipeline
|
||||
@@ -23,45 +25,31 @@ pipeline = DDIMPipeline.from_pretrained("google/ddpm-cifar10-32")
|
||||
outputs = pipeline()
|
||||
```
|
||||
|
||||
The `outputs` object is a [`~pipelines.ImagePipelineOutput`] which means it has an image attribute.
|
||||
The `outputs` object is a [`~pipelines.ImagePipelineOutput`], as we can see in the
|
||||
documentation of that class below, it means it has an image attribute.
|
||||
|
||||
You can access each attribute as you normally would or with a keyword lookup, and if that attribute is not returned by the model, you will get `None`:
|
||||
You can access each attribute as you would usually do, and if that attribute has not been returned by the model, you will get `None`:
|
||||
|
||||
```python
|
||||
outputs.images
|
||||
```
|
||||
|
||||
or via keyword lookup
|
||||
|
||||
```python
|
||||
outputs["images"]
|
||||
```
|
||||
|
||||
When considering the `outputs` object as a tuple, it only considers the attributes that don't have `None` values.
|
||||
For instance, retrieving an image by indexing into it returns the tuple `(outputs.images)`:
|
||||
When considering our `outputs` object as tuple, it only considers the attributes that don't have `None` values.
|
||||
Here for instance, we could retrieve images via indexing:
|
||||
|
||||
```python
|
||||
outputs[:1]
|
||||
```
|
||||
|
||||
<Tip>
|
||||
|
||||
To check a specific pipeline or model output, refer to its corresponding API documentation.
|
||||
|
||||
</Tip>
|
||||
which will return the tuple `(outputs.images)` for instance.
|
||||
|
||||
## BaseOutput
|
||||
|
||||
[[autodoc]] utils.BaseOutput
|
||||
- to_tuple
|
||||
|
||||
## ImagePipelineOutput
|
||||
|
||||
[[autodoc]] pipelines.ImagePipelineOutput
|
||||
|
||||
## FlaxImagePipelineOutput
|
||||
|
||||
[[autodoc]] pipelines.pipeline_flax_utils.FlaxImagePipelineOutput
|
||||
|
||||
## AudioPipelineOutput
|
||||
|
||||
[[autodoc]] pipelines.AudioPipelineOutput
|
||||
|
||||
## ImageTextPipelineOutput
|
||||
|
||||
[[autodoc]] ImageTextPipelineOutput
|
||||
@@ -43,7 +43,7 @@ pipe = DiffusionPipeline.from_pretrained("teticio/audio-diffusion-256").to(devic
|
||||
|
||||
output = pipe()
|
||||
display(output.images[0])
|
||||
display(Audio(output.audios[0], rate=pipe.mel.get_sample_rate()))
|
||||
display(Audio(output.audios[0], rate=mel.get_sample_rate()))
|
||||
```
|
||||
|
||||
### Latent Audio Diffusion
|
||||
|
||||
@@ -1,87 +0,0 @@
|
||||
# Consistency Models
|
||||
|
||||
Consistency Models were proposed in [Consistency Models](https://arxiv.org/abs/2303.01469) by Yang Song, Prafulla Dhariwal, Mark Chen, and Ilya Sutskever.
|
||||
|
||||
The abstract of the [paper](https://arxiv.org/pdf/2303.01469.pdf) is as follows:
|
||||
|
||||
*Diffusion models have significantly advanced the fields of image, audio, and video generation, but they depend on an iterative sampling process that causes slow generation. To overcome this limitation, we propose consistency models, a new family of models that generate high quality samples by directly mapping noise to data. They support fast one-step generation by design, while still allowing multistep sampling to trade compute for sample quality. They also support zero-shot data editing, such as image inpainting, colorization, and super-resolution, without requiring explicit training on these tasks. Consistency models can be trained either by distilling pre-trained diffusion models, or as standalone generative models altogether. Through extensive experiments, we demonstrate that they outperform existing distillation techniques for diffusion models in one- and few-step sampling, achieving the new state-of-the-art FID of 3.55 on CIFAR-10 and 6.20 on ImageNet 64x64 for one-step generation. When trained in isolation, consistency models become a new family of generative models that can outperform existing one-step, non-adversarial generative models on standard benchmarks such as CIFAR-10, ImageNet 64x64 and LSUN 256x256. *
|
||||
|
||||
Resources:
|
||||
|
||||
* [Paper](https://arxiv.org/abs/2303.01469)
|
||||
* [Original Code](https://github.com/openai/consistency_models)
|
||||
|
||||
Available Checkpoints are:
|
||||
- *cd_imagenet64_l2 (64x64 resolution)* [openai/consistency-model-pipelines](https://huggingface.co/openai/diffusers-cd_imagenet64_l2)
|
||||
- *cd_imagenet64_lpips (64x64 resolution)* [openai/diffusers-cd_imagenet64_lpips](https://huggingface.co/openai/diffusers-cd_imagenet64_lpips)
|
||||
- *ct_imagenet64 (64x64 resolution)* [openai/diffusers-ct_imagenet64](https://huggingface.co/openai/diffusers-ct_imagenet64)
|
||||
- *cd_bedroom256_l2 (256x256 resolution)* [openai/diffusers-cd_bedroom256_l2](https://huggingface.co/openai/diffusers-cd_bedroom256_l2)
|
||||
- *cd_bedroom256_lpips (256x256 resolution)* [openai/diffusers-cd_bedroom256_lpips](https://huggingface.co/openai/diffusers-cd_bedroom256_lpips)
|
||||
- *ct_bedroom256 (256x256 resolution)* [openai/diffusers-ct_bedroom256](https://huggingface.co/openai/diffusers-ct_bedroom256)
|
||||
- *cd_cat256_l2 (256x256 resolution)* [openai/diffusers-cd_cat256_l2](https://huggingface.co/openai/diffusers-cd_cat256_l2)
|
||||
- *cd_cat256_lpips (256x256 resolution)* [openai/diffusers-cd_cat256_lpips](https://huggingface.co/openai/diffusers-cd_cat256_lpips)
|
||||
- *ct_cat256 (256x256 resolution)* [openai/diffusers-ct_cat256](https://huggingface.co/openai/diffusers-ct_cat256)
|
||||
|
||||
## Available Pipelines
|
||||
|
||||
| Pipeline | Tasks | Demo | Colab |
|
||||
|:---:|:---:|:---:|:---:|
|
||||
| [ConsistencyModelPipeline](https://github.com/huggingface/diffusers/blob/main/src/diffusers/pipelines/pipeline_consistency_models.py) | *Unconditional Image Generation* | | |
|
||||
|
||||
This pipeline was contributed by our community members [dg845](https://github.com/dg845) and [ayushtues](https://huggingface.co/ayushtues) ❤️
|
||||
|
||||
## Usage Example
|
||||
|
||||
```python
|
||||
import torch
|
||||
|
||||
from diffusers import ConsistencyModelPipeline
|
||||
|
||||
device = "cuda"
|
||||
# Load the cd_imagenet64_l2 checkpoint.
|
||||
model_id_or_path = "openai/diffusers-cd_imagenet64_l2"
|
||||
pipe = ConsistencyModelPipeline.from_pretrained(model_id_or_path, torch_dtype=torch.float16)
|
||||
pipe.to(device)
|
||||
|
||||
# Onestep Sampling
|
||||
image = pipe(num_inference_steps=1).images[0]
|
||||
image.save("consistency_model_onestep_sample.png")
|
||||
|
||||
# Onestep sampling, class-conditional image generation
|
||||
# ImageNet-64 class label 145 corresponds to king penguins
|
||||
image = pipe(num_inference_steps=1, class_labels=145).images[0]
|
||||
image.save("consistency_model_onestep_sample_penguin.png")
|
||||
|
||||
# Multistep sampling, class-conditional image generation
|
||||
# Timesteps can be explicitly specified; the particular timesteps below are from the original Github repo.
|
||||
# https://github.com/openai/consistency_models/blob/main/scripts/launch.sh#L77
|
||||
image = pipe(timesteps=[22, 0], class_labels=145).images[0]
|
||||
image.save("consistency_model_multistep_sample_penguin.png")
|
||||
```
|
||||
|
||||
For an additional speed-up, one can also make use of `torch.compile`. Multiple images can be generated in <1 second as follows:
|
||||
|
||||
```py
|
||||
import torch
|
||||
from diffusers import ConsistencyModelPipeline
|
||||
|
||||
device = "cuda"
|
||||
# Load the cd_bedroom256_lpips checkpoint.
|
||||
model_id_or_path = "openai/diffusers-cd_bedroom256_lpips"
|
||||
pipe = ConsistencyModelPipeline.from_pretrained(model_id_or_path, torch_dtype=torch.float16)
|
||||
pipe.to(device)
|
||||
|
||||
pipe.unet = torch.compile(pipe.unet, mode="reduce-overhead", fullgraph=True)
|
||||
|
||||
# Multistep sampling
|
||||
# Timesteps can be explicitly specified; the particular timesteps below are from the original Github repo:
|
||||
# https://github.com/openai/consistency_models/blob/main/scripts/launch.sh#L83
|
||||
for _ in range(10):
|
||||
image = pipe(timesteps=[17, 0]).images[0]
|
||||
image.show()
|
||||
```
|
||||
|
||||
## ConsistencyModelPipeline
|
||||
[[autodoc]] ConsistencyModelPipeline
|
||||
- all
|
||||
- __call__
|
||||
@@ -10,7 +10,7 @@ an "AS IS" BASIS, WITHOUT WARRANTIES OR CONDITIONS OF ANY KIND, either express o
|
||||
specific language governing permissions and limitations under the License.
|
||||
-->
|
||||
|
||||
# DeepFloyd IF
|
||||
# IF
|
||||
|
||||
## Overview
|
||||
|
||||
@@ -11,94 +11,89 @@ specific language governing permissions and limitations under the License.
|
||||
|
||||
## Overview
|
||||
|
||||
Kandinsky inherits best practices from [DALL-E 2](https://huggingface.co/papers/2204.06125) and [Latent Diffusion](https://huggingface.co/docs/diffusers/api/pipelines/latent_diffusion), while introducing some new ideas.
|
||||
Kandinsky 2.1 inherits best practices from [DALL-E 2](https://arxiv.org/abs/2204.06125) and [Latent Diffusion](https://huggingface.co/docs/diffusers/api/pipelines/latent_diffusion), while introducing some new ideas.
|
||||
|
||||
It uses [CLIP](https://huggingface.co/docs/transformers/model_doc/clip) for encoding images and text, and a diffusion image prior (mapping) between latent spaces of CLIP modalities. This approach enhances the visual performance of the model and unveils new horizons in blending images and text-guided image manipulation.
|
||||
|
||||
The Kandinsky model is created by [Arseniy Shakhmatov](https://github.com/cene555), [Anton Razzhigaev](https://github.com/razzant), [Aleksandr Nikolich](https://github.com/AlexWortega), [Igor Pavlov](https://github.com/boomb0om), [Andrey Kuznetsov](https://github.com/kuznetsoffandrey) and [Denis Dimitrov](https://github.com/denndimitrov). The original codebase can be found [here](https://github.com/ai-forever/Kandinsky-2)
|
||||
The Kandinsky model is created by [Arseniy Shakhmatov](https://github.com/cene555), [Anton Razzhigaev](https://github.com/razzant), [Aleksandr Nikolich](https://github.com/AlexWortega), [Igor Pavlov](https://github.com/boomb0om), [Andrey Kuznetsov](https://github.com/kuznetsoffandrey) and [Denis Dimitrov](https://github.com/denndimitrov) and the original codebase can be found [here](https://github.com/ai-forever/Kandinsky-2)
|
||||
|
||||
## Available Pipelines:
|
||||
|
||||
| Pipeline | Tasks | Colab
|
||||
|---|---|:---:|
|
||||
| [pipeline_kandinsky.py](https://github.com/huggingface/diffusers/blob/main/src/diffusers/pipelines/kandinsky/pipeline_kandinsky.py) | *Text-to-Image Generation* | - |
|
||||
| [pipeline_kandinsky_inpaint.py](https://github.com/huggingface/diffusers/blob/main/src/diffusers/pipelines/kandinsky/pipeline_kandinsky_inpaint.py) | *Image-Guided Image Generation* | - |
|
||||
| [pipeline_kandinsky_img2img.py](https://github.com/huggingface/diffusers/blob/main/src/diffusers/pipelines/kandinsky/pipeline_kandinsky_img2img.py) | *Image-Guided Image Generation* | - |
|
||||
|
||||
## Usage example
|
||||
|
||||
In the following, we will walk you through some examples of how to use the Kandinsky pipelines to create some visually aesthetic artwork.
|
||||
In the following, we will walk you through some cool examples of using the Kandinsky pipelines to create some visually aesthetic artwork.
|
||||
|
||||
### Text-to-Image Generation
|
||||
|
||||
For text-to-image generation, we need to use both [`KandinskyPriorPipeline`] and [`KandinskyPipeline`].
|
||||
The first step is to encode text prompts with CLIP and then diffuse the CLIP text embeddings to CLIP image embeddings,
|
||||
as first proposed in [DALL-E 2](https://cdn.openai.com/papers/dall-e-2.pdf).
|
||||
Let's throw a fun prompt at Kandinsky to see what it comes up with.
|
||||
For text-to-image generation, we need to use both [`KandinskyPriorPipeline`] and [`KandinskyPipeline`]. The first step is to encode text prompts with CLIP and then diffuse the CLIP text embeddings to CLIP image embeddings, as first proposed in [DALL-E 2](https://cdn.openai.com/papers/dall-e-2.pdf). Let's throw a fun prompt at Kandinsky to see what it comes up with :)
|
||||
|
||||
```py
|
||||
prompt = "A alien cheeseburger creature eating itself, claymation, cinematic, moody lighting"
|
||||
```
|
||||
|
||||
First, let's instantiate the prior pipeline and the text-to-image pipeline. Both
|
||||
pipelines are diffusion models.
|
||||
|
||||
|
||||
```py
|
||||
from diffusers import DiffusionPipeline
|
||||
import torch
|
||||
|
||||
pipe_prior = DiffusionPipeline.from_pretrained("kandinsky-community/kandinsky-2-1-prior", torch_dtype=torch.float16)
|
||||
pipe_prior.to("cuda")
|
||||
|
||||
t2i_pipe = DiffusionPipeline.from_pretrained("kandinsky-community/kandinsky-2-1", torch_dtype=torch.float16)
|
||||
t2i_pipe.to("cuda")
|
||||
```
|
||||
|
||||
<Tip warning={true}>
|
||||
|
||||
By default, the text-to-image pipeline use [`DDIMScheduler`], you can change the scheduler to [`DDPMScheduler`]
|
||||
|
||||
```py
|
||||
scheduler = DDPMScheduler.from_pretrained("kandinsky-community/kandinsky-2-1", subfolder="ddpm_scheduler")
|
||||
t2i_pipe = DiffusionPipeline.from_pretrained(
|
||||
"kandinsky-community/kandinsky-2-1", scheduler=scheduler, torch_dtype=torch.float16
|
||||
)
|
||||
t2i_pipe.to("cuda")
|
||||
```
|
||||
|
||||
</Tip>
|
||||
|
||||
Now we pass the prompt through the prior to generate image embeddings. The prior
|
||||
returns both the image embeddings corresponding to the prompt and negative/unconditional image
|
||||
embeddings corresponding to an empty string.
|
||||
|
||||
```py
|
||||
image_embeds, negative_image_embeds = pipe_prior(prompt, guidance_scale=1.0).to_tuple()
|
||||
```
|
||||
|
||||
<Tip warning={true}>
|
||||
|
||||
The text-to-image pipeline expects both `image_embeds`, `negative_image_embeds` and the original
|
||||
`prompt` as the text-to-image pipeline uses another text encoder to better guide the second diffusion
|
||||
process of `t2i_pipe`.
|
||||
|
||||
By default, the prior returns unconditioned negative image embeddings corresponding to the negative prompt of `""`.
|
||||
For better results, you can also pass a `negative_prompt` to the prior. This will increase the effective batch size
|
||||
of the prior by a factor of 2.
|
||||
|
||||
```py
|
||||
```python
|
||||
prompt = "A alien cheeseburger creature eating itself, claymation, cinematic, moody lighting"
|
||||
negative_prompt = "low quality, bad quality"
|
||||
|
||||
image_embeds, negative_image_embeds = pipe_prior(prompt, negative_prompt, guidance_scale=1.0).to_tuple()
|
||||
```
|
||||
|
||||
</Tip>
|
||||
We will pass both the `prompt` and `negative_prompt` to our prior diffusion pipeline. In contrast to other diffusion pipelines, such as Stable Diffusion, the `prompt` and `negative_prompt` shall be passed separately so that we can retrieve a CLIP image embedding for each prompt input. You can use `guidance_scale`, and `num_inference_steps` arguments to guide this process, just like how you would normally do with all other pipelines in diffusers.
|
||||
|
||||
```python
|
||||
from diffusers import KandinskyPriorPipeline
|
||||
import torch
|
||||
|
||||
# create prior
|
||||
pipe_prior = KandinskyPriorPipeline.from_pretrained(
|
||||
"kandinsky-community/kandinsky-2-1-prior", torch_dtype=torch.float16
|
||||
)
|
||||
pipe_prior.to("cuda")
|
||||
|
||||
generator = torch.Generator(device="cuda").manual_seed(12)
|
||||
image_emb = pipe_prior(
|
||||
prompt, guidance_scale=1.0, num_inference_steps=25, generator=generator, negative_prompt=negative_prompt
|
||||
).images
|
||||
|
||||
zero_image_emb = pipe_prior(
|
||||
negative_prompt, guidance_scale=1.0, num_inference_steps=25, generator=generator, negative_prompt=negative_prompt
|
||||
).images
|
||||
```
|
||||
|
||||
Once we create the image embedding, we can use [`KandinskyPipeline`] to generate images.
|
||||
|
||||
```python
|
||||
from PIL import Image
|
||||
from diffusers import KandinskyPipeline
|
||||
|
||||
|
||||
Next, we can pass the embeddings as well as the prompt to the text-to-image pipeline. Remember that
|
||||
in case you are using a customized negative prompt, that you should pass this one also to the text-to-image pipelines
|
||||
with `negative_prompt=negative_prompt`:
|
||||
def image_grid(imgs, rows, cols):
|
||||
assert len(imgs) == rows * cols
|
||||
|
||||
```py
|
||||
image = t2i_pipe(
|
||||
prompt, image_embeds=image_embeds, negative_image_embeds=negative_image_embeds, height=768, width=768
|
||||
).images[0]
|
||||
image.save("cheeseburger_monster.png")
|
||||
w, h = imgs[0].size
|
||||
grid = Image.new("RGB", size=(cols * w, rows * h))
|
||||
grid_w, grid_h = grid.size
|
||||
|
||||
for i, img in enumerate(imgs):
|
||||
grid.paste(img, box=(i % cols * w, i // cols * h))
|
||||
return grid
|
||||
|
||||
|
||||
# create diffuser pipeline
|
||||
pipe = KandinskyPipeline.from_pretrained("kandinsky-community/kandinsky-2-1", torch_dtype=torch.float16)
|
||||
pipe.to("cuda")
|
||||
|
||||
images = pipe(
|
||||
prompt,
|
||||
image_embeds=image_emb,
|
||||
negative_image_embeds=zero_image_emb,
|
||||
num_images_per_prompt=2,
|
||||
height=768,
|
||||
width=768,
|
||||
num_inference_steps=100,
|
||||
guidance_scale=4.0,
|
||||
generator=generator,
|
||||
).images
|
||||
```
|
||||
|
||||
One cheeseburger monster coming up! Enjoy!
|
||||
@@ -128,7 +123,6 @@ prompt = "birds eye view of a quilted paper style alien planet landscape, vibran
|
||||
|
||||
|
||||
|
||||
|
||||
### Text Guided Image-to-Image Generation
|
||||
|
||||
The same Kandinsky model weights can be used for text-guided image-to-image translation. In this case, just make sure to load the weights using the [`KandinskyImg2ImgPipeline`] pipeline.
|
||||
@@ -169,15 +163,23 @@ pipe.to("cuda")
|
||||
prompt = "A fantasy landscape, Cinematic lighting"
|
||||
negative_prompt = "low quality, bad quality"
|
||||
|
||||
image_embeds, negative_image_embeds = pipe_prior(prompt, negative_prompt).to_tuple()
|
||||
generator = torch.Generator(device="cuda").manual_seed(30)
|
||||
image_emb = pipe_prior(
|
||||
prompt, guidance_scale=4.0, num_inference_steps=25, generator=generator, negative_prompt=negative_prompt
|
||||
).images
|
||||
|
||||
zero_image_emb = pipe_prior(
|
||||
negative_prompt, guidance_scale=4.0, num_inference_steps=25, generator=generator, negative_prompt=negative_prompt
|
||||
).images
|
||||
|
||||
out = pipe(
|
||||
prompt,
|
||||
image=original_image,
|
||||
image_embeds=image_embeds,
|
||||
negative_image_embeds=negative_image_embeds,
|
||||
image_embeds=image_emb,
|
||||
negative_image_embeds=zero_image_emb,
|
||||
height=768,
|
||||
width=768,
|
||||
num_inference_steps=500,
|
||||
strength=0.3,
|
||||
)
|
||||
|
||||
@@ -191,7 +193,7 @@ out.images[0].save("fantasy_land.png")
|
||||
|
||||
You can use [`KandinskyInpaintPipeline`] to edit images. In this example, we will add a hat to the portrait of a cat.
|
||||
|
||||
```py
|
||||
```python
|
||||
from diffusers import KandinskyInpaintPipeline, KandinskyPriorPipeline
|
||||
from diffusers.utils import load_image
|
||||
import torch
|
||||
@@ -203,7 +205,7 @@ pipe_prior = KandinskyPriorPipeline.from_pretrained(
|
||||
pipe_prior.to("cuda")
|
||||
|
||||
prompt = "a hat"
|
||||
prior_output = pipe_prior(prompt)
|
||||
image_emb, zero_image_emb = pipe_prior(prompt, return_dict=False)
|
||||
|
||||
pipe = KandinskyInpaintPipeline.from_pretrained("kandinsky-community/kandinsky-2-1-inpaint", torch_dtype=torch.float16)
|
||||
pipe.to("cuda")
|
||||
@@ -220,7 +222,8 @@ out = pipe(
|
||||
prompt,
|
||||
image=init_image,
|
||||
mask_image=mask,
|
||||
**prior_output,
|
||||
image_embeds=image_emb,
|
||||
negative_image_embeds=zero_image_emb,
|
||||
height=768,
|
||||
width=768,
|
||||
num_inference_steps=150,
|
||||
@@ -243,6 +246,7 @@ from diffusers.utils import load_image
|
||||
import PIL
|
||||
|
||||
import torch
|
||||
from torchvision import transforms
|
||||
|
||||
pipe_prior = KandinskyPriorPipeline.from_pretrained(
|
||||
"kandinsky-community/kandinsky-2-1-prior", torch_dtype=torch.float16
|
||||
@@ -259,356 +263,44 @@ img2 = load_image(
|
||||
|
||||
# add all the conditions we want to interpolate, can be either text or image
|
||||
images_texts = ["a cat", img1, img2]
|
||||
|
||||
# specify the weights for each condition in images_texts
|
||||
weights = [0.3, 0.3, 0.4]
|
||||
|
||||
# We can leave the prompt empty
|
||||
prompt = ""
|
||||
prior_out = pipe_prior.interpolate(images_texts, weights)
|
||||
image_emb, zero_image_emb = pipe_prior.interpolate(images_texts, weights)
|
||||
|
||||
pipe = KandinskyPipeline.from_pretrained("kandinsky-community/kandinsky-2-1", torch_dtype=torch.float16)
|
||||
pipe.to("cuda")
|
||||
|
||||
image = pipe(prompt, **prior_out, height=768, width=768).images[0]
|
||||
image = pipe(
|
||||
"", image_embeds=image_emb, negative_image_embeds=zero_image_emb, height=768, width=768, num_inference_steps=150
|
||||
).images[0]
|
||||
|
||||
image.save("starry_cat.png")
|
||||
```
|
||||
|
||||
|
||||
|
||||
### Text-to-Image Generation with ControlNet Conditioning
|
||||
|
||||
In the following, we give a simple example of how to use [`KandinskyV22ControlnetPipeline`] to add control to the text-to-image generation with a depth image.
|
||||
|
||||
First, let's take an image and extract its depth map.
|
||||
|
||||
```python
|
||||
from diffusers.utils import load_image
|
||||
|
||||
img = load_image(
|
||||
"https://huggingface.co/datasets/hf-internal-testing/diffusers-images/resolve/main/kandinskyv22/cat.png"
|
||||
).resize((768, 768))
|
||||
```
|
||||
|
||||
|
||||
We can use the `depth-estimation` pipeline from transformers to process the image and retrieve its depth map.
|
||||
|
||||
```python
|
||||
import torch
|
||||
import numpy as np
|
||||
|
||||
from transformers import pipeline
|
||||
from diffusers.utils import load_image
|
||||
|
||||
|
||||
def make_hint(image, depth_estimator):
|
||||
image = depth_estimator(image)["depth"]
|
||||
image = np.array(image)
|
||||
image = image[:, :, None]
|
||||
image = np.concatenate([image, image, image], axis=2)
|
||||
detected_map = torch.from_numpy(image).float() / 255.0
|
||||
hint = detected_map.permute(2, 0, 1)
|
||||
return hint
|
||||
|
||||
|
||||
depth_estimator = pipeline("depth-estimation")
|
||||
hint = make_hint(img, depth_estimator).unsqueeze(0).half().to("cuda")
|
||||
```
|
||||
Now, we load the prior pipeline and the text-to-image controlnet pipeline
|
||||
|
||||
```python
|
||||
from diffusers import KandinskyV22PriorPipeline, KandinskyV22ControlnetPipeline
|
||||
|
||||
pipe_prior = KandinskyV22PriorPipeline.from_pretrained(
|
||||
"kandinsky-community/kandinsky-2-2-prior", torch_dtype=torch.float16
|
||||
)
|
||||
pipe_prior = pipe_prior.to("cuda")
|
||||
|
||||
pipe = KandinskyV22ControlnetPipeline.from_pretrained(
|
||||
"kandinsky-community/kandinsky-2-2-controlnet-depth", torch_dtype=torch.float16
|
||||
)
|
||||
pipe = pipe.to("cuda")
|
||||
```
|
||||
|
||||
We pass the prompt and negative prompt through the prior to generate image embeddings
|
||||
|
||||
```python
|
||||
prompt = "A robot, 4k photo"
|
||||
|
||||
negative_prior_prompt = "lowres, text, error, cropped, worst quality, low quality, jpeg artifacts, ugly, duplicate, morbid, mutilated, out of frame, extra fingers, mutated hands, poorly drawn hands, poorly drawn face, mutation, deformed, blurry, dehydrated, bad anatomy, bad proportions, extra limbs, cloned face, disfigured, gross proportions, malformed limbs, missing arms, missing legs, extra arms, extra legs, fused fingers, too many fingers, long neck, username, watermark, signature"
|
||||
|
||||
generator = torch.Generator(device="cuda").manual_seed(43)
|
||||
image_emb, zero_image_emb = pipe_prior(
|
||||
prompt=prompt, negative_prompt=negative_prior_prompt, generator=generator
|
||||
).to_tuple()
|
||||
```
|
||||
|
||||
Now we can pass the image embeddings and the depth image we extracted to the controlnet pipeline. With Kandinsky 2.2, only prior pipelines accept `prompt` input. You do not need to pass the prompt to the controlnet pipeline.
|
||||
|
||||
```python
|
||||
images = pipe(
|
||||
image_embeds=image_emb,
|
||||
negative_image_embeds=zero_image_emb,
|
||||
hint=hint,
|
||||
num_inference_steps=50,
|
||||
generator=generator,
|
||||
height=768,
|
||||
width=768,
|
||||
).images
|
||||
|
||||
images[0].save("robot_cat.png")
|
||||
```
|
||||
|
||||
The output image looks as follow:
|
||||
|
||||
|
||||
### Image-to-Image Generation with ControlNet Conditioning
|
||||
|
||||
Kandinsky 2.2 also includes a [`KandinskyV22ControlnetImg2ImgPipeline`] that will allow you to add control to the image generation process with both the image and its depth map. This pipeline works really well with [`KandinskyV22PriorEmb2EmbPipeline`], which generates image embeddings based on both a text prompt and an image.
|
||||
|
||||
For our robot cat example, we will pass the prompt and cat image together to the prior pipeline to generate an image embedding. We will then use that image embedding and the depth map of the cat to further control the image generation process.
|
||||
|
||||
We can use the same cat image and its depth map from the last example.
|
||||
|
||||
```python
|
||||
import torch
|
||||
import numpy as np
|
||||
|
||||
from diffusers import KandinskyV22PriorEmb2EmbPipeline, KandinskyV22ControlnetImg2ImgPipeline
|
||||
from diffusers.utils import load_image
|
||||
from transformers import pipeline
|
||||
|
||||
img = load_image(
|
||||
"https://huggingface.co/datasets/hf-internal-testing/diffusers-images/resolve/main" "/kandinskyv22/cat.png"
|
||||
).resize((768, 768))
|
||||
|
||||
|
||||
def make_hint(image, depth_estimator):
|
||||
image = depth_estimator(image)["depth"]
|
||||
image = np.array(image)
|
||||
image = image[:, :, None]
|
||||
image = np.concatenate([image, image, image], axis=2)
|
||||
detected_map = torch.from_numpy(image).float() / 255.0
|
||||
hint = detected_map.permute(2, 0, 1)
|
||||
return hint
|
||||
|
||||
|
||||
depth_estimator = pipeline("depth-estimation")
|
||||
hint = make_hint(img, depth_estimator).unsqueeze(0).half().to("cuda")
|
||||
|
||||
pipe_prior = KandinskyV22PriorEmb2EmbPipeline.from_pretrained(
|
||||
"kandinsky-community/kandinsky-2-2-prior", torch_dtype=torch.float16
|
||||
)
|
||||
pipe_prior = pipe_prior.to("cuda")
|
||||
|
||||
pipe = KandinskyV22ControlnetImg2ImgPipeline.from_pretrained(
|
||||
"kandinsky-community/kandinsky-2-2-controlnet-depth", torch_dtype=torch.float16
|
||||
)
|
||||
pipe = pipe.to("cuda")
|
||||
|
||||
prompt = "A robot, 4k photo"
|
||||
negative_prior_prompt = "lowres, text, error, cropped, worst quality, low quality, jpeg artifacts, ugly, duplicate, morbid, mutilated, out of frame, extra fingers, mutated hands, poorly drawn hands, poorly drawn face, mutation, deformed, blurry, dehydrated, bad anatomy, bad proportions, extra limbs, cloned face, disfigured, gross proportions, malformed limbs, missing arms, missing legs, extra arms, extra legs, fused fingers, too many fingers, long neck, username, watermark, signature"
|
||||
|
||||
generator = torch.Generator(device="cuda").manual_seed(43)
|
||||
|
||||
# run prior pipeline
|
||||
|
||||
img_emb = pipe_prior(prompt=prompt, image=img, strength=0.85, generator=generator)
|
||||
negative_emb = pipe_prior(prompt=negative_prior_prompt, image=img, strength=1, generator=generator)
|
||||
|
||||
# run controlnet img2img pipeline
|
||||
images = pipe(
|
||||
image=img,
|
||||
strength=0.5,
|
||||
image_embeds=img_emb.image_embeds,
|
||||
negative_image_embeds=negative_emb.image_embeds,
|
||||
hint=hint,
|
||||
num_inference_steps=50,
|
||||
generator=generator,
|
||||
height=768,
|
||||
width=768,
|
||||
).images
|
||||
|
||||
images[0].save("robot_cat.png")
|
||||
```
|
||||
|
||||
Here is the output. Compared with the output from our text-to-image controlnet example, it kept a lot more cat facial details from the original image and worked into the robot style we asked for.
|
||||
|
||||

|
||||
|
||||
## Kandinsky 2.2
|
||||
|
||||
The Kandinsky 2.2 release includes robust new text-to-image models that support text-to-image generation, image-to-image generation, image interpolation, and text-guided image inpainting. The general workflow to perform these tasks using Kandinsky 2.2 is the same as in Kandinsky 2.1. First, you will need to use a prior pipeline to generate image embeddings based on your text prompt, and then use one of the image decoding pipelines to generate the output image. The only difference is that in Kandinsky 2.2, all of the decoding pipelines no longer accept the `prompt` input, and the image generation process is conditioned with only `image_embeds` and `negative_image_embeds`.
|
||||
|
||||
Let's look at an example of how to perform text-to-image generation using Kandinsky 2.2.
|
||||
|
||||
First, let's create the prior pipeline and text-to-image pipeline with Kandinsky 2.2 checkpoints.
|
||||
|
||||
```python
|
||||
from diffusers import DiffusionPipeline
|
||||
import torch
|
||||
|
||||
pipe_prior = DiffusionPipeline.from_pretrained("kandinsky-community/kandinsky-2-2-prior", torch_dtype=torch.float16)
|
||||
pipe_prior.to("cuda")
|
||||
|
||||
t2i_pipe = DiffusionPipeline.from_pretrained("kandinsky-community/kandinsky-2-2-decoder", torch_dtype=torch.float16)
|
||||
t2i_pipe.to("cuda")
|
||||
```
|
||||
|
||||
You can then use `pipe_prior` to generate image embeddings.
|
||||
|
||||
```python
|
||||
prompt = "portrait of a women, blue eyes, cinematic"
|
||||
negative_prompt = "low quality, bad quality"
|
||||
|
||||
image_embeds, negative_image_embeds = pipe_prior(prompt, guidance_scale=1.0).to_tuple()
|
||||
```
|
||||
|
||||
Now you can pass these embeddings to the text-to-image pipeline. When using Kandinsky 2.2 you don't need to pass the `prompt` (but you do with the previous version, Kandinsky 2.1).
|
||||
|
||||
```
|
||||
image = t2i_pipe(image_embeds=image_embeds, negative_image_embeds=negative_image_embeds, height=768, width=768).images[
|
||||
0
|
||||
]
|
||||
image.save("portrait.png")
|
||||
```
|
||||
|
||||
|
||||
We used the text-to-image pipeline as an example, but the same process applies to all decoding pipelines in Kandinsky 2.2. For more information, please refer to our API section for each pipeline.
|
||||
|
||||
|
||||
## Optimization
|
||||
|
||||
Running Kandinsky in inference requires running both a first prior pipeline: [`KandinskyPriorPipeline`]
|
||||
and a second image decoding pipeline which is one of [`KandinskyPipeline`], [`KandinskyImg2ImgPipeline`], or [`KandinskyInpaintPipeline`].
|
||||
|
||||
The bulk of the computation time will always be the second image decoding pipeline, so when looking
|
||||
into optimizing the model, one should look into the second image decoding pipeline.
|
||||
|
||||
When running with PyTorch < 2.0, we strongly recommend making use of [`xformers`](https://github.com/facebookresearch/xformers)
|
||||
to speed-up the optimization. This can be done by simply running:
|
||||
|
||||
```py
|
||||
from diffusers import DiffusionPipeline
|
||||
import torch
|
||||
|
||||
t2i_pipe = DiffusionPipeline.from_pretrained("kandinsky-community/kandinsky-2-1", torch_dtype=torch.float16)
|
||||
t2i_pipe.enable_xformers_memory_efficient_attention()
|
||||
```
|
||||
|
||||
When running on PyTorch >= 2.0, PyTorch's SDPA attention will automatically be used. For more information on
|
||||
PyTorch's SDPA, feel free to have a look at [this blog post](https://pytorch.org/blog/accelerated-diffusers-pt-20/).
|
||||
|
||||
To have explicit control , you can also manually set the pipeline to use PyTorch's 2.0 efficient attention:
|
||||
|
||||
```py
|
||||
from diffusers.models.attention_processor import AttnAddedKVProcessor2_0
|
||||
|
||||
t2i_pipe.unet.set_attn_processor(AttnAddedKVProcessor2_0())
|
||||
```
|
||||
|
||||
The slowest and most memory intense attention processor is the default `AttnAddedKVProcessor` processor.
|
||||
We do **not** recommend using it except for testing purposes or cases where very high determistic behaviour is desired.
|
||||
You can set it with:
|
||||
|
||||
```py
|
||||
from diffusers.models.attention_processor import AttnAddedKVProcessor
|
||||
|
||||
t2i_pipe.unet.set_attn_processor(AttnAddedKVProcessor())
|
||||
```
|
||||
|
||||
With PyTorch >= 2.0, you can also use Kandinsky with `torch.compile` which depending
|
||||
on your hardware can signficantly speed-up your inference time once the model is compiled.
|
||||
To use Kandinsksy with `torch.compile`, you can do:
|
||||
|
||||
```py
|
||||
t2i_pipe.unet.to(memory_format=torch.channels_last)
|
||||
t2i_pipe.unet = torch.compile(t2i_pipe.unet, mode="reduce-overhead", fullgraph=True)
|
||||
```
|
||||
|
||||
After compilation you should see a very fast inference time. For more information,
|
||||
feel free to have a look at [Our PyTorch 2.0 benchmark](https://huggingface.co/docs/diffusers/main/en/optimization/torch2.0).
|
||||
|
||||
## Available Pipelines:
|
||||
|
||||
| Pipeline | Tasks |
|
||||
|---|---|
|
||||
| [pipeline_kandinsky2_2.py](https://github.com/huggingface/diffusers/blob/main/src/diffusers/pipelines/kandinsky2_2/pipeline_kandinsky2_2.py) | *Text-to-Image Generation* |
|
||||
| [pipeline_kandinsky.py](https://github.com/huggingface/diffusers/blob/main/src/diffusers/pipelines/kandinsky/pipeline_kandinsky.py) | *Text-to-Image Generation* |
|
||||
| [pipeline_kandinsky2_2_inpaint.py](https://github.com/huggingface/diffusers/blob/main/src/diffusers/pipelines/kandinsky2_2/pipeline_kandinsky2_2_inpaint.py) | *Image-Guided Image Generation* |
|
||||
| [pipeline_kandinsky_inpaint.py](https://github.com/huggingface/diffusers/blob/main/src/diffusers/pipelines/kandinsky/pipeline_kandinsky_inpaint.py) | *Image-Guided Image Generation* |
|
||||
| [pipeline_kandinsky2_2_img2img.py](https://github.com/huggingface/diffusers/blob/main/src/diffusers/pipelines/kandinsky2_2/pipeline_kandinsky2_2_img2img.py) | *Image-Guided Image Generation* |
|
||||
| [pipeline_kandinsky_img2img.py](https://github.com/huggingface/diffusers/blob/main/src/diffusers/pipelines/kandinsky/pipeline_kandinsky_img2img.py) | *Image-Guided Image Generation* |
|
||||
| [pipeline_kandinsky2_2_controlnet.py](https://github.com/huggingface/diffusers/blob/main/src/diffusers/pipelines/kandinsky2_2/pipeline_kandinsky2_2_controlnet.py) | *Image-Guided Image Generation* |
|
||||
| [pipeline_kandinsky2_2_controlnet_img2img.py](https://github.com/huggingface/diffusers/blob/main/src/diffusers/pipelines/kandinsky2_2/pipeline_kandinsky2_2_controlnet_img2img.py) | *Image-Guided Image Generation* |
|
||||
|
||||
|
||||
### KandinskyV22Pipeline
|
||||
|
||||
[[autodoc]] KandinskyV22Pipeline
|
||||
- all
|
||||
- __call__
|
||||
|
||||
### KandinskyV22ControlnetPipeline
|
||||
|
||||
[[autodoc]] KandinskyV22ControlnetPipeline
|
||||
- all
|
||||
- __call__
|
||||
|
||||
### KandinskyV22ControlnetImg2ImgPipeline
|
||||
|
||||
[[autodoc]] KandinskyV22ControlnetImg2ImgPipeline
|
||||
- all
|
||||
- __call__
|
||||
|
||||
### KandinskyV22Img2ImgPipeline
|
||||
|
||||
[[autodoc]] KandinskyV22Img2ImgPipeline
|
||||
- all
|
||||
- __call__
|
||||
|
||||
### KandinskyV22InpaintPipeline
|
||||
|
||||
[[autodoc]] KandinskyV22InpaintPipeline
|
||||
- all
|
||||
- __call__
|
||||
|
||||
### KandinskyV22PriorPipeline
|
||||
|
||||
[[autodoc]] ## KandinskyV22PriorPipeline
|
||||
- all
|
||||
- __call__
|
||||
- interpolate
|
||||
|
||||
### KandinskyV22PriorEmb2EmbPipeline
|
||||
|
||||
[[autodoc]] KandinskyV22PriorEmb2EmbPipeline
|
||||
- all
|
||||
- __call__
|
||||
- interpolate
|
||||
|
||||
### KandinskyPriorPipeline
|
||||
## KandinskyPriorPipeline
|
||||
|
||||
[[autodoc]] KandinskyPriorPipeline
|
||||
- all
|
||||
- __call__
|
||||
- interpolate
|
||||
|
||||
### KandinskyPipeline
|
||||
## KandinskyPipeline
|
||||
|
||||
[[autodoc]] KandinskyPipeline
|
||||
- all
|
||||
- __call__
|
||||
|
||||
### KandinskyImg2ImgPipeline
|
||||
## KandinskyInpaintPipeline
|
||||
|
||||
[[autodoc]] KandinskyInpaintPipeline
|
||||
- all
|
||||
- __call__
|
||||
|
||||
## KandinskyImg2ImgPipeline
|
||||
|
||||
[[autodoc]] KandinskyImg2ImgPipeline
|
||||
- all
|
||||
- __call__
|
||||
|
||||
### KandinskyInpaintPipeline
|
||||
|
||||
[[autodoc]] KandinskyInpaintPipeline
|
||||
- all
|
||||
- __call__
|
||||
|
||||
@@ -54,19 +54,14 @@ available a colab notebook to directly try them out.
|
||||
| [if](./if) | [**IF**](https://github.com/deep-floyd/IF) | Image Generation | [](https://colab.research.google.com/github/huggingface/notebooks/blob/main/diffusers/deepfloyd_if_free_tier_google_colab.ipynb)
|
||||
| [if_img2img](./if) | [**IF**](https://github.com/deep-floyd/IF) | Image-to-Image Generation | [](https://colab.research.google.com/github/huggingface/notebooks/blob/main/diffusers/deepfloyd_if_free_tier_google_colab.ipynb)
|
||||
| [if_inpainting](./if) | [**IF**](https://github.com/deep-floyd/IF) | Image-to-Image Generation | [](https://colab.research.google.com/github/huggingface/notebooks/blob/main/diffusers/deepfloyd_if_free_tier_google_colab.ipynb)
|
||||
| [kandinsky](./kandinsky) | **Kandinsky** | Text-to-Image Generation |
|
||||
| [kandinsky_inpaint](./kandinsky) | **Kandinsky** | Image-to-Image Generation |
|
||||
| [kandinsky_img2img](./kandinsky) | **Kandinsksy** | Image-to-Image Generation |
|
||||
| [latent_diffusion](./latent_diffusion) | [**High-Resolution Image Synthesis with Latent Diffusion Models**](https://arxiv.org/abs/2112.10752)| Text-to-Image Generation |
|
||||
| [latent_diffusion](./latent_diffusion) | [**High-Resolution Image Synthesis with Latent Diffusion Models**](https://arxiv.org/abs/2112.10752)| Super Resolution Image-to-Image |
|
||||
| [latent_diffusion_uncond](./latent_diffusion_uncond) | [**High-Resolution Image Synthesis with Latent Diffusion Models**](https://arxiv.org/abs/2112.10752) | Unconditional Image Generation |
|
||||
| [paint_by_example](./paint_by_example) | [**Paint by Example: Exemplar-based Image Editing with Diffusion Models**](https://arxiv.org/abs/2211.13227) | Image-Guided Image Inpainting |
|
||||
| [paradigms](./paradigms) | [**Parallel Sampling of Diffusion Models**](https://arxiv.org/abs/2305.16317) | Text-to-Image Generation |
|
||||
| [pndm](./pndm) | [**Pseudo Numerical Methods for Diffusion Models on Manifolds**](https://arxiv.org/abs/2202.09778) | Unconditional Image Generation |
|
||||
| [score_sde_ve](./score_sde_ve) | [**Score-Based Generative Modeling through Stochastic Differential Equations**](https://openreview.net/forum?id=PxTIG12RRHS) | Unconditional Image Generation |
|
||||
| [score_sde_vp](./score_sde_vp) | [**Score-Based Generative Modeling through Stochastic Differential Equations**](https://openreview.net/forum?id=PxTIG12RRHS) | Unconditional Image Generation |
|
||||
| [semantic_stable_diffusion](./semantic_stable_diffusion) | [**SEGA: Instructing Diffusion using Semantic Dimensions**](https://arxiv.org/abs/2301.12247) | Text-to-Image Generation |
|
||||
| [stable_diffusion_adapter](./stable_diffusion/adapter) | [**T2I-Adapter**](https://arxiv.org/abs/2302.08453) | Image-to-Image Text-Guided Generation with Adapters | -
|
||||
| [stable_diffusion_text2img](./stable_diffusion/text2img) | [**Stable Diffusion**](https://stability.ai/blog/stable-diffusion-public-release) | Text-to-Image Generation | [](https://colab.research.google.com/github/huggingface/notebooks/blob/main/diffusers/training_example.ipynb)
|
||||
| [stable_diffusion_img2img](./stable_diffusion/img2img) | [**Stable Diffusion**](https://stability.ai/blog/stable-diffusion-public-release) | Image-to-Image Text-Guided Generation | [](https://colab.research.google.com/github/huggingface/notebooks/blob/main/diffusers/image_2_image_using_diffusers.ipynb)
|
||||
| [stable_diffusion_inpaint](./stable_diffusion/inpaint) | [**Stable Diffusion**](https://stability.ai/blog/stable-diffusion-public-release) | Text-Guided Image Inpainting | [](https://colab.research.google.com/github/huggingface/notebooks/blob/main/diffusers/in_painting_with_stable_diffusion_using_diffusers.ipynb)
|
||||
@@ -77,20 +72,21 @@ available a colab notebook to directly try them out.
|
||||
| [stable_diffusion_self_attention_guidance](./stable_diffusion/self_attention_guidance) | [**Self-Attention Guidance**](https://arxiv.org/abs/2210.00939) | Text-to-Image Generation |
|
||||
| [stable_diffusion_image_variation](./stable_diffusion/image_variation) | [**Stable Diffusion Image Variations**](https://github.com/LambdaLabsML/lambda-diffusers#stable-diffusion-image-variations) | Image-to-Image Generation |
|
||||
| [stable_diffusion_latent_upscale](./stable_diffusion/latent_upscale) | [**Stable Diffusion Latent Upscaler**](https://twitter.com/StabilityAI/status/1590531958815064065) | Text-Guided Super Resolution Image-to-Image |
|
||||
| [stable_diffusion_2](./stable_diffusion/stable_diffusion_2) | [**Stable Diffusion 2**](https://stability.ai/blog/stable-diffusion-v2-release) | Text-Guided Image Inpainting |
|
||||
| [stable_diffusion_2](./stable_diffusion/stable_diffusion_2) | [**Stable Diffusion 2**](https://stability.ai/blog/stable-diffusion-v2-release) | Depth-to-Image Text-Guided Generation |
|
||||
| [stable_diffusion_2](./stable_diffusion/stable_diffusion_2) | [**Stable Diffusion 2**](https://stability.ai/blog/stable-diffusion-v2-release) | Text-Guided Super Resolution Image-to-Image |
|
||||
| [stable_diffusion_2](./stable_diffusion_2/) | [**Stable Diffusion 2**](https://stability.ai/blog/stable-diffusion-v2-release) | Text-to-Image Generation |
|
||||
| [stable_diffusion_2](./stable_diffusion_2) | [**Stable Diffusion 2**](https://stability.ai/blog/stable-diffusion-v2-release) | Text-Guided Image Inpainting |
|
||||
| [stable_diffusion_2](./stable_diffusion_2) | [**Stable Diffusion 2**](https://stability.ai/blog/stable-diffusion-v2-release) | Depth-to-Image Text-Guided Generation |
|
||||
| [stable_diffusion_2](./stable_diffusion_2) | [**Stable Diffusion 2**](https://stability.ai/blog/stable-diffusion-v2-release) | Text-Guided Super Resolution Image-to-Image |
|
||||
| [stable_diffusion_safe](./stable_diffusion_safe) | [**Safe Stable Diffusion**](https://arxiv.org/abs/2211.05105) | Text-Guided Generation | [](https://colab.research.google.com/github/ml-research/safe-latent-diffusion/blob/main/examples/Safe%20Latent%20Diffusion.ipynb)
|
||||
| [stable_unclip](./stable_unclip) | **Stable unCLIP** | Text-to-Image Generation |
|
||||
| [stable_unclip](./stable_unclip) | **Stable unCLIP** | Image-to-Image Text-Guided Generation |
|
||||
| [stochastic_karras_ve](./stochastic_karras_ve) | [**Elucidating the Design Space of Diffusion-Based Generative Models**](https://arxiv.org/abs/2206.00364) | Unconditional Image Generation |
|
||||
| [text_to_video_sd](./api/pipelines/text_to_video) | [**Modelscope's Text-to-video-synthesis Model in Open Domain**](https://modelscope.cn/models/damo/text-to-video-synthesis/summary) | Text-to-Video Generation |
|
||||
| [unclip](./unclip) | [**Hierarchical Text-Conditional Image Generation with CLIP Latents](https://arxiv.org/abs/2204.06125) | Text-to-Image Generation |
|
||||
| [versatile_diffusion](./versatile_diffusion) | [**Versatile Diffusion: Text, Images and Variations All in One Diffusion Model**](https://arxiv.org/abs/2211.08332) | Text-to-Image Generation |
|
||||
| [versatile_diffusion](./versatile_diffusion) | [**Versatile Diffusion: Text, Images and Variations All in One Diffusion Model**](https://arxiv.org/abs/2211.08332) | Image Variations Generation |
|
||||
| [versatile_diffusion](./versatile_diffusion) | [**Versatile Diffusion: Text, Images and Variations All in One Diffusion Model**](https://arxiv.org/abs/2211.08332) | Dual Image and Text Guided Generation |
|
||||
| [vq_diffusion](./vq_diffusion) | [**Vector Quantized Diffusion Model for Text-to-Image Synthesis**](https://arxiv.org/abs/2111.14822) | Text-to-Image Generation |
|
||||
| [text_to_video_zero](./text_to_video_zero) | [**Text2Video-Zero: Text-to-Image Diffusion Models are Zero-Shot Video Generators**](https://arxiv.org/abs/2303.13439) | Text-to-Video Generation |
|
||||
| [text_to_video_sd](./api/pipelines/text_to_video) | [Modelscope's Text-to-video-synthesis Model in Open Domain](https://modelscope.cn/models/damo/text-to-video-synthesis/summary) | Text-to-Video Generation |
|
||||
| [unclip](./unclip) | [Hierarchical Text-Conditional Image Generation with CLIP Latents](https://arxiv.org/abs/2204.06125) | Text-to-Image Generation |
|
||||
| [versatile_diffusion](./versatile_diffusion) | [Versatile Diffusion: Text, Images and Variations All in One Diffusion Model](https://arxiv.org/abs/2211.08332) | Text-to-Image Generation |
|
||||
| [versatile_diffusion](./versatile_diffusion) | [Versatile Diffusion: Text, Images and Variations All in One Diffusion Model](https://arxiv.org/abs/2211.08332) | Image Variations Generation |
|
||||
| [versatile_diffusion](./versatile_diffusion) | [Versatile Diffusion: Text, Images and Variations All in One Diffusion Model](https://arxiv.org/abs/2211.08332) | Dual Image and Text Guided Generation |
|
||||
| [vq_diffusion](./vq_diffusion) | [Vector Quantized Diffusion Model for Text-to-Image Synthesis](https://arxiv.org/abs/2111.14822) | Text-to-Image Generation |
|
||||
| [text_to_video_zero](./text_to_video_zero) | [Text2Video-Zero: Text-to-Image Diffusion Models are Zero-Shot Video Generators](https://arxiv.org/abs/2303.13439) | Text-to-Video Generation |
|
||||
|
||||
|
||||
**Note**: Pipelines are simple examples of how to play around with the diffusion systems as described in the corresponding papers.
|
||||
|
||||
@@ -1,83 +0,0 @@
|
||||
<!--Copyright 2023 ParaDiGMS authors and The HuggingFace Team. All rights reserved.
|
||||
|
||||
Licensed under the Apache License, Version 2.0 (the "License"); you may not use this file except in compliance with
|
||||
the License. You may obtain a copy of the License at
|
||||
|
||||
http://www.apache.org/licenses/LICENSE-2.0
|
||||
|
||||
Unless required by applicable law or agreed to in writing, software distributed under the License is distributed on
|
||||
an "AS IS" BASIS, WITHOUT WARRANTIES OR CONDITIONS OF ANY KIND, either express or implied. See the License for the
|
||||
specific language governing permissions and limitations under the License.
|
||||
-->
|
||||
|
||||
# Parallel Sampling of Diffusion Models (ParaDiGMS)
|
||||
|
||||
## Overview
|
||||
|
||||
[Parallel Sampling of Diffusion Models](https://arxiv.org/abs/2305.16317) by Andy Shih, Suneel Belkhale, Stefano Ermon, Dorsa Sadigh, Nima Anari.
|
||||
|
||||
The abstract of the paper is the following:
|
||||
|
||||
*Diffusion models are powerful generative models but suffer from slow sampling, often taking 1000 sequential denoising steps for one sample. As a result, considerable efforts have been directed toward reducing the number of denoising steps, but these methods hurt sample quality. Instead of reducing the number of denoising steps (trading quality for speed), in this paper we explore an orthogonal approach: can we run the denoising steps in parallel (trading compute for speed)? In spite of the sequential nature of the denoising steps, we show that surprisingly it is possible to parallelize sampling via Picard iterations, by guessing the solution of future denoising steps and iteratively refining until convergence. With this insight, we present ParaDiGMS, a novel method to accelerate the sampling of pretrained diffusion models by denoising multiple steps in parallel. ParaDiGMS is the first diffusion sampling method that enables trading compute for speed and is even compatible with existing fast sampling techniques such as DDIM and DPMSolver. Using ParaDiGMS, we improve sampling speed by 2-4x across a range of robotics and image generation models, giving state-of-the-art sampling speeds of 0.2s on 100-step DiffusionPolicy and 16s on 1000-step StableDiffusion-v2 with no measurable degradation of task reward, FID score, or CLIP score.*
|
||||
|
||||
Resources:
|
||||
|
||||
* [Paper](https://arxiv.org/abs/2305.16317).
|
||||
* [Original Code](https://github.com/AndyShih12/paradigms).
|
||||
|
||||
## Available Pipelines:
|
||||
|
||||
| Pipeline | Tasks | Demo
|
||||
|---|---|:---:|
|
||||
| [StableDiffusionParadigmsPipeline](https://github.com/huggingface/diffusers/blob/main/src/diffusers/pipelines/stable_diffusion/pipeline_stable_diffusion_paradigms.py) | *Faster Text-to-Image Generation* | |
|
||||
|
||||
This pipeline was contributed by [`AndyShih12`](https://github.com/AndyShih12) in this [PR](https://github.com/huggingface/diffusers/pull/3716/).
|
||||
|
||||
## Usage example
|
||||
|
||||
```python
|
||||
import torch
|
||||
from diffusers import DDPMParallelScheduler
|
||||
from diffusers import StableDiffusionParadigmsPipeline
|
||||
|
||||
scheduler = DDPMParallelScheduler.from_pretrained("runwayml/stable-diffusion-v1-5", subfolder="scheduler")
|
||||
|
||||
pipe = StableDiffusionParadigmsPipeline.from_pretrained(
|
||||
"runwayml/stable-diffusion-v1-5", scheduler=scheduler, torch_dtype=torch.float16
|
||||
)
|
||||
pipe = pipe.to("cuda")
|
||||
|
||||
ngpu, batch_per_device = torch.cuda.device_count(), 5
|
||||
pipe.wrapped_unet = torch.nn.DataParallel(pipe.unet, device_ids=[d for d in range(ngpu)])
|
||||
|
||||
prompt = "a photo of an astronaut riding a horse on mars"
|
||||
image = pipe(prompt, parallel=ngpu * batch_per_device, num_inference_steps=1000).images[0]
|
||||
```
|
||||
|
||||
<Tip>
|
||||
This pipeline improves sampling speed by running denoising steps in parallel, at the cost of increased total FLOPs.
|
||||
Therefore, it is better to call this pipeline when running on multiple GPUs. Otherwise, without enough GPU bandwidth
|
||||
sampling may be even slower than sequential sampling.
|
||||
|
||||
The two parameters to play with are `parallel` (batch size) and `tolerance`.
|
||||
- If it fits in memory, for 1000-step DDPM you can aim for a batch size of around 100
|
||||
(e.g. 8 GPUs and batch_per_device=12 to get parallel=96). Higher batch size
|
||||
may not fit in memory, and lower batch size gives less parallelism.
|
||||
- For tolerance, using a higher tolerance may get better speedups but can risk sample quality degradation.
|
||||
If there is quality degradation with the default tolerance, then use a lower tolerance (e.g. 0.001).
|
||||
|
||||
For 1000-step DDPM on 8 A100 GPUs, you can expect around a 3x speedup by StableDiffusionParadigmsPipeline instead of StableDiffusionPipeline
|
||||
by setting parallel=80 and tolerance=0.1.
|
||||
</Tip>
|
||||
|
||||
<Tip>
|
||||
Diffusers also offers distributed inference support for generating multiple prompts
|
||||
in parallel on multiple GPUs. Check out the docs [here](https://huggingface.co/docs/diffusers/main/en/training/distributed_inference).
|
||||
|
||||
In contrast, this pipeline is designed for speeding up sampling of a single prompt (by using multiple GPUs).
|
||||
</Tip>
|
||||
|
||||
## StableDiffusionParadigmsPipeline
|
||||
[[autodoc]] StableDiffusionParadigmsPipeline
|
||||
- __call__
|
||||
- all
|
||||
@@ -1,196 +0,0 @@
|
||||
<!--Copyright 2023 The HuggingFace Team. All rights reserved.
|
||||
Licensed under the Apache License, Version 2.0 (the "License"); you may not use this file except in compliance with
|
||||
the License. You may obtain a copy of the License at
|
||||
http://www.apache.org/licenses/LICENSE-2.0
|
||||
Unless required by applicable law or agreed to in writing, software distributed under the License is distributed on
|
||||
an "AS IS" BASIS, WITHOUT WARRANTIES OR CONDITIONS OF ANY KIND, either express or implied. See the License for the
|
||||
specific language governing permissions and limitations under the License.
|
||||
-->
|
||||
|
||||
# Shap-E
|
||||
|
||||
## Overview
|
||||
|
||||
|
||||
The Shap-E model was proposed in [Shap-E: Generating Conditional 3D Implicit Functions](https://arxiv.org/abs/2305.02463) by Alex Nichol and Heewon Jun from [OpenAI](https://github.com/openai).
|
||||
|
||||
The abstract of the paper is the following:
|
||||
|
||||
*We present Shap-E, a conditional generative model for 3D assets. Unlike recent work on 3D generative models which produce a single output representation, Shap-E directly generates the parameters of implicit functions that can be rendered as both textured meshes and neural radiance fields. We train Shap-E in two stages: first, we train an encoder that deterministically maps 3D assets into the parameters of an implicit function; second, we train a conditional diffusion model on outputs of the encoder. When trained on a large dataset of paired 3D and text data, our resulting models are capable of generating complex and diverse 3D assets in a matter of seconds. When compared to Point-E, an explicit generative model over point clouds, Shap-E converges faster and reaches comparable or better sample quality despite modeling a higher-dimensional, multi-representation output space.*
|
||||
|
||||
The original codebase can be found [here](https://github.com/openai/shap-e).
|
||||
|
||||
## Available Pipelines:
|
||||
|
||||
| Pipeline | Tasks |
|
||||
|---|---|
|
||||
| [pipeline_shap_e.py](https://github.com/huggingface/diffusers/blob/main/src/diffusers/pipelines/shap_e/pipeline_shap_e.py) | *Text-to-Image Generation* |
|
||||
| [pipeline_shap_e_img2img.py](https://github.com/huggingface/diffusers/blob/main/src/diffusers/pipelines/shap_e/pipeline_shap_e_img2img.py) | *Image-to-Image Generation* |
|
||||
|
||||
## Available checkpoints
|
||||
|
||||
* [`openai/shap-e`](https://huggingface.co/openai/shap-e)
|
||||
* [`openai/shap-e-img2img`](https://huggingface.co/openai/shap-e-img2img)
|
||||
|
||||
## Usage Examples
|
||||
|
||||
In the following, we will walk you through some examples of how to use Shap-E pipelines to create 3D objects in gif format.
|
||||
|
||||
### Text-to-3D image generation
|
||||
|
||||
We can use [`ShapEPipeline`] to create 3D object based on a text prompt. In this example, we will make a birthday cupcake for :firecracker: diffusers library's 1 year birthday. The workflow to use the Shap-E text-to-image pipeline is same as how you would use other text-to-image pipelines in diffusers.
|
||||
|
||||
```python
|
||||
import torch
|
||||
|
||||
from diffusers import DiffusionPipeline
|
||||
|
||||
device = torch.device("cuda" if torch.cuda.is_available() else "cpu")
|
||||
|
||||
repo = "openai/shap-e"
|
||||
pipe = DiffusionPipeline.from_pretrained(repo, torch_dtype=torch.float16)
|
||||
pipe = pipe.to(device)
|
||||
|
||||
guidance_scale = 15.0
|
||||
prompt = ["A firecracker", "A birthday cupcake"]
|
||||
|
||||
images = pipe(
|
||||
prompt,
|
||||
guidance_scale=guidance_scale,
|
||||
num_inference_steps=64,
|
||||
frame_size=256,
|
||||
).images
|
||||
```
|
||||
|
||||
The output of [`ShapEPipeline`] is a list of lists of images frames. Each list of frames can be used to create a 3D object. Let's use the `export_to_gif` utility function in diffusers to make a 3D cupcake!
|
||||
|
||||
```python
|
||||
from diffusers.utils import export_to_gif
|
||||
|
||||
export_to_gif(images[0], "firecracker_3d.gif")
|
||||
export_to_gif(images[1], "cake_3d.gif")
|
||||
```
|
||||

|
||||
|
||||
|
||||
|
||||
### Image-to-Image generation
|
||||
|
||||
You can use [`ShapEImg2ImgPipeline`] along with other text-to-image pipelines in diffusers and turn your 2D generation into 3D.
|
||||
|
||||
In this example, We will first genrate a cheeseburger with a simple prompt "A cheeseburger, white background"
|
||||
|
||||
```python
|
||||
from diffusers import DiffusionPipeline
|
||||
import torch
|
||||
|
||||
pipe_prior = DiffusionPipeline.from_pretrained("kandinsky-community/kandinsky-2-1-prior", torch_dtype=torch.float16)
|
||||
pipe_prior.to("cuda")
|
||||
|
||||
t2i_pipe = DiffusionPipeline.from_pretrained("kandinsky-community/kandinsky-2-1", torch_dtype=torch.float16)
|
||||
t2i_pipe.to("cuda")
|
||||
|
||||
prompt = "A cheeseburger, white background"
|
||||
|
||||
image_embeds, negative_image_embeds = pipe_prior(prompt, guidance_scale=1.0).to_tuple()
|
||||
image = t2i_pipe(
|
||||
prompt,
|
||||
image_embeds=image_embeds,
|
||||
negative_image_embeds=negative_image_embeds,
|
||||
).images[0]
|
||||
|
||||
image.save("burger.png")
|
||||
```
|
||||
|
||||
|
||||
|
||||
we will then use the Shap-E image-to-image pipeline to turn it into a 3D cheeseburger :)
|
||||
|
||||
```python
|
||||
from PIL import Image
|
||||
from diffusers.utils import export_to_gif
|
||||
|
||||
repo = "openai/shap-e-img2img"
|
||||
pipe = DiffusionPipeline.from_pretrained(repo, torch_dtype=torch.float16)
|
||||
pipe = pipe.to("cuda")
|
||||
|
||||
guidance_scale = 3.0
|
||||
image = Image.open("burger.png").resize((256, 256))
|
||||
|
||||
images = pipe(
|
||||
image,
|
||||
guidance_scale=guidance_scale,
|
||||
num_inference_steps=64,
|
||||
frame_size=256,
|
||||
).images
|
||||
|
||||
gif_path = export_to_gif(images[0], "burger_3d.gif")
|
||||
```
|
||||
|
||||
|
||||
### Generate mesh
|
||||
|
||||
For both [`ShapEPipeline`] and [`ShapEImg2ImgPipeline`], you can generate mesh output by passing `output_type` as `mesh` to the pipeline, and then use the [`ShapEPipeline.export_to_ply`] utility function to save the output as a `ply` file. We also provide a [`ShapEPipeline.export_to_obj`] function that you can use to save mesh outputs as `obj` files.
|
||||
|
||||
```python
|
||||
import torch
|
||||
|
||||
from diffusers import DiffusionPipeline
|
||||
from diffusers.utils import export_to_ply
|
||||
|
||||
device = torch.device("cuda" if torch.cuda.is_available() else "cpu")
|
||||
|
||||
repo = "openai/shap-e"
|
||||
pipe = DiffusionPipeline.from_pretrained(repo, torch_dtype=torch.float16, variant="fp16")
|
||||
pipe = pipe.to(device)
|
||||
|
||||
guidance_scale = 15.0
|
||||
prompt = "A birthday cupcake"
|
||||
|
||||
images = pipe(prompt, guidance_scale=guidance_scale, num_inference_steps=64, frame_size=256, output_type="mesh").images
|
||||
|
||||
ply_path = export_to_ply(images[0], "3d_cake.ply")
|
||||
print(f"saved to folder: {ply_path}")
|
||||
```
|
||||
|
||||
Huggingface Datasets supports mesh visualization for mesh files in `glb` format. Below we will show you how to convert your mesh file into `glb` format so that you can use the Dataset viewer to render 3D objects.
|
||||
|
||||
We need to install `trimesh` library.
|
||||
|
||||
```
|
||||
pip install trimesh
|
||||
```
|
||||
|
||||
To convert the mesh file into `glb` format,
|
||||
|
||||
```python
|
||||
import trimesh
|
||||
|
||||
mesh = trimesh.load("3d_cake.ply")
|
||||
mesh.export("3d_cake.glb", file_type="glb")
|
||||
```
|
||||
|
||||
By default, the mesh output of Shap-E is from the bottom viewpoint; you can change the default viewpoint by applying a rotation transformation
|
||||
|
||||
```python
|
||||
import trimesh
|
||||
import numpy as np
|
||||
|
||||
mesh = trimesh.load("3d_cake.ply")
|
||||
rot = trimesh.transformations.rotation_matrix(-np.pi / 2, [1, 0, 0])
|
||||
mesh = mesh.apply_transform(rot)
|
||||
mesh.export("3d_cake.glb", file_type="glb")
|
||||
```
|
||||
|
||||
Now you can upload your mesh file to your dataset and visualize it! Here is the link to the 3D cake we just generated
|
||||
https://huggingface.co/datasets/hf-internal-testing/diffusers-images/blob/main/shap_e/3d_cake.glb
|
||||
|
||||
## ShapEPipeline
|
||||
[[autodoc]] ShapEPipeline
|
||||
- all
|
||||
- __call__
|
||||
|
||||
## ShapEImg2ImgPipeline
|
||||
[[autodoc]] ShapEImg2ImgPipeline
|
||||
- all
|
||||
- __call__
|
||||
@@ -1,187 +0,0 @@
|
||||
<!--Copyright 2023 The HuggingFace Team. All rights reserved.
|
||||
|
||||
Licensed under the Apache License, Version 2.0 (the "License"); you may not use this file except in compliance with
|
||||
the License. You may obtain a copy of the License at
|
||||
|
||||
http://www.apache.org/licenses/LICENSE-2.0
|
||||
|
||||
Unless required by applicable law or agreed to in writing, software distributed under the License is distributed on
|
||||
an "AS IS" BASIS, WITHOUT WARRANTIES OR CONDITIONS OF ANY KIND, either express or implied. See the License for the
|
||||
specific language governing permissions and limitations under the License.
|
||||
-->
|
||||
|
||||
# Text-to-Image Generation with Adapter Conditioning
|
||||
|
||||
## Overview
|
||||
|
||||
[T2I-Adapter: Learning Adapters to Dig out More Controllable Ability for Text-to-Image Diffusion Models](https://arxiv.org/abs/2302.08453) by Chong Mou, Xintao Wang, Liangbin Xie, Jian Zhang, Zhongang Qi, Ying Shan, Xiaohu Qie.
|
||||
|
||||
Using the pretrained models we can provide control images (for example, a depth map) to control Stable Diffusion text-to-image generation so that it follows the structure of the depth image and fills in the details.
|
||||
|
||||
The abstract of the paper is the following:
|
||||
|
||||
*The incredible generative ability of large-scale text-to-image (T2I) models has demonstrated strong power of learning complex structures and meaningful semantics. However, relying solely on text prompts cannot fully take advantage of the knowledge learned by the model, especially when flexible and accurate structure control is needed. In this paper, we aim to ``dig out" the capabilities that T2I models have implicitly learned, and then explicitly use them to control the generation more granularly. Specifically, we propose to learn simple and small T2I-Adapters to align internal knowledge in T2I models with external control signals, while freezing the original large T2I models. In this way, we can train various adapters according to different conditions, and achieve rich control and editing effects. Further, the proposed T2I-Adapters have attractive properties of practical value, such as composability and generalization ability. Extensive experiments demonstrate that our T2I-Adapter has promising generation quality and a wide range of applications.*
|
||||
|
||||
This model was contributed by the community contributor [HimariO](https://github.com/HimariO) ❤️ .
|
||||
|
||||
## Available Pipelines:
|
||||
|
||||
| Pipeline | Tasks | Demo
|
||||
|---|---|:---:|
|
||||
| [StableDiffusionAdapterPipeline](https://github.com/huggingface/diffusers/blob/main/src/diffusers/pipelines/stable_diffusion/pipeline_stable_diffusion_adapter.py) | *Text-to-Image Generation with T2I-Adapter Conditioning* | -
|
||||
|
||||
## Usage example
|
||||
|
||||
In the following we give a simple example of how to use a *T2IAdapter* checkpoint with Diffusers for inference.
|
||||
All adapters use the same pipeline.
|
||||
|
||||
1. Images are first converted into the appropriate *control image* format.
|
||||
2. The *control image* and *prompt* are passed to the [`StableDiffusionAdapterPipeline`].
|
||||
|
||||
Let's have a look at a simple example using the [Color Adapter](https://huggingface.co/TencentARC/t2iadapter_color_sd14v1).
|
||||
|
||||
```python
|
||||
from diffusers.utils import load_image
|
||||
|
||||
image = load_image("https://huggingface.co/datasets/diffusers/docs-images/resolve/main/t2i-adapter/color_ref.png")
|
||||
```
|
||||
|
||||
|
||||
|
||||
|
||||
Then we can create our color palette by simply resizing it to 8 by 8 pixels and then scaling it back to original size.
|
||||
|
||||
```python
|
||||
from PIL import Image
|
||||
|
||||
color_palette = image.resize((8, 8))
|
||||
color_palette = color_palette.resize((512, 512), resample=Image.Resampling.NEAREST)
|
||||
```
|
||||
|
||||
Let's take a look at the processed image.
|
||||
|
||||

|
||||
|
||||
|
||||
Next, create the adapter pipeline
|
||||
|
||||
```py
|
||||
import torch
|
||||
from diffusers import StableDiffusionAdapterPipeline, T2IAdapter
|
||||
|
||||
adapter = T2IAdapter.from_pretrained("TencentARC/t2iadapter_color_sd14v1")
|
||||
pipe = StableDiffusionAdapterPipeline.from_pretrained(
|
||||
"CompVis/stable-diffusion-v1-4",
|
||||
adapter=adapter,
|
||||
torch_dtype=torch.float16,
|
||||
)
|
||||
pipe.to("cuda")
|
||||
```
|
||||
|
||||
Finally, pass the prompt and control image to the pipeline
|
||||
|
||||
```py
|
||||
# fix the random seed, so you will get the same result as the example
|
||||
generator = torch.manual_seed(7)
|
||||
|
||||
out_image = pipe(
|
||||
"At night, glowing cubes in front of the beach",
|
||||
image=color_palette,
|
||||
generator=generator,
|
||||
).images[0]
|
||||
```
|
||||
|
||||
|
||||
|
||||
|
||||
## Available checkpoints
|
||||
|
||||
Non-diffusers checkpoints can be found under [TencentARC/T2I-Adapter](https://huggingface.co/TencentARC/T2I-Adapter/tree/main/models).
|
||||
|
||||
### T2I-Adapter with Stable Diffusion 1.4
|
||||
|
||||
| Model Name | Control Image Overview| Control Image Example | Generated Image Example |
|
||||
|---|---|---|---|
|
||||
|[TencentARC/t2iadapter_color_sd14v1](https://huggingface.co/TencentARC/t2iadapter_color_sd14v1)<br/> *Trained with spatial color palette* | A image with 8x8 color palette.|<a href="https://huggingface.co/datasets/diffusers/docs-images/resolve/main/t2i-adapter/color_sample_input.png"><img width="64" style="margin:0;padding:0;" src="https://huggingface.co/datasets/diffusers/docs-images/resolve/main/t2i-adapter/color_sample_input.png"/></a>|<a href="https://huggingface.co/datasets/diffusers/docs-images/resolve/main/t2i-adapter/color_sample_output.png"><img width="64" src="https://huggingface.co/datasets/diffusers/docs-images/resolve/main/t2i-adapter/color_sample_output.png"/></a>|
|
||||
|[TencentARC/t2iadapter_canny_sd14v1](https://huggingface.co/TencentARC/t2iadapter_canny_sd14v1)<br/> *Trained with canny edge detection* | A monochrome image with white edges on a black background.|<a href="https://huggingface.co/datasets/diffusers/docs-images/resolve/main/t2i-adapter/canny_sample_input.png"><img width="64" style="margin:0;padding:0;" src="https://huggingface.co/datasets/diffusers/docs-images/resolve/main/t2i-adapter/canny_sample_input.png"/></a>|<a href="https://huggingface.co/datasets/diffusers/docs-images/resolve/main/t2i-adapter/canny_sample_output.png"><img width="64" src="https://huggingface.co/datasets/diffusers/docs-images/resolve/main/t2i-adapter/canny_sample_output.png"/></a>|
|
||||
|[TencentARC/t2iadapter_sketch_sd14v1](https://huggingface.co/TencentARC/t2iadapter_sketch_sd14v1)<br/> *Trained with [PidiNet](https://github.com/zhuoinoulu/pidinet) edge detection* | A hand-drawn monochrome image with white outlines on a black background.|<a href="https://huggingface.co/datasets/diffusers/docs-images/resolve/main/t2i-adapter/sketch_sample_input.png"><img width="64" style="margin:0;padding:0;" src="https://huggingface.co/datasets/diffusers/docs-images/resolve/main/t2i-adapter/sketch_sample_input.png"/></a>|<a href="https://huggingface.co/datasets/diffusers/docs-images/resolve/main/t2i-adapter/sketch_sample_output.png"><img width="64" src="https://huggingface.co/datasets/diffusers/docs-images/resolve/main/t2i-adapter/sketch_sample_output.png"/></a>|
|
||||
|[TencentARC/t2iadapter_depth_sd14v1](https://huggingface.co/TencentARC/t2iadapter_depth_sd14v1)<br/> *Trained with Midas depth estimation* | A grayscale image with black representing deep areas and white representing shallow areas.|<a href="https://huggingface.co/datasets/diffusers/docs-images/resolve/main/t2i-adapter/depth_sample_input.png"><img width="64" src="https://huggingface.co/datasets/diffusers/docs-images/resolve/main/t2i-adapter/depth_sample_input.png"/></a>|<a href="https://huggingface.co/datasets/diffusers/docs-images/resolve/main/t2i-adapter/depth_sample_output.png"><img width="64" src="https://huggingface.co/datasets/diffusers/docs-images/resolve/main/t2i-adapter/depth_sample_output.png"/></a>|
|
||||
|[TencentARC/t2iadapter_openpose_sd14v1](https://huggingface.co/TencentARC/t2iadapter_openpose_sd14v1)<br/> *Trained with OpenPose bone image* | A [OpenPose bone](https://github.com/CMU-Perceptual-Computing-Lab/openpose) image.|<a href="https://huggingface.co/datasets/diffusers/docs-images/resolve/main/t2i-adapter/openpose_sample_input.png"><img width="64" src="https://huggingface.co/datasets/diffusers/docs-images/resolve/main/t2i-adapter/openpose_sample_input.png"/></a>|<a href="https://huggingface.co/datasets/diffusers/docs-images/resolve/main/t2i-adapter/openpose_sample_output.png"><img width="64" src="https://huggingface.co/datasets/diffusers/docs-images/resolve/main/t2i-adapter/openpose_sample_output.png"/></a>|
|
||||
|[TencentARC/t2iadapter_keypose_sd14v1](https://huggingface.co/TencentARC/t2iadapter_keypose_sd14v1)<br/> *Trained with mmpose skeleton image* | A [mmpose skeleton](https://github.com/open-mmlab/mmpose) image.|<a href="https://huggingface.co/datasets/diffusers/docs-images/resolve/main/t2i-adapter/keypose_sample_input.png"><img width="64" src="https://huggingface.co/datasets/diffusers/docs-images/resolve/main/t2i-adapter/keypose_sample_input.png"/></a>|<a href="https://huggingface.co/datasets/diffusers/docs-images/resolve/main/t2i-adapter/keypose_sample_output.png"><img width="64" src="https://huggingface.co/datasets/diffusers/docs-images/resolve/main/t2i-adapter/keypose_sample_output.png"/></a>|
|
||||
|[TencentARC/t2iadapter_seg_sd14v1](https://huggingface.co/TencentARC/t2iadapter_seg_sd14v1)<br/>*Trained with semantic segmentation* | An [custom](https://github.com/TencentARC/T2I-Adapter/discussions/25) segmentation protocol image.|<a href="https://huggingface.co/datasets/diffusers/docs-images/resolve/main/t2i-adapter/seg_sample_input.png"><img width="64" src="https://huggingface.co/datasets/diffusers/docs-images/resolve/main/t2i-adapter/seg_sample_input.png"/></a>|<a href="https://huggingface.co/datasets/diffusers/docs-images/resolve/main/t2i-adapter/seg_sample_output.png"><img width="64" src="https://huggingface.co/datasets/diffusers/docs-images/resolve/main/t2i-adapter/seg_sample_output.png"/></a> |
|
||||
|[TencentARC/t2iadapter_canny_sd15v2](https://huggingface.co/TencentARC/t2iadapter_canny_sd15v2)||
|
||||
|[TencentARC/t2iadapter_depth_sd15v2](https://huggingface.co/TencentARC/t2iadapter_depth_sd15v2)||
|
||||
|[TencentARC/t2iadapter_sketch_sd15v2](https://huggingface.co/TencentARC/t2iadapter_sketch_sd15v2)||
|
||||
|[TencentARC/t2iadapter_zoedepth_sd15v1](https://huggingface.co/TencentARC/t2iadapter_zoedepth_sd15v1)||
|
||||
|
||||
## Combining multiple adapters
|
||||
|
||||
[`MultiAdapter`] can be used for applying multiple conditionings at once.
|
||||
|
||||
Here we use the keypose adapter for the character posture and the depth adapter for creating the scene.
|
||||
|
||||
```py
|
||||
import torch
|
||||
from PIL import Image
|
||||
from diffusers.utils import load_image
|
||||
|
||||
cond_keypose = load_image(
|
||||
"https://huggingface.co/datasets/diffusers/docs-images/resolve/main/t2i-adapter/keypose_sample_input.png"
|
||||
)
|
||||
cond_depth = load_image(
|
||||
"https://huggingface.co/datasets/diffusers/docs-images/resolve/main/t2i-adapter/depth_sample_input.png"
|
||||
)
|
||||
cond = [[cond_keypose, cond_depth]]
|
||||
|
||||
prompt = ["A man walking in an office room with a nice view"]
|
||||
```
|
||||
|
||||
The two control images look as such:
|
||||
|
||||
|
||||
|
||||
|
||||
|
||||
`MultiAdapter` combines keypose and depth adapters.
|
||||
|
||||
`adapter_conditioning_scale` balances the relative influence of the different adapters.
|
||||
|
||||
```py
|
||||
from diffusers import StableDiffusionAdapterPipeline, MultiAdapter
|
||||
|
||||
adapters = MultiAdapter(
|
||||
[
|
||||
T2IAdapter.from_pretrained("TencentARC/t2iadapter_keypose_sd14v1"),
|
||||
T2IAdapter.from_pretrained("TencentARC/t2iadapter_depth_sd14v1"),
|
||||
]
|
||||
)
|
||||
adapters = adapters.to(torch.float16)
|
||||
|
||||
pipe = StableDiffusionAdapterPipeline.from_pretrained(
|
||||
"CompVis/stable-diffusion-v1-4",
|
||||
torch_dtype=torch.float16,
|
||||
adapter=adapters,
|
||||
)
|
||||
|
||||
images = pipe(prompt, cond, adapter_conditioning_scale=[0.8, 0.8])
|
||||
```
|
||||
|
||||

|
||||
|
||||
|
||||
## T2I Adapter vs ControlNet
|
||||
|
||||
T2I-Adapter is similar to [ControlNet](https://huggingface.co/docs/diffusers/main/en/api/pipelines/controlnet).
|
||||
T2i-Adapter uses a smaller auxiliary network which is only run once for the entire diffusion process.
|
||||
However, T2I-Adapter performs slightly worse than ControlNet.
|
||||
|
||||
## StableDiffusionAdapterPipeline
|
||||
[[autodoc]] StableDiffusionAdapterPipeline
|
||||
- all
|
||||
- __call__
|
||||
- enable_attention_slicing
|
||||
- disable_attention_slicing
|
||||
- enable_vae_slicing
|
||||
- disable_vae_slicing
|
||||
- enable_xformers_memory_efficient_attention
|
||||
- disable_xformers_memory_efficient_attention
|
||||
+2
-2
@@ -71,7 +71,7 @@ First, let's load our pipeline:
|
||||
|
||||
```py
|
||||
import torch
|
||||
from diffusers import DDIMScheduler, DDIMInverseScheduler, StableDiffusionDiffEditPipeline
|
||||
from diffusers import DDIMScheduler, DDIMInverseScheduler, StableDiffusionPix2PixZeroPipeline
|
||||
|
||||
sd_model_ckpt = "stabilityai/stable-diffusion-2-1"
|
||||
pipeline = StableDiffusionDiffEditPipeline.from_pretrained(
|
||||
@@ -357,4 +357,4 @@ images[0].save("edited_image.png")
|
||||
- all
|
||||
- generate_mask
|
||||
- invert
|
||||
- __call__
|
||||
- __call__
|
||||
@@ -31,7 +31,7 @@ proposed by Chenlin Meng, Yutong He, Yang Song, Jiaming Song, Jiajun Wu, Jun-Yan
|
||||
- enable_xformers_memory_efficient_attention
|
||||
- disable_xformers_memory_efficient_attention
|
||||
- load_textual_inversion
|
||||
- from_single_file
|
||||
- from_ckpt
|
||||
- load_lora_weights
|
||||
- save_lora_weights
|
||||
|
||||
|
||||
@@ -1,55 +0,0 @@
|
||||
<!--Copyright 2023 The Intel Labs Team Authors and HuggingFace Team. All rights reserved.
|
||||
|
||||
Licensed under the Apache License, Version 2.0 (the "License"); you may not use this file except in compliance with
|
||||
the License. You may obtain a copy of the License at
|
||||
|
||||
http://www.apache.org/licenses/LICENSE-2.0
|
||||
|
||||
Unless required by applicable law or agreed to in writing, software distributed under the License is distributed on
|
||||
an "AS IS" BASIS, WITHOUT WARRANTIES OR CONDITIONS OF ANY KIND, either express or implied. See the License for the
|
||||
specific language governing permissions and limitations under the License.
|
||||
-->
|
||||
|
||||
# LDM3D
|
||||
|
||||
LDM3D was proposed in [LDM3D: Latent Diffusion Model for 3D](https://arxiv.org/abs/2305.10853) by Gabriela Ben Melech Stan, Diana Wofk, Scottie Fox, Alex Redden, Will Saxton, Jean Yu, Estelle Aflalo, Shao-Yen Tseng, Fabio Nonato, Matthias Muller, Vasudev Lal
|
||||
The abstract of the paper is the following:
|
||||
|
||||
*This research paper proposes a Latent Diffusion Model for 3D (LDM3D) that generates both image and depth map data from a given text prompt, allowing users to generate RGBD images from text prompts. The LDM3D model is fine-tuned on a dataset of tuples containing an RGB image, depth map and caption, and validated through extensive experiments. We also develop an application called DepthFusion, which uses the generated RGB images and depth maps to create immersive and interactive 360-degree-view experiences using TouchDesigner. This technology has the potential to transform a wide range of industries, from entertainment and gaming to architecture and design. Overall, this paper presents a significant contribution to the field of generative AI and computer vision, and showcases the potential of LDM3D and DepthFusion to revolutionize content creation and digital experiences. A short video summarizing the approach can be found at [this url](https://t.ly/tdi2).*
|
||||
|
||||
|
||||
*Overview*:
|
||||
|
||||
| Pipeline | Tasks | Colab | Demo
|
||||
|---|---|:---:|:---:|
|
||||
| [pipeline_stable_diffusion_ldm3d.py](https://github.com/huggingface/diffusers/blob/main/src/diffusers/pipelines/stable_diffusion/pipeline_stable_diffusion_ldm3d.py) | *Text-to-Image Generation* | - | -
|
||||
|
||||
## Tips
|
||||
|
||||
- LDM3D generates both an image and a depth map from a given text prompt, compared to the existing txt-to-img diffusion models such as [Stable Diffusion](./stable_diffusion/overview) that generates only an image.
|
||||
- With almost the same number of parameters, LDM3D achieves to create a latent space that can compress both the RGB images and the depth maps.
|
||||
|
||||
|
||||
Running LDM3D is straighforward with the [`StableDiffusionLDM3DPipeline`]:
|
||||
|
||||
```python
|
||||
>>> from diffusers import StableDiffusionLDM3DPipeline
|
||||
|
||||
>>> pipe = StableDiffusionLDM3DPipeline.from_pretrained("Intel/ldm3d")
|
||||
prompt ="A picture of some lemons on a table"
|
||||
output = pipe(prompt)
|
||||
rgb_image, depth_image = output.rgb, output.depth
|
||||
rgb_image[0].save("lemons_ldm3d_rgb.jpg")
|
||||
depth_image[0].save("lemons_ldm3d_depth.png")
|
||||
```
|
||||
|
||||
|
||||
## StableDiffusionPipelineOutput
|
||||
[[autodoc]] pipelines.stable_diffusion.StableDiffusionPipelineOutput
|
||||
- all
|
||||
- __call__
|
||||
|
||||
## StableDiffusionLDM3DPipeline
|
||||
[[autodoc]] StableDiffusionLDM3DPipeline
|
||||
- all
|
||||
- __call__
|
||||
@@ -26,17 +26,19 @@ For more details about how Stable Diffusion works and how it differs from the ba
|
||||
| Pipeline | Tasks | Colab | Demo
|
||||
|---|---|:---:|:---:|
|
||||
| [StableDiffusionPipeline](./text2img) | *Text-to-Image Generation* | [](https://colab.research.google.com/github/huggingface/notebooks/blob/main/diffusers/stable_diffusion.ipynb) | [🤗 Stable Diffusion](https://huggingface.co/spaces/stabilityai/stable-diffusion)
|
||||
| [StableDiffusionPipelineSafe](./stable_diffusion_safe) | *Text-to-Image Generation* | [](https://colab.research.google.com/github/ml-research/safe-latent-diffusion/blob/main/examples/Safe%20Latent%20Diffusion.ipynb) | [](https://huggingface.co/spaces/AIML-TUDA/unsafe-vs-safe-stable-diffusion)
|
||||
| [StableDiffusionImg2ImgPipeline](./img2img) | *Image-to-Image Text-Guided Generation* | [](https://colab.research.google.com/github/huggingface/notebooks/blob/main/diffusers/image_2_image_using_diffusers.ipynb) | [🤗 Diffuse the Rest](https://huggingface.co/spaces/huggingface/diffuse-the-rest)
|
||||
| [StableDiffusionInpaintPipeline](./inpaint) | **Experimental** – *Text-Guided Image Inpainting* | [](https://colab.research.google.com/github/huggingface/notebooks/blob/main/diffusers/in_painting_with_stable_diffusion_using_diffusers.ipynb) |
|
||||
| [StableDiffusionDepth2ImgPipeline](./depth2img) | **Experimental** – *Depth-to-Image Text-Guided Generation* | |
|
||||
| [StableDiffusionImageVariationPipeline](./image_variation) | **Experimental** – *Image Variation Generation* | | [🤗 Stable Diffusion Image Variations](https://huggingface.co/spaces/lambdalabs/stable-diffusion-image-variations)
|
||||
| [StableDiffusionUpscalePipeline](./upscale) | **Experimental** – *Text-Guided Image Super-Resolution* | |
|
||||
| [StableDiffusionLatentUpscalePipeline](./latent_upscale) | **Experimental** – *Text-Guided Image Super-Resolution* | |
|
||||
| [Stable Diffusion 2](./stable_diffusion_2) | *Text-Guided Image Inpainting* |
|
||||
| [Stable Diffusion 2](./stable_diffusion_2) | *Depth-to-Image Text-Guided Generation* |
|
||||
| [Stable Diffusion 2](./stable_diffusion_2) | *Text-Guided Super Resolution Image-to-Image* |
|
||||
| [StableDiffusionLDM3DPipeline](./ldm3d) | *Text-to-(RGB, Depth)* |
|
||||
| [StableDiffusionInpaintPipeline](./inpaint) | **Experimental** – *Text-Guided Image Inpainting* | [](https://colab.research.google.com/github/huggingface/notebooks/blob/main/diffusers/in_painting_with_stable_diffusion_using_diffusers.ipynb) | Coming soon
|
||||
| [StableDiffusionDepth2ImgPipeline](./depth2img) | **Experimental** – *Depth-to-Image Text-Guided Generation * | | Coming soon
|
||||
| [StableDiffusionImageVariationPipeline](./image_variation) | **Experimental** – *Image Variation Generation * | | [🤗 Stable Diffusion Image Variations](https://huggingface.co/spaces/lambdalabs/stable-diffusion-image-variations)
|
||||
| [StableDiffusionUpscalePipeline](./upscale) | **Experimental** – *Text-Guided Image Super-Resolution * | | Coming soon
|
||||
| [StableDiffusionLatentUpscalePipeline](./latent_upscale) | **Experimental** – *Text-Guided Image Super-Resolution * | | Coming soon
|
||||
| [StableDiffusionInstructPix2PixPipeline](./pix2pix) | **Experimental** – *Text-Based Image Editing * | | [InstructPix2Pix: Learning to Follow Image Editing Instructions](https://huggingface.co/spaces/timbrooks/instruct-pix2pix)
|
||||
| [StableDiffusionAttendAndExcitePipeline](./attend_and_excite) | **Experimental** – *Text-to-Image Generation * | | [Attend-and-Excite: Attention-Based Semantic Guidance for Text-to-Image Diffusion Models](https://huggingface.co/spaces/AttendAndExcite/Attend-and-Excite)
|
||||
| [StableDiffusionPix2PixZeroPipeline](./pix2pix_zero) | **Experimental** – *Text-Based Image Editing * | | [Zero-shot Image-to-Image Translation](https://arxiv.org/abs/2302.03027)
|
||||
| [StableDiffusionModelEditingPipeline](./model_editing) | **Experimental** – *Text-to-Image Model Editing * | | [Editing Implicit Assumptions in Text-to-Image Diffusion Models](https://arxiv.org/abs/2303.08084)
|
||||
| [StableDiffusionDiffEditPipeline](./diffedit) | **Experimental** – *Text-Based Image Editing * | | [DiffEdit: Diffusion-based semantic image editing with mask guidance](https://arxiv.org/abs/2210.11427)
|
||||
|
||||
|
||||
|
||||
## Tips
|
||||
|
||||
|
||||
-27
@@ -52,33 +52,6 @@ image = pipe(prompt).images[0]
|
||||
image.save("dolomites.png")
|
||||
```
|
||||
|
||||
<Tip>
|
||||
|
||||
While calling this pipeline, it's possible to specify the `view_batch_size` to have a >1 value.
|
||||
For some GPUs with high performance, higher a `view_batch_size`, can speedup the generation
|
||||
and increase the VRAM usage.
|
||||
|
||||
</Tip>
|
||||
|
||||
<Tip>
|
||||
|
||||
Circular padding is applied to ensure there are no stitching artifacts when working with
|
||||
panoramas that needs to seamlessly transition from the rightmost part to the leftmost part.
|
||||
By enabling circular padding (set `circular_padding=True`), the operation applies additional
|
||||
crops after the rightmost point of the image, allowing the model to "see” the transition
|
||||
from the rightmost part to the leftmost part. This helps maintain visual consistency in
|
||||
a 360-degree sense and creates a proper “panorama” that can be viewed using 360-degree
|
||||
panorama viewers. When decoding latents in StableDiffusion, circular padding is applied
|
||||
to ensure that the decoded latents match in the RGB space.
|
||||
|
||||
Without circular padding, there is a stitching artifact (default):
|
||||
|
||||
|
||||
With circular padding, the right and the left parts are matching (`circular_padding=True`):
|
||||
|
||||
|
||||
</Tip>
|
||||
|
||||
## StableDiffusionPanoramaPipeline
|
||||
[[autodoc]] StableDiffusionPanoramaPipeline
|
||||
- __call__
|
||||
@@ -1,364 +0,0 @@
|
||||
<!--Copyright 2023 The HuggingFace Team. All rights reserved.
|
||||
|
||||
Licensed under the Apache License, Version 2.0 (the "License"); you may not use this file except in compliance with
|
||||
the License. You may obtain a copy of the License at
|
||||
|
||||
http://www.apache.org/licenses/LICENSE-2.0
|
||||
|
||||
Unless required by applicable law or agreed to in writing, software distributed under the License is distributed on
|
||||
an "AS IS" BASIS, WITHOUT WARRANTIES OR CONDITIONS OF ANY KIND, either express or implied. See the License for the
|
||||
specific language governing permissions and limitations under the License.
|
||||
-->
|
||||
|
||||
# Stable diffusion XL
|
||||
|
||||
Stable Diffusion XL was proposed in [SDXL: Improving Latent Diffusion Models for High-Resolution Image Synthesis](https://arxiv.org/abs/2307.01952) by Dustin Podell, Zion English, Kyle Lacey, Andreas Blattmann, Tim Dockhorn, Jonas Müller, Joe Penna, Robin Rombach
|
||||
|
||||
The abstract of the paper is the following:
|
||||
|
||||
*We present SDXL, a latent diffusion model for text-to-image synthesis. Compared to previous versions of Stable Diffusion, SDXL leverages a three times larger UNet backbone: The increase of model parameters is mainly due to more attention blocks and a larger cross-attention context as SDXL uses a second text encoder. We design multiple novel conditioning schemes and train SDXL on multiple aspect ratios. We also introduce a refinement model which is used to improve the visual fidelity of samples generated by SDXL using a post-hoc image-to-image technique. We demonstrate that SDXL shows drastically improved performance compared the previous versions of Stable Diffusion and achieves results competitive with those of black-box state-of-the-art image generators.*
|
||||
|
||||
## Tips
|
||||
|
||||
- Stable Diffusion XL works especially well with images between 768 and 1024.
|
||||
- Stable Diffusion XL output image can be improved by making use of a refiner as shown below.
|
||||
|
||||
### Available checkpoints:
|
||||
|
||||
- *Text-to-Image (1024x1024 resolution)*: [stabilityai/stable-diffusion-xl-base-0.9](https://huggingface.co/stabilityai/stable-diffusion-xl-base-0.9) with [`StableDiffusionXLPipeline`]
|
||||
- *Image-to-Image / Refiner (1024x1024 resolution)*: [stabilityai/stable-diffusion-xl-refiner-0.9](https://huggingface.co/stabilityai/stable-diffusion-xl-refiner-0.9) with [`StableDiffusionXLImg2ImgPipeline`]
|
||||
|
||||
## Usage Example
|
||||
|
||||
Before using SDXL make sure to have `transformers`, `accelerate`, `safetensors` and `invisible_watermark` installed.
|
||||
You can install the libraries as follows:
|
||||
|
||||
```
|
||||
pip install transformers
|
||||
pip install accelerate
|
||||
pip install safetensors
|
||||
pip install invisible-watermark>=0.2.0
|
||||
```
|
||||
|
||||
### Text-to-Image
|
||||
|
||||
You can use SDXL as follows for *text-to-image*:
|
||||
|
||||
```py
|
||||
from diffusers import StableDiffusionXLPipeline
|
||||
import torch
|
||||
|
||||
pipe = StableDiffusionXLPipeline.from_pretrained(
|
||||
"stabilityai/stable-diffusion-xl-base-0.9", torch_dtype=torch.float16, variant="fp16", use_safetensors=True
|
||||
)
|
||||
pipe.to("cuda")
|
||||
|
||||
prompt = "Astronaut in a jungle, cold color palette, muted colors, detailed, 8k"
|
||||
image = pipe(prompt=prompt).images[0]
|
||||
```
|
||||
|
||||
### Image-to-image
|
||||
|
||||
You can use SDXL as follows for *image-to-image*:
|
||||
|
||||
```py
|
||||
import torch
|
||||
from diffusers import StableDiffusionXLImg2ImgPipeline
|
||||
from diffusers.utils import load_image
|
||||
|
||||
pipe = StableDiffusionXLImg2ImgPipeline.from_pretrained(
|
||||
"stabilityai/stable-diffusion-xl-refiner-0.9", torch_dtype=torch.float16, variant="fp16", use_safetensors=True
|
||||
)
|
||||
pipe = pipe.to("cuda")
|
||||
url = "https://huggingface.co/datasets/patrickvonplaten/images/resolve/main/aa_xl/000000009.png"
|
||||
|
||||
init_image = load_image(url).convert("RGB")
|
||||
prompt = "a photo of an astronaut riding a horse on mars"
|
||||
image = pipe(prompt, image=init_image).images[0]
|
||||
```
|
||||
|
||||
### Inpainting
|
||||
|
||||
You can use SDXL as follows for *inpainting*
|
||||
|
||||
```py
|
||||
import torch
|
||||
from diffusers import StableDiffusionXLInpaintPipeline
|
||||
from diffusers.utils import load_image
|
||||
|
||||
pipe = StableDiffusionXLInpaintPipeline.from_pretrained(
|
||||
"stabilityai/stable-diffusion-xl-base-0.9", torch_dtype=torch.float16, variant="fp16", use_safetensors=True
|
||||
)
|
||||
pipe.to("cuda")
|
||||
|
||||
img_url = "https://raw.githubusercontent.com/CompVis/latent-diffusion/main/data/inpainting_examples/overture-creations-5sI6fQgYIuo.png"
|
||||
mask_url = "https://raw.githubusercontent.com/CompVis/latent-diffusion/main/data/inpainting_examples/overture-creations-5sI6fQgYIuo_mask.png"
|
||||
|
||||
init_image = load_image(img_url).convert("RGB")
|
||||
mask_image = load_image(mask_url).convert("RGB")
|
||||
|
||||
prompt = "A majestic tiger sitting on a bench"
|
||||
image = pipe(prompt=prompt, image=init_image, mask_image=mask_image, num_inference_steps=50, strength=0.80).images[0]
|
||||
```
|
||||
|
||||
### Refining the image output
|
||||
|
||||
In addition to the [base model checkpoint](https://huggingface.co/stabilityai/stable-diffusion-xl-base-0.9),
|
||||
StableDiffusion-XL also includes a [refiner checkpoint](huggingface.co/stabilityai/stable-diffusion-xl-refiner-0.9)
|
||||
that is specialized in denoising low-noise stage images to generate images of improved high-frequency quality.
|
||||
This refiner checkpoint can be used as a "second-step" pipeline after having run the base checkpoint to improve
|
||||
image quality.
|
||||
|
||||
When using the refiner, one can easily
|
||||
- 1.) employ the base model and refiner as an *Ensemble of Expert Denoisers* as first proposed in [eDiff-I](https://research.nvidia.com/labs/dir/eDiff-I/) or
|
||||
- 2.) simply run the refiner in [SDEdit](https://arxiv.org/abs/2108.01073) fashion after the base model.
|
||||
|
||||
**Note**: The idea of using SD-XL base & refiner as an ensemble of experts was first brought forward by
|
||||
a couple community contributors which also helped shape the following `diffusers` implementation, namely:
|
||||
- [SytanSD](https://github.com/SytanSD)
|
||||
- [bghira](https://github.com/bghira)
|
||||
- [Birch-san](https://github.com/Birch-san)
|
||||
|
||||
#### 1.) Ensemble of Expert Denoisers
|
||||
|
||||
When using the base and refiner model as an ensemble of expert of denoisers, the base model should serve as the
|
||||
expert for the high-noise diffusion stage and the refiner serves as the expert for the low-noise diffusion stage.
|
||||
|
||||
The advantage of 1.) over 2.) is that it requires less overall denoising steps and therefore should be significantly
|
||||
faster. The drawback is that one cannot really inspect the output of the base model; it will still be heavily denoised.
|
||||
|
||||
To use the base model and refiner as an ensemble of expert denoisers, make sure to define the fraction
|
||||
of timesteps which should be run through the high-noise denoising stage (*i.e.* the base model) and the low-noise
|
||||
denoising stage (*i.e.* the refiner model) respectively. This fraction should be set as the [`denoising_end`](https://huggingface.co/docs/diffusers/main/en/api/pipelines/stable_diffusion/stable_diffusion_xl#diffusers.StableDiffusionXLPipeline.__call__.denoising_end) of the base model
|
||||
and as the [`denoising_start`](https://huggingface.co/docs/diffusers/main/en/api/pipelines/stable_diffusion/stable_diffusion_xl#diffusers.StableDiffusionXLImg2ImgPipeline.__call__.denoising_start) of the refiner model.
|
||||
|
||||
Let's look at an example.
|
||||
First, we import the two pipelines. Since the text encoders and variational autoencoder are the same
|
||||
you don't have to load those again for the refiner.
|
||||
|
||||
```py
|
||||
from diffusers import DiffusionPipeline
|
||||
import torch
|
||||
|
||||
base = DiffusionPipeline.from_pretrained(
|
||||
"stabilityai/stable-diffusion-xl-base-0.9", torch_dtype=torch.float16, variant="fp16", use_safetensors=True
|
||||
)
|
||||
pipe.to("cuda")
|
||||
|
||||
refiner = DiffusionPipeline.from_pretrained(
|
||||
"stabilityai/stable-diffusion-xl-refiner-0.9",
|
||||
text_encoder_2=base.text_encoder_2,
|
||||
vae=base.vae,
|
||||
torch_dtype=torch.float16,
|
||||
use_safetensors=True,
|
||||
variant="fp16",
|
||||
)
|
||||
refiner.to("cuda")
|
||||
```
|
||||
|
||||
Now we define the number of inference steps and the fraction at which the model shall be run through the
|
||||
high-noise denoising stage (*i.e.* the base model).
|
||||
|
||||
```py
|
||||
n_steps = 40
|
||||
high_noise_frac = 0.7
|
||||
```
|
||||
|
||||
A fraction of 0.7 means that 70% of the 40 inference steps (28 steps) are run through the base model
|
||||
and the remaining 12 steps are run through the refiner. Let's run the two pipelines now.
|
||||
Make sure to set `denoising_end` and `denoising_start` to the same values and keep `num_inference_steps`
|
||||
constant. Also remember that the output of the base model should be in latent space:
|
||||
|
||||
```py
|
||||
prompt = "A majestic lion jumping from a big stone at night"
|
||||
|
||||
image = base(prompt=prompt, num_inference_steps=n_steps, denoising_end=high_noise_frac, output_type="latent").images
|
||||
image = refiner(prompt=prompt, num_inference_steps=n_steps, denoising_start=high_noise_frac, image=image).images[0]
|
||||
```
|
||||
|
||||
Let's have a look at the image
|
||||
|
||||
| Original Image | Ensemble of Denoisers Experts |
|
||||
|---|---|
|
||||
|  | 
|
||||
|
||||
If we would have just run the base model on the same 40 steps, the image would have been arguably less detailed (e.g. the lion eyes and nose):
|
||||
|
||||
<Tip>
|
||||
|
||||
The ensemble-of-experts method works well on all available schedulers!
|
||||
|
||||
</Tip>
|
||||
|
||||
#### 2.) Refining the image output from fully denoised base image
|
||||
|
||||
In standard [`StableDiffusionImg2ImgPipeline`]-fashion, the fully-denoised image generated of the base model
|
||||
can be further improved using the [refiner checkpoint](huggingface.co/stabilityai/stable-diffusion-xl-refiner-0.9).
|
||||
|
||||
For this, you simply run the refiner as a normal image-to-image pipeline after the "base" text-to-image
|
||||
pipeline. You can leave the outputs of the base model in latent space.
|
||||
|
||||
```py
|
||||
from diffusers import DiffusionPipeline
|
||||
import torch
|
||||
|
||||
pipe = DiffusionPipeline.from_pretrained(
|
||||
"stabilityai/stable-diffusion-xl-base-0.9", torch_dtype=torch.float16, variant="fp16", use_safetensors=True
|
||||
)
|
||||
pipe.to("cuda")
|
||||
|
||||
refiner = DiffusionPipeline.from_pretrained(
|
||||
"stabilityai/stable-diffusion-xl-refiner-0.9",
|
||||
text_encoder_2=pipe.text_encoder_2,
|
||||
vae=pipe.vae,
|
||||
torch_dtype=torch.float16,
|
||||
use_safetensors=True,
|
||||
variant="fp16",
|
||||
)
|
||||
refiner.to("cuda")
|
||||
|
||||
prompt = "Astronaut in a jungle, cold color palette, muted colors, detailed, 8k"
|
||||
|
||||
image = pipe(prompt=prompt, output_type="latent" if use_refiner else "pil").images[0]
|
||||
image = refiner(prompt=prompt, image=image[None, :]).images[0]
|
||||
```
|
||||
|
||||
| Original Image | Refined Image |
|
||||
|---|---|
|
||||
|  |  |
|
||||
|
||||
<Tip>
|
||||
|
||||
The refiner can also very well be used in an in-painting setting. To do so just make
|
||||
sure you use the [`StableDiffusionXLInpaintPipeline`] classes as shown below
|
||||
|
||||
</Tip>
|
||||
|
||||
To use the refiner for inpainting in the Ensemble of Expert Denoisers setting you can do the following:
|
||||
|
||||
```py
|
||||
from diffusers import StableDiffusionXLInpaintPipeline
|
||||
from diffusers.utils import load_image
|
||||
|
||||
pipe = StableDiffusionXLInpaintPipeline.from_pretrained(
|
||||
"stabilityai/stable-diffusion-xl-base-0.9", torch_dtype=torch.float16, variant="fp16", use_safetensors=True
|
||||
)
|
||||
pipe.to("cuda")
|
||||
|
||||
refiner = StableDiffusionXLInpaintPipeline.from_pretrained(
|
||||
"stabilityai/stable-diffusion-xl-refiner-0.9",
|
||||
text_encoder_2=pipe.text_encoder_2,
|
||||
vae=pipe.vae,
|
||||
torch_dtype=torch.float16,
|
||||
use_safetensors=True,
|
||||
variant="fp16",
|
||||
)
|
||||
refiner.to("cuda")
|
||||
|
||||
img_url = "https://raw.githubusercontent.com/CompVis/latent-diffusion/main/data/inpainting_examples/overture-creations-5sI6fQgYIuo.png"
|
||||
mask_url = "https://raw.githubusercontent.com/CompVis/latent-diffusion/main/data/inpainting_examples/overture-creations-5sI6fQgYIuo_mask.png"
|
||||
|
||||
init_image = load_image(img_url).convert("RGB")
|
||||
mask_image = load_image(mask_url).convert("RGB")
|
||||
|
||||
prompt = "A majestic tiger sitting on a bench"
|
||||
num_inference_steps = 75
|
||||
high_noise_frac = 0.7
|
||||
|
||||
image = pipe(
|
||||
prompt=prompt,
|
||||
image=init_image,
|
||||
mask_image=mask_image,
|
||||
num_inference_steps=num_inference_steps,
|
||||
strength=0.80,
|
||||
denoising_start=high_noise_frac,
|
||||
output_type="latent",
|
||||
).images
|
||||
image = refiner(
|
||||
prompt=prompt,
|
||||
image=image,
|
||||
mask_image=mask_image,
|
||||
num_inference_steps=num_inference_steps,
|
||||
denoising_start=high_noise_frac,
|
||||
).images[0]
|
||||
```
|
||||
|
||||
To use the refiner for inpainting in the standard SDE-style setting, simply remove `denoising_end` and `denoising_start` and choose a smaller
|
||||
number of inference steps for the refiner.
|
||||
|
||||
### Loading single file checkpoints / original file format
|
||||
|
||||
By making use of [`~diffusers.loaders.FromSingleFileMixin.from_single_file`] you can also load the
|
||||
original file format into `diffusers`:
|
||||
|
||||
```py
|
||||
from diffusers import StableDiffusionXLPipeline, StableDiffusionXLImg2ImgPipeline
|
||||
import torch
|
||||
|
||||
pipe = StableDiffusionXLPipeline.from_single_file(
|
||||
"./sd_xl_base_0.9.safetensors", torch_dtype=torch.float16, variant="fp16", use_safetensors=True
|
||||
)
|
||||
pipe.to("cuda")
|
||||
|
||||
refiner = StableDiffusionXLImg2ImgPipeline.from_single_file(
|
||||
"./sd_xl_refiner_0.9.safetensors", torch_dtype=torch.float16, use_safetensors=True, variant="fp16"
|
||||
)
|
||||
refiner.to("cuda")
|
||||
```
|
||||
|
||||
### Memory optimization via model offloading
|
||||
|
||||
If you are seeing out-of-memory errors, we recommend making use of [`StableDiffusionXLPipeline.enable_model_cpu_offload`].
|
||||
|
||||
```diff
|
||||
- pipe.to("cuda")
|
||||
+ pipe.enable_model_cpu_offload()
|
||||
```
|
||||
|
||||
and
|
||||
|
||||
```diff
|
||||
- refiner.to("cuda")
|
||||
+ refiner.enable_model_cpu_offload()
|
||||
```
|
||||
|
||||
### Speed-up inference with `torch.compile`
|
||||
|
||||
You can speed up inference by making use of `torch.compile`. This should give you **ca.** 20% speed-up.
|
||||
|
||||
```diff
|
||||
+ pipe.unet = torch.compile(pipe.unet, mode="reduce-overhead", fullgraph=True)
|
||||
+ refiner.unet = torch.compile(refiner.unet, mode="reduce-overhead", fullgraph=True)
|
||||
```
|
||||
|
||||
### Running with `torch < 2.0`
|
||||
|
||||
**Note** that if you want to run Stable Diffusion XL with `torch` < 2.0, please make sure to enable xformers
|
||||
attention:
|
||||
|
||||
```
|
||||
pip install xformers
|
||||
```
|
||||
|
||||
```diff
|
||||
+pipe.enable_xformers_memory_efficient_attention()
|
||||
+refiner.enable_xformers_memory_efficient_attention()
|
||||
```
|
||||
|
||||
## StableDiffusionXLPipeline
|
||||
|
||||
[[autodoc]] StableDiffusionXLPipeline
|
||||
- all
|
||||
- __call__
|
||||
|
||||
## StableDiffusionXLImg2ImgPipeline
|
||||
|
||||
[[autodoc]] StableDiffusionXLImg2ImgPipeline
|
||||
- all
|
||||
- __call__
|
||||
|
||||
## StableDiffusionXLInpaintPipeline
|
||||
|
||||
[[autodoc]] StableDiffusionXLInpaintPipeline
|
||||
- all
|
||||
- __call__
|
||||
@@ -40,7 +40,7 @@ Available Checkpoints are:
|
||||
- enable_vae_tiling
|
||||
- disable_vae_tiling
|
||||
- load_textual_inversion
|
||||
- from_single_file
|
||||
- from_ckpt
|
||||
- load_lora_weights
|
||||
- save_lora_weights
|
||||
|
||||
|
||||
-58
@@ -71,64 +71,6 @@ image = pipe(prompt, guidance_scale=9, num_inference_steps=25).images[0]
|
||||
image.save("astronaut.png")
|
||||
```
|
||||
|
||||
#### Experimental: "Common Diffusion Noise Schedules and Sample Steps are Flawed":
|
||||
|
||||
The paper **[Common Diffusion Noise Schedules and Sample Steps are Flawed](https://arxiv.org/abs/2305.08891)**
|
||||
claims that a mismatch between the training and inference settings leads to suboptimal inference generation results for Stable Diffusion.
|
||||
|
||||
The abstract reads as follows:
|
||||
|
||||
*We discover that common diffusion noise schedules do not enforce the last timestep to have zero signal-to-noise ratio (SNR),
|
||||
and some implementations of diffusion samplers do not start from the last timestep.
|
||||
Such designs are flawed and do not reflect the fact that the model is given pure Gaussian noise at inference, creating a discrepancy between training and inference.
|
||||
We show that the flawed design causes real problems in existing implementations.
|
||||
In Stable Diffusion, it severely limits the model to only generate images with medium brightness and
|
||||
prevents it from generating very bright and dark samples. We propose a few simple fixes:
|
||||
- (1) rescale the noise schedule to enforce zero terminal SNR;
|
||||
- (2) train the model with v prediction;
|
||||
- (3) change the sampler to always start from the last timestep;
|
||||
- (4) rescale classifier-free guidance to prevent over-exposure.
|
||||
These simple changes ensure the diffusion process is congruent between training and inference and
|
||||
allow the model to generate samples more faithful to the original data distribution.*
|
||||
|
||||
You can apply all of these changes in `diffusers` when using [`DDIMScheduler`]:
|
||||
- (1) rescale the noise schedule to enforce zero terminal SNR;
|
||||
```py
|
||||
pipe.scheduler = DDIMScheduler.from_config(pipe.scheduler.config, rescale_betas_zero_snr=True)
|
||||
```
|
||||
- (2) train the model with v prediction;
|
||||
Continue fine-tuning a checkpoint with [`train_text_to_image.py`](https://github.com/huggingface/diffusers/blob/main/examples/text_to_image/train_text_to_image.py) or [`train_text_to_image_lora.py`](https://github.com/huggingface/diffusers/blob/main/examples/text_to_image/train_text_to_image_lora.py)
|
||||
and `--prediction_type="v_prediction"`.
|
||||
- (3) change the sampler to always start from the last timestep;
|
||||
```py
|
||||
pipe.scheduler = DDIMScheduler.from_config(pipe.scheduler.config, timestep_spacing="trailing")
|
||||
```
|
||||
- (4) rescale classifier-free guidance to prevent over-exposure.
|
||||
```py
|
||||
pipe(..., guidance_rescale=0.7)
|
||||
```
|
||||
|
||||
An example is to use [this checkpoint](https://huggingface.co/ptx0/pseudo-journey-v2)
|
||||
which has been fine-tuned using the `"v_prediction"`.
|
||||
|
||||
The checkpoint can then be run in inference as follows:
|
||||
|
||||
```py
|
||||
from diffusers import DiffusionPipeline, DDIMScheduler
|
||||
|
||||
pipe = DiffusionPipeline.from_pretrained("ptx0/pseudo-journey-v2", torch_dtype=torch.float16)
|
||||
pipe.scheduler = DDIMScheduler.from_config(
|
||||
pipe.scheduler.config, rescale_betas_zero_snr=True, timestep_spacing="trailing"
|
||||
)
|
||||
pipe.to("cuda")
|
||||
|
||||
prompt = "A lion in galaxies, spirals, nebulae, stars, smoke, iridescent, intricate detail, octane render, 8k"
|
||||
image = pipeline(prompt, guidance_rescale=0.7).images[0]
|
||||
```
|
||||
|
||||
## DDIMScheduler
|
||||
[[autodoc]] DDIMScheduler
|
||||
|
||||
### Image Inpainting
|
||||
|
||||
- *Image Inpainting (512x512 resolution)*: [stabilityai/stable-diffusion-2-inpainting](https://huggingface.co/stabilityai/stable-diffusion-2-inpainting) with [`StableDiffusionInpaintPipeline`]
|
||||
@@ -37,12 +37,9 @@ Resources:
|
||||
| Pipeline | Tasks | Demo
|
||||
|---|---|:---:|
|
||||
| [TextToVideoSDPipeline](https://github.com/huggingface/diffusers/blob/main/src/diffusers/pipelines/text_to_video_synthesis/pipeline_text_to_video_synth.py) | *Text-to-Video Generation* | [🤗 Spaces](https://huggingface.co/spaces/damo-vilab/modelscope-text-to-video-synthesis)
|
||||
| [VideoToVideoSDPipeline](https://github.com/huggingface/diffusers/blob/main/src/diffusers/pipelines/text_to_video_synthesis/pipeline_text_to_video_synth_img2img.py) | *Text-Guided Video-to-Video Generation* | [(TODO)🤗 Spaces]()
|
||||
|
||||
## Usage example
|
||||
|
||||
### `text-to-video-ms-1.7b`
|
||||
|
||||
Let's start by generating a short video with the default length of 16 frames (2s at 8 fps):
|
||||
|
||||
```python
|
||||
@@ -122,98 +119,12 @@ Here are some sample outputs:
|
||||
</tr>
|
||||
</table>
|
||||
|
||||
### `cerspense/zeroscope_v2_576w` & `cerspense/zeroscope_v2_XL`
|
||||
|
||||
Zeroscope are watermark-free model and have been trained on specific sizes such as `576x320` and `1024x576`.
|
||||
One should first generate a video using the lower resolution checkpoint [`cerspense/zeroscope_v2_576w`](https://huggingface.co/cerspense/zeroscope_v2_576w) with [`TextToVideoSDPipeline`],
|
||||
which can then be upscaled using [`VideoToVideoSDPipeline`] and [`cerspense/zeroscope_v2_XL`](https://huggingface.co/cerspense/zeroscope_v2_XL).
|
||||
|
||||
|
||||
```py
|
||||
import torch
|
||||
from diffusers import DiffusionPipeline
|
||||
from diffusers.utils import export_to_video
|
||||
|
||||
pipe = DiffusionPipeline.from_pretrained("cerspense/zeroscope_v2_576w", torch_dtype=torch.float16)
|
||||
pipe.enable_model_cpu_offload()
|
||||
|
||||
# memory optimization
|
||||
pipe.unet.enable_forward_chunking(chunk_size=1, dim=1)
|
||||
pipe.enable_vae_slicing()
|
||||
|
||||
prompt = "Darth Vader surfing a wave"
|
||||
video_frames = pipe(prompt, num_frames=24).frames
|
||||
video_path = export_to_video(video_frames)
|
||||
video_path
|
||||
```
|
||||
|
||||
Now the video can be upscaled:
|
||||
|
||||
```py
|
||||
pipe = DiffusionPipeline.from_pretrained("cerspense/zeroscope_v2_XL", torch_dtype=torch.float16)
|
||||
pipe.scheduler = DPMSolverMultistepScheduler.from_config(pipe.scheduler.config)
|
||||
pipe.enable_model_cpu_offload()
|
||||
|
||||
# memory optimization
|
||||
pipe.unet.enable_forward_chunking(chunk_size=1, dim=1)
|
||||
pipe.enable_vae_slicing()
|
||||
|
||||
video = [Image.fromarray(frame).resize((1024, 576)) for frame in video_frames]
|
||||
|
||||
video_frames = pipe(prompt, video=video, strength=0.6).frames
|
||||
video_path = export_to_video(video_frames)
|
||||
video_path
|
||||
```
|
||||
|
||||
Here are some sample outputs:
|
||||
|
||||
<table>
|
||||
<tr>
|
||||
<td ><center>
|
||||
Darth vader surfing in waves.
|
||||
<br>
|
||||
<img src="https://huggingface.co/datasets/huggingface/documentation-images/resolve/main/diffusers/darthvader_cerpense.gif"
|
||||
alt="Darth vader surfing in waves."
|
||||
style="width: 576px;" />
|
||||
</center></td>
|
||||
</tr>
|
||||
</table>
|
||||
|
||||
### Memory optimizations
|
||||
|
||||
Text-guided video generation with [`~TextToVideoSDPipeline`] and [`~VideoToVideoSDPipeline`] is very memory intensive both
|
||||
when denoising with [`~UNet3DConditionModel`] and when decoding with [`~AutoencoderKL`]. It is possible though to reduce
|
||||
memory usage at the cost of increased runtime to achieve the exact same result. To do so, it is recommended to enable
|
||||
**forward chunking** and **vae slicing**:
|
||||
|
||||
Forward chunking via [`~UNet3DConditionModel.enable_forward_chunking`]is explained in [this blog post](https://huggingface.co/blog/reformer#2-chunked-feed-forward-layers) and
|
||||
allows to significantly reduce the required memory for the unet. You can chunk the feed forward layer over the `num_frames`
|
||||
dimension by doing:
|
||||
|
||||
```py
|
||||
pipe.unet.enable_forward_chunking(chunk_size=1, dim=1)
|
||||
```
|
||||
|
||||
Vae slicing via [`~TextToVideoSDPipeline.enable_vae_slicing`] and [`~VideoToVideoSDPipeline.enable_vae_slicing`] also
|
||||
gives significant memory savings since the two pipelines decode all image frames at once.
|
||||
|
||||
```py
|
||||
pipe.enable_vae_slicing()
|
||||
```
|
||||
|
||||
## Available checkpoints
|
||||
|
||||
* [damo-vilab/text-to-video-ms-1.7b](https://huggingface.co/damo-vilab/text-to-video-ms-1.7b/)
|
||||
* [damo-vilab/text-to-video-ms-1.7b-legacy](https://huggingface.co/damo-vilab/text-to-video-ms-1.7b-legacy)
|
||||
* [cerspense/zeroscope_v2_576w](https://huggingface.co/cerspense/zeroscope_v2_576w)
|
||||
* [cerspense/zeroscope_v2_XL](https://huggingface.co/cerspense/zeroscope_v2_XL)
|
||||
|
||||
## TextToVideoSDPipeline
|
||||
[[autodoc]] TextToVideoSDPipeline
|
||||
- all
|
||||
- __call__
|
||||
|
||||
## VideoToVideoSDPipeline
|
||||
[[autodoc]] VideoToVideoSDPipeline
|
||||
- all
|
||||
- __call__
|
||||
|
||||
@@ -80,41 +80,6 @@ You can change these parameters in the pipeline call:
|
||||
* Video length:
|
||||
* `video_length`, the number of frames video_length to be generated. Default: `video_length=8`
|
||||
|
||||
We an also generate longer videos by doing the processing in a chunk-by-chunk manner:
|
||||
```python
|
||||
import torch
|
||||
import imageio
|
||||
from diffusers import TextToVideoZeroPipeline
|
||||
import numpy as np
|
||||
|
||||
model_id = "runwayml/stable-diffusion-v1-5"
|
||||
pipe = TextToVideoZeroPipeline.from_pretrained(model_id, torch_dtype=torch.float16).to("cuda")
|
||||
seed = 0
|
||||
video_length = 8
|
||||
chunk_size = 4
|
||||
prompt = "A panda is playing guitar on times square"
|
||||
|
||||
# Generate the video chunk-by-chunk
|
||||
result = []
|
||||
chunk_ids = np.arange(0, video_length, chunk_size - 1)
|
||||
generator = torch.Generator(device="cuda")
|
||||
for i in range(len(chunk_ids)):
|
||||
print(f"Processing chunk {i + 1} / {len(chunk_ids)}")
|
||||
ch_start = chunk_ids[i]
|
||||
ch_end = video_length if i == len(chunk_ids) - 1 else chunk_ids[i + 1]
|
||||
# Attach the first frame for Cross Frame Attention
|
||||
frame_ids = [0] + list(range(ch_start, ch_end))
|
||||
# Fix the seed for the temporal consistency
|
||||
generator.manual_seed(seed)
|
||||
output = pipe(prompt=prompt, video_length=len(frame_ids), generator=generator, frame_ids=frame_ids)
|
||||
result.append(output.images[1:])
|
||||
|
||||
# Concatenate chunks and save
|
||||
result = np.concatenate(result)
|
||||
result = [(r * 255).astype("uint8") for r in result]
|
||||
imageio.mimsave("video.mp4", result, fps=4)
|
||||
```
|
||||
|
||||
|
||||
### Text-To-Video with Pose Control
|
||||
To generate a video from prompt with additional pose control
|
||||
@@ -237,7 +202,7 @@ can run with custom [DreamBooth](../training/dreambooth) models, as shown below
|
||||
|
||||
reader = imageio.get_reader(video_path, "ffmpeg")
|
||||
frame_count = 8
|
||||
canny_edges = [Image.fromarray(reader.get_data(i)) for i in range(frame_count)]
|
||||
video = [Image.fromarray(reader.get_data(i)) for i in range(frame_count)]
|
||||
```
|
||||
|
||||
3. Run `StableDiffusionControlNetPipeline` with custom trained DreamBooth model
|
||||
@@ -258,10 +223,10 @@ can run with custom [DreamBooth](../training/dreambooth) models, as shown below
|
||||
pipe.controlnet.set_attn_processor(CrossFrameAttnProcessor(batch_size=2))
|
||||
|
||||
# fix latents for all frames
|
||||
latents = torch.randn((1, 4, 64, 64), device="cuda", dtype=torch.float16).repeat(len(canny_edges), 1, 1, 1)
|
||||
latents = torch.randn((1, 4, 64, 64), device="cuda", dtype=torch.float16).repeat(len(pose_images), 1, 1, 1)
|
||||
|
||||
prompt = "oil painting of a beautiful girl avatar style"
|
||||
result = pipe(prompt=[prompt] * len(canny_edges), image=canny_edges, latents=latents).images
|
||||
result = pipe(prompt=[prompt] * len(pose_images), image=pose_images, latents=latents).images
|
||||
imageio.mimsave("video.mp4", result, fps=4)
|
||||
```
|
||||
|
||||
|
||||
@@ -1,11 +0,0 @@
|
||||
# Consistency Model Multistep Scheduler
|
||||
|
||||
## Overview
|
||||
|
||||
Multistep and onestep scheduler (Algorithm 1) introduced alongside consistency models in the paper [Consistency Models](https://arxiv.org/abs/2303.01469) by Yang Song, Prafulla Dhariwal, Mark Chen, and Ilya Sutskever.
|
||||
Based on the [original consistency models implementation](https://github.com/openai/consistency_models).
|
||||
Should generate good samples from [`ConsistencyModelPipeline`] in one or a small number of steps.
|
||||
|
||||
## CMStochasticIterativeScheduler
|
||||
[[autodoc]] CMStochasticIterativeScheduler
|
||||
|
||||
@@ -18,71 +18,10 @@ specific language governing permissions and limitations under the License.
|
||||
|
||||
The abstract of the paper is the following:
|
||||
|
||||
*Denoising diffusion probabilistic models (DDPMs) have achieved high quality image generation without adversarial training,
|
||||
yet they require simulating a Markov chain for many steps to produce a sample.
|
||||
To accelerate sampling, we present denoising diffusion implicit models (DDIMs), a more efficient class of iterative implicit probabilistic models
|
||||
with the same training procedure as DDPMs. In DDPMs, the generative process is defined as the reverse of a Markovian diffusion process.
|
||||
We construct a class of non-Markovian diffusion processes that lead to the same training objective, but whose reverse process can be much faster to sample from.
|
||||
We empirically demonstrate that DDIMs can produce high quality samples 10× to 50× faster in terms of wall-clock time compared to DDPMs, allow us to trade off
|
||||
computation for sample quality, and can perform semantically meaningful image interpolation directly in the latent space.*
|
||||
Denoising diffusion probabilistic models (DDPMs) have achieved high quality image generation without adversarial training, yet they require simulating a Markov chain for many steps to produce a sample. To accelerate sampling, we present denoising diffusion implicit models (DDIMs), a more efficient class of iterative implicit probabilistic models with the same training procedure as DDPMs. In DDPMs, the generative process is defined as the reverse of a Markovian diffusion process. We construct a class of non-Markovian diffusion processes that lead to the same training objective, but whose reverse process can be much faster to sample from. We empirically demonstrate that DDIMs can produce high quality samples 10× to 50× faster in terms of wall-clock time compared to DDPMs, allow us to trade off computation for sample quality, and can perform semantically meaningful image interpolation directly in the latent space.
|
||||
|
||||
The original codebase of this paper can be found here: [ermongroup/ddim](https://github.com/ermongroup/ddim).
|
||||
For questions, feel free to contact the author on [tsong.me](https://tsong.me/).
|
||||
|
||||
### Experimental: "Common Diffusion Noise Schedules and Sample Steps are Flawed":
|
||||
|
||||
The paper **[Common Diffusion Noise Schedules and Sample Steps are Flawed](https://arxiv.org/abs/2305.08891)**
|
||||
claims that a mismatch between the training and inference settings leads to suboptimal inference generation results for Stable Diffusion.
|
||||
|
||||
The abstract reads as follows:
|
||||
|
||||
*We discover that common diffusion noise schedules do not enforce the last timestep to have zero signal-to-noise ratio (SNR),
|
||||
and some implementations of diffusion samplers do not start from the last timestep.
|
||||
Such designs are flawed and do not reflect the fact that the model is given pure Gaussian noise at inference, creating a discrepancy between training and inference.
|
||||
We show that the flawed design causes real problems in existing implementations.
|
||||
In Stable Diffusion, it severely limits the model to only generate images with medium brightness and
|
||||
prevents it from generating very bright and dark samples. We propose a few simple fixes:
|
||||
- (1) rescale the noise schedule to enforce zero terminal SNR;
|
||||
- (2) train the model with v prediction;
|
||||
- (3) change the sampler to always start from the last timestep;
|
||||
- (4) rescale classifier-free guidance to prevent over-exposure.
|
||||
These simple changes ensure the diffusion process is congruent between training and inference and
|
||||
allow the model to generate samples more faithful to the original data distribution.*
|
||||
|
||||
You can apply all of these changes in `diffusers` when using [`DDIMScheduler`]:
|
||||
- (1) rescale the noise schedule to enforce zero terminal SNR;
|
||||
```py
|
||||
pipe.scheduler = DDIMScheduler.from_config(pipe.scheduler.config, rescale_betas_zero_snr=True)
|
||||
```
|
||||
- (2) train the model with v prediction;
|
||||
Continue fine-tuning a checkpoint with [`train_text_to_image.py`](https://github.com/huggingface/diffusers/blob/main/examples/text_to_image/train_text_to_image.py) or [`train_text_to_image_lora.py`](https://github.com/huggingface/diffusers/blob/main/examples/text_to_image/train_text_to_image_lora.py)
|
||||
and `--prediction_type="v_prediction"`.
|
||||
- (3) change the sampler to always start from the last timestep;
|
||||
```py
|
||||
pipe.scheduler = DDIMScheduler.from_config(pipe.scheduler.config, timestep_spacing="trailing")
|
||||
```
|
||||
- (4) rescale classifier-free guidance to prevent over-exposure.
|
||||
```py
|
||||
pipe(..., guidance_rescale=0.7)
|
||||
```
|
||||
|
||||
An example is to use [this checkpoint](https://huggingface.co/ptx0/pseudo-journey-v2)
|
||||
which has been fine-tuned using the `"v_prediction"`.
|
||||
|
||||
The checkpoint can then be run in inference as follows:
|
||||
|
||||
```py
|
||||
from diffusers import DiffusionPipeline, DDIMScheduler
|
||||
|
||||
pipe = DiffusionPipeline.from_pretrained("ptx0/pseudo-journey-v2", torch_dtype=torch.float16)
|
||||
pipe.scheduler = DDIMScheduler.from_config(
|
||||
pipe.scheduler.config, rescale_betas_zero_snr=True, timestep_spacing="trailing"
|
||||
)
|
||||
pipe.to("cuda")
|
||||
|
||||
prompt = "A lion in galaxies, spirals, nebulae, stars, smoke, iridescent, intricate detail, octane render, 8k"
|
||||
image = pipeline(prompt, guidance_rescale=0.7).images[0]
|
||||
```
|
||||
|
||||
## DDIMScheduler
|
||||
[[autodoc]] DDIMScheduler
|
||||
|
||||
@@ -1,23 +0,0 @@
|
||||
# Utilities
|
||||
|
||||
Utility and helper functions for working with 🤗 Diffusers.
|
||||
|
||||
## randn_tensor
|
||||
|
||||
[[autodoc]] diffusers.utils.randn_tensor
|
||||
|
||||
## numpy_to_pil
|
||||
|
||||
[[autodoc]] utils.pil_utils.numpy_to_pil
|
||||
|
||||
## pt_to_pil
|
||||
|
||||
[[autodoc]] utils.pil_utils.pt_to_pil
|
||||
|
||||
## load_image
|
||||
|
||||
[[autodoc]] utils.testing_utils.load_image
|
||||
|
||||
## export_to_video
|
||||
|
||||
[[autodoc]] utils.testing_utils.export_to_video
|
||||
@@ -40,7 +40,7 @@ The library has three main components:
|
||||
><div class="w-full text-center bg-gradient-to-br from-pink-400 to-pink-500 rounded-lg py-1.5 font-semibold mb-5 text-white text-lg leading-relaxed">Conceptual guides</div>
|
||||
<p class="text-gray-700">Understand why the library was designed the way it was, and learn more about the ethical guidelines and safety implementations for using the library.</p>
|
||||
</a>
|
||||
<a class="!no-underline border dark:border-gray-700 p-5 rounded-lg shadow hover:shadow-lg" href="./api/models/overview"
|
||||
<a class="!no-underline border dark:border-gray-700 p-5 rounded-lg shadow hover:shadow-lg" href="./api/models"
|
||||
><div class="w-full text-center bg-gradient-to-br from-purple-400 to-purple-500 rounded-lg py-1.5 font-semibold mb-5 text-white text-lg leading-relaxed">Reference</div>
|
||||
<p class="text-gray-700">Technical descriptions of how 🤗 Diffusers classes and methods work.</p>
|
||||
</a>
|
||||
@@ -69,7 +69,6 @@ The library has three main components:
|
||||
| [score_sde_ve](./api/pipelines/score_sde_ve) | [Score-Based Generative Modeling through Stochastic Differential Equations](https://openreview.net/forum?id=PxTIG12RRHS) | Unconditional Image Generation |
|
||||
| [score_sde_vp](./api/pipelines/score_sde_vp) | [Score-Based Generative Modeling through Stochastic Differential Equations](https://openreview.net/forum?id=PxTIG12RRHS) | Unconditional Image Generation |
|
||||
| [semantic_stable_diffusion](./api/pipelines/semantic_stable_diffusion) | [Semantic Guidance](https://arxiv.org/abs/2301.12247) | Text-Guided Generation |
|
||||
| [stable_diffusion_adapter](./api/pipelines/stable_diffusion/adapter) | [**T2I-Adapter**](https://arxiv.org/abs/2302.08453) | Image-to-Image Text-Guided Generation | -
|
||||
| [stable_diffusion_text2img](./api/pipelines/stable_diffusion/text2img) | [Stable Diffusion](https://stability.ai/blog/stable-diffusion-public-release) | Text-to-Image Generation |
|
||||
| [stable_diffusion_img2img](./api/pipelines/stable_diffusion/img2img) | [Stable Diffusion](https://stability.ai/blog/stable-diffusion-public-release) | Image-to-Image Text-Guided Generation |
|
||||
| [stable_diffusion_inpaint](./api/pipelines/stable_diffusion/inpaint) | [Stable Diffusion](https://stability.ai/blog/stable-diffusion-public-release) | Text-Guided Image Inpainting |
|
||||
@@ -95,4 +94,3 @@ The library has three main components:
|
||||
| [versatile_diffusion](./api/pipelines/versatile_diffusion) | [Versatile Diffusion: Text, Images and Variations All in One Diffusion Model](https://arxiv.org/abs/2211.08332) | Image Variations Generation |
|
||||
| [versatile_diffusion](./api/pipelines/versatile_diffusion) | [Versatile Diffusion: Text, Images and Variations All in One Diffusion Model](https://arxiv.org/abs/2211.08332) | Dual Image and Text Guided Generation |
|
||||
| [vq_diffusion](./api/pipelines/vq_diffusion) | [Vector Quantized Diffusion Model for Text-to-Image Synthesis](https://arxiv.org/abs/2111.14822) | Text-to-Image Generation |
|
||||
| [stable_diffusion_ldm3d](./api/pipelines/stable_diffusion/ldm3d_diffusion) | [LDM3D: Latent Diffusion Model for 3D](https://arxiv.org/abs/2305.10853) | Text to Image and Depth Generation |
|
||||
|
||||
@@ -23,7 +23,7 @@ Install 🤗 Diffusers for whichever deep learning library you're working with.
|
||||
|
||||
You should install 🤗 Diffusers in a [virtual environment](https://docs.python.org/3/library/venv.html).
|
||||
If you're unfamiliar with Python virtual environments, take a look at this [guide](https://packaging.python.org/guides/installing-using-pip-and-virtual-environments/).
|
||||
A virtual environment makes it easier to manage different projects and avoid compatibility issues between dependencies.
|
||||
A virtual environment makes it easier to manage different projects, and avoid compatibility issues between dependencies.
|
||||
|
||||
Start by creating a virtual environment in your project directory:
|
||||
|
||||
@@ -127,7 +127,7 @@ Your Python environment will find the `main` version of 🤗 Diffusers on the ne
|
||||
|
||||
Our library gathers telemetry information during `from_pretrained()` requests.
|
||||
This data includes the version of Diffusers and PyTorch/Flax, the requested model or pipeline class,
|
||||
and the path to a pre-trained checkpoint if it is hosted on the Hub.
|
||||
and the path to a pretrained checkpoint if it is hosted on the Hub.
|
||||
This usage data helps us debug issues and prioritize new features.
|
||||
Telemetry is only sent when loading models and pipelines from the HuggingFace Hub,
|
||||
and is not collected during local usage.
|
||||
@@ -143,4 +143,4 @@ export DISABLE_TELEMETRY=YES
|
||||
On Windows:
|
||||
```bash
|
||||
set DISABLE_TELEMETRY=YES
|
||||
```
|
||||
```
|
||||
@@ -1,200 +0,0 @@
|
||||
<!--Copyright 2023 The HuggingFace Team. All rights reserved.
|
||||
|
||||
Licensed under the Apache License, Version 2.0 (the "License"); you may not use this file except in compliance with
|
||||
the License. You may obtain a copy of the License at
|
||||
|
||||
http://www.apache.org/licenses/LICENSE-2.0
|
||||
|
||||
Unless required by applicable law or agreed to in writing, software distributed under the License is distributed on
|
||||
an "AS IS" BASIS, WITHOUT WARRANTIES OR CONDITIONS OF ANY KIND, either express or implied. See the License for the
|
||||
specific language governing permissions and limitations under the License.
|
||||
-->
|
||||
|
||||
# BentoML Integration Guide
|
||||
|
||||
[[open-in-colab]]
|
||||
|
||||
[BentoML](https://github.com/bentoml/BentoML/) is an open-source framework designed for building,
|
||||
shipping, and scaling AI applications. It allows users to easily package and serve diffusion models
|
||||
for production, ensuring reliable and efficient deployments. It features out-of-the-box operational
|
||||
management tools like monitoring and tracing, and facilitates the deployment to various cloud platforms
|
||||
with ease. BentoML's distributed architecture and the separation of API server logic from
|
||||
model inference logic enable efficient scaling of deployments, even with budget constraints.
|
||||
As a result, integrating it with Diffusers provides a valuable tool for real-world deployments.
|
||||
|
||||
This tutorial demonstrates how to integrate BentoML with Diffusers.
|
||||
|
||||
## Prerequisites
|
||||
|
||||
- Install [Diffusers](https://huggingface.co/docs/diffusers/installation).
|
||||
- Install BentoML by running `pip install bentoml`. For more information, see the [BentoML documentation](https://docs.bentoml.com).
|
||||
|
||||
## Import a diffusion model
|
||||
|
||||
First, you need to prepare the model. BentoML has its own [Model Store](https://docs.bentoml.com/en/latest/concepts/model.html)
|
||||
for model management. Create a `download_model.py` file as below to import a diffusion model into BentoML's Model
|
||||
Store:
|
||||
|
||||
```py
|
||||
import bentoml
|
||||
|
||||
bentoml.diffusers.import_model(
|
||||
"sd2.1", # Model tag in the BentoML Model Store
|
||||
"stabilityai/stable-diffusion-2-1", # Hugging Face model identifier
|
||||
)
|
||||
```
|
||||
|
||||
This code snippet downloads the Stable Diffusion 2.1 model (using it's repo id
|
||||
`stabilityai/stable-diffusion-2-1`) from the Hugging Face Hub (or use the cached download
|
||||
files if the model is already downloaded) and imports it into the BentoML Model
|
||||
Store with the name `sd2.1`.
|
||||
|
||||
For models already fine-tuned and stored on disk, you can provide the path instead of
|
||||
the repo id.
|
||||
|
||||
```py
|
||||
import bentoml
|
||||
|
||||
bentoml.diffusers.import_model(
|
||||
"sd2.1-local",
|
||||
"./local_stable_diffusion_2.1/",
|
||||
)
|
||||
```
|
||||
|
||||
You can view the model in the Model Store:
|
||||
|
||||
```
|
||||
bentoml models list
|
||||
|
||||
Tag Module Size Creation Time
|
||||
sd2.1:ysrlmubascajwnry bentoml.diffusers 33.85 GiB 2023-07-12 16:47:44
|
||||
```
|
||||
|
||||
## Turn a diffusion model into a RESTful service with BentoML
|
||||
|
||||
Once the diffusion model is in BentoML's Model Store, you can implement a text-to-image
|
||||
service with it. The Stable Diffusion model accepts various arguments
|
||||
in addition to the required prompt to guide the image generation process.
|
||||
To validate these input arguments, use BentoML's [pydantic](https://github.com/pydantic/pydantic) integration.
|
||||
Create a `sdargs.py` file with an example pydantic model:
|
||||
|
||||
```py
|
||||
import typing as t
|
||||
|
||||
from pydantic import BaseModel
|
||||
|
||||
|
||||
class SDArgs(BaseModel):
|
||||
prompt: str
|
||||
negative_prompt: t.Optional[str] = None
|
||||
height: t.Optional[int] = 512
|
||||
width: t.Optional[int] = 512
|
||||
|
||||
class Config:
|
||||
extra = "allow"
|
||||
```
|
||||
|
||||
This pydantic model requires a string field `prompt` and three optional fields: `height`, `width`, and `negative_prompt`,
|
||||
each with corresponding types. The `extra = "allow"` line supports adding additional fields not defined in the `SDArgs` class.
|
||||
In a real-world scenario, you may define all the desired fields and not allow extra ones.
|
||||
|
||||
Next, create a BentoML Service file that defines a Stable Diffusion service:
|
||||
|
||||
```py
|
||||
import bentoml
|
||||
from bentoml.io import Image, JSON
|
||||
|
||||
from sdargs import SDArgs
|
||||
|
||||
bento_model = bentoml.diffusers.get("sd2.1:latest")
|
||||
sd21_runner = bento_model.to_runner(name="sd21-runner")
|
||||
|
||||
svc = bentoml.Service("stable-diffusion-21", runners=[sd21_runner])
|
||||
|
||||
|
||||
@svc.api(input=JSON(pydantic_model=SDArgs), output=Image())
|
||||
async def txt2img(input_data):
|
||||
kwargs = input_data.dict()
|
||||
res = await sd21_runner.async_run(**kwargs)
|
||||
images = res[0]
|
||||
return images[0]
|
||||
```
|
||||
|
||||
Save the file as `service.py`, and spin up a BentoML Service endpoint using:
|
||||
|
||||
```
|
||||
bentoml serve service:svc
|
||||
```
|
||||
|
||||
An HTTP server with `/txt2img` endpoint that accepts a JSON dictionary should be up at
|
||||
port 3000. Go to <http://127.0.0.1:3000> in your web browser to access the Swagger UI.
|
||||
|
||||
You can also test the text-to-image generation using `curl` and write the returned image to
|
||||
`output.jpg`.
|
||||
|
||||
```
|
||||
curl -X POST http://127.0.0.1:3000/txt2img \
|
||||
-H 'Content-Type: application/json' \
|
||||
-d "{\"prompt\":\"a black cat\", \"height\":768, \"width\":768}" \
|
||||
--output output.jpg
|
||||
```
|
||||
|
||||
## Package a BentoML Service for cloud deployment
|
||||
|
||||
To deploy a BentoML Service, you need to pack it into a BentoML
|
||||
[Bento](https://docs.bentoml.com/en/latest/concepts/bento.html), a file archive with all the source code,
|
||||
models, data files, and dependencies. This can be done by providing a `bentofile.yaml` file as follows:
|
||||
|
||||
```yaml
|
||||
service: "service.py:svc"
|
||||
include:
|
||||
- "service.py"
|
||||
python:
|
||||
packages:
|
||||
- torch
|
||||
- transformers
|
||||
- accelerate
|
||||
- diffusers
|
||||
- triton
|
||||
- xformers
|
||||
- pydantic
|
||||
docker:
|
||||
distro: debian
|
||||
cuda_version: "11.6"
|
||||
```
|
||||
|
||||
The `bentofile.yaml` file contains [Bento build
|
||||
options](https://docs.bentoml.com/en/latest/concepts/bento.html#bento-build-options),
|
||||
such as package dependencies and Docker options.
|
||||
|
||||
Then you build a Bento using:
|
||||
|
||||
```
|
||||
bentoml build
|
||||
```
|
||||
|
||||
The output looks like:
|
||||
|
||||
```
|
||||
Successfully built Bento(tag="stable-diffusion-21:crkuh7a7rw5bcasc").
|
||||
|
||||
Possible next steps:
|
||||
|
||||
* Containerize your Bento with `bentoml containerize`:
|
||||
$ bentoml containerize stable-diffusion-21:crkuh7a7rw5bcasc
|
||||
|
||||
* Push to BentoCloud with `bentoml push`:
|
||||
$ bentoml push stable-diffusion-21:crkuh7a7rw5bcasc
|
||||
```
|
||||
|
||||
You can create a Docker image based on the Bento by running the following command and deploy it to a cloud provider.
|
||||
|
||||
```
|
||||
bentoml containerize stable-diffusion-21:crkuh7a7rw5bcasc
|
||||
```
|
||||
|
||||
If you want an end-to-end solution for deploying and managing models, you can push the Bento to [Yatai](https://github.com/bentoml/Yatai) or
|
||||
[BentoCloud](https://bentoml.com/cloud) for a distributed deployment.
|
||||
|
||||
For more information about BentoML's integration with Diffusers, see the [BentoML Diffusers
|
||||
Guide](https://docs.bentoml.com/en/latest/frameworks/diffusers.html).
|
||||
@@ -16,8 +16,8 @@ specific language governing permissions and limitations under the License.
|
||||
|
||||
## Requirements
|
||||
|
||||
- Optimum Habana 1.6 or later, [here](https://huggingface.co/docs/optimum/habana/installation) is how to install it.
|
||||
- SynapseAI 1.10.
|
||||
- Optimum Habana 1.5 or later, [here](https://huggingface.co/docs/optimum/habana/installation) is how to install it.
|
||||
- SynapseAI 1.9.
|
||||
|
||||
|
||||
## Inference Pipeline
|
||||
@@ -41,7 +41,7 @@ pipeline = GaudiStableDiffusionPipeline.from_pretrained(
|
||||
scheduler=scheduler,
|
||||
use_habana=True,
|
||||
use_hpu_graphs=True,
|
||||
gaudi_config="Habana/stable-diffusion-2",
|
||||
gaudi_config="Habana/stable-diffusion",
|
||||
)
|
||||
```
|
||||
|
||||
@@ -62,18 +62,18 @@ For more information, check out Optimum Habana's [documentation](https://hugging
|
||||
|
||||
## Benchmark
|
||||
|
||||
Here are the latencies for Habana first-generation Gaudi and Gaudi2 with the [Habana/stable-diffusion](https://huggingface.co/Habana/stable-diffusion) and [Habana/stable-diffusion-2](https://huggingface.co/Habana/stable-diffusion-2) Gaudi configurations (mixed precision bf16/fp32):
|
||||
Here are the latencies for Habana first-generation Gaudi and Gaudi2 with the [Habana/stable-diffusion](https://huggingface.co/Habana/stable-diffusion) Gaudi configuration (mixed precision bf16/fp32):
|
||||
|
||||
- [Stable Diffusion v1.5](https://huggingface.co/runwayml/stable-diffusion-v1-5) (512x512 resolution):
|
||||
|
||||
| | Latency (batch size = 1) | Throughput (batch size = 8) |
|
||||
| ---------------------- |:------------------------:|:---------------------------:|
|
||||
| first-generation Gaudi | 3.80s | 0.308 images/s |
|
||||
| Gaudi2 | 1.33s | 1.081 images/s |
|
||||
| first-generation Gaudi | 4.22s | 0.29 images/s |
|
||||
| Gaudi2 | 1.70s | 0.925 images/s |
|
||||
|
||||
- [Stable Diffusion v2.1](https://huggingface.co/stabilityai/stable-diffusion-2-1) (768x768 resolution):
|
||||
|
||||
| | Latency (batch size = 1) | Throughput |
|
||||
| ---------------------- |:------------------------:|:-------------------------------:|
|
||||
| first-generation Gaudi | 10.2s | 0.108 images/s (batch size = 4) |
|
||||
| Gaudi2 | 3.17s | 0.379 images/s (batch size = 8) |
|
||||
| first-generation Gaudi | 23.3s | 0.045 images/s (batch size = 2) |
|
||||
| Gaudi2 | 7.75s | 0.14 images/s (batch size = 5) |
|
||||
|
||||
@@ -32,9 +32,8 @@ The quicktour is a simplified version of the introductory 🧨 Diffusers [notebo
|
||||
|
||||
Before you begin, make sure you have all the necessary libraries installed:
|
||||
|
||||
```py
|
||||
# uncomment to install the necessary libraries in Colab
|
||||
#!pip install --upgrade diffusers accelerate transformers
|
||||
```bash
|
||||
!pip install --upgrade diffusers accelerate transformers
|
||||
```
|
||||
|
||||
- [🤗 Accelerate](https://huggingface.co/docs/accelerate/index) speeds up model loading for inference and training.
|
||||
|
||||
@@ -52,8 +52,6 @@ pipeline = pipeline.to("cuda")
|
||||
To make sure you can use the same image and improve on it, use a [`Generator`](https://pytorch.org/docs/stable/generated/torch.Generator.html) and set a seed for [reproducibility](./using-diffusers/reproducibility):
|
||||
|
||||
```python
|
||||
import torch
|
||||
|
||||
generator = torch.Generator("cuda").manual_seed(0)
|
||||
```
|
||||
|
||||
|
||||
@@ -12,6 +12,8 @@ specific language governing permissions and limitations under the License.
|
||||
|
||||
# DreamBooth
|
||||
|
||||
[[open-in-colab]]
|
||||
|
||||
[DreamBooth](https://arxiv.org/abs/2208.12242) is a method to personalize text-to-image models like Stable Diffusion given just a few (3-5) images of a subject. It allows the model to generate contextualized images of the subject in different scenes, poses, and views.
|
||||
|
||||
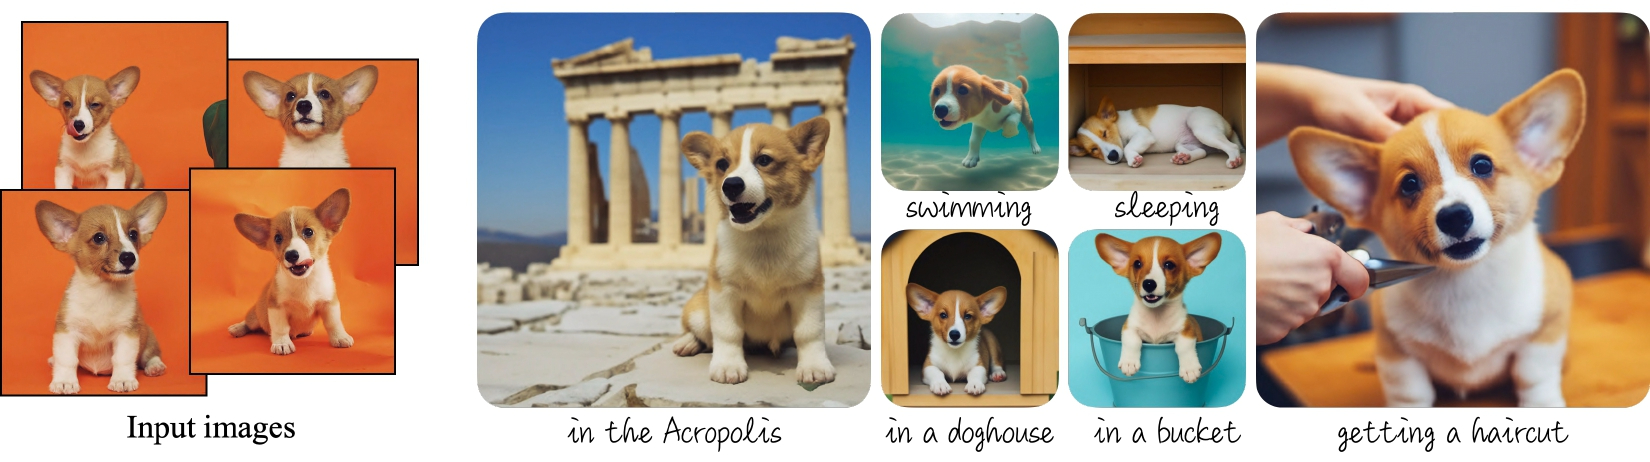
|
||||
@@ -500,68 +502,9 @@ You may also run inference from any of the [saved training checkpoints](#inferen
|
||||
|
||||
## IF
|
||||
|
||||
You can use the lora and full dreambooth scripts to train the text to image [IF model](https://huggingface.co/DeepFloyd/IF-I-XL-v1.0) and the stage II upscaler
|
||||
[IF model](https://huggingface.co/DeepFloyd/IF-II-L-v1.0).
|
||||
You can use the lora and full dreambooth scripts to also train the text to image [IF model](https://huggingface.co/DeepFloyd/IF-I-XL-v1.0). A few alternative cli flags are needed due to the model size, the expected input resolution, and the text encoder conventions.
|
||||
|
||||
Note that IF has a predicted variance, and our finetuning scripts only train the models predicted error, so for finetuned IF models we switch to a fixed
|
||||
variance schedule. The full finetuning scripts will update the scheduler config for the full saved model. However, when loading saved LoRA weights, you
|
||||
must also update the pipeline's scheduler config.
|
||||
|
||||
```py
|
||||
from diffusers import DiffusionPipeline
|
||||
|
||||
pipe = DiffusionPipeline.from_pretrained("DeepFloyd/IF-I-XL-v1.0")
|
||||
|
||||
pipe.load_lora_weights("<lora weights path>")
|
||||
|
||||
# Update scheduler config to fixed variance schedule
|
||||
pipe.scheduler = pipe.scheduler.__class__.from_config(pipe.scheduler.config, variance_type="fixed_small")
|
||||
```
|
||||
|
||||
Additionally, a few alternative cli flags are needed for IF.
|
||||
|
||||
`--resolution=64`: IF is a pixel space diffusion model. In order to operate on un-compressed pixels, the input images are of a much smaller resolution.
|
||||
|
||||
`--pre_compute_text_embeddings`: IF uses [T5](https://huggingface.co/docs/transformers/model_doc/t5) for its text encoder. In order to save GPU memory, we pre compute all text embeddings and then de-allocate
|
||||
T5.
|
||||
|
||||
`--tokenizer_max_length=77`: T5 has a longer default text length, but the default IF encoding procedure uses a smaller number.
|
||||
|
||||
`--text_encoder_use_attention_mask`: T5 passes the attention mask to the text encoder.
|
||||
|
||||
### Tips and Tricks
|
||||
We find LoRA to be sufficient for finetuning the stage I model as the low resolution of the model makes representing finegrained detail hard regardless.
|
||||
|
||||
For common and/or not-visually complex object concepts, you can get away with not-finetuning the upscaler. Just be sure to adjust the prompt passed to the
|
||||
upscaler to remove the new token from the instance prompt. I.e. if your stage I prompt is "a sks dog", use "a dog" for your stage II prompt.
|
||||
|
||||
For finegrained detail like faces that aren't present in the original training set, we find that full finetuning of the stage II upscaler is better than
|
||||
LoRA finetuning stage II.
|
||||
|
||||
For finegrained detail like faces, we find that lower learning rates along with larger batch sizes work best.
|
||||
|
||||
For stage II, we find that lower learning rates are also needed.
|
||||
|
||||
We found experimentally that the DDPM scheduler with the default larger number of denoising steps to sometimes work better than the DPM Solver scheduler
|
||||
used in the training scripts.
|
||||
|
||||
### Stage II additional validation images
|
||||
|
||||
The stage II validation requires images to upscale, we can download a downsized version of the training set:
|
||||
|
||||
```py
|
||||
from huggingface_hub import snapshot_download
|
||||
|
||||
local_dir = "./dog_downsized"
|
||||
snapshot_download(
|
||||
"diffusers/dog-example-downsized",
|
||||
local_dir=local_dir,
|
||||
repo_type="dataset",
|
||||
ignore_patterns=".gitattributes",
|
||||
)
|
||||
```
|
||||
|
||||
### IF stage I LoRA Dreambooth
|
||||
### LoRA Dreambooth
|
||||
This training configuration requires ~28 GB VRAM.
|
||||
|
||||
```sh
|
||||
@@ -575,7 +518,7 @@ accelerate launch train_dreambooth_lora.py \
|
||||
--instance_data_dir=$INSTANCE_DIR \
|
||||
--output_dir=$OUTPUT_DIR \
|
||||
--instance_prompt="a sks dog" \
|
||||
--resolution=64 \
|
||||
--resolution=64 \ # The input resolution of the IF unet is 64x64
|
||||
--train_batch_size=4 \
|
||||
--gradient_accumulation_steps=1 \
|
||||
--learning_rate=5e-6 \
|
||||
@@ -584,58 +527,16 @@ accelerate launch train_dreambooth_lora.py \
|
||||
--validation_prompt="a sks dog" \
|
||||
--validation_epochs=25 \
|
||||
--checkpointing_steps=100 \
|
||||
--pre_compute_text_embeddings \
|
||||
--tokenizer_max_length=77 \
|
||||
--text_encoder_use_attention_mask
|
||||
--pre_compute_text_embeddings \ # Pre compute text embeddings to that T5 doesn't have to be kept in memory
|
||||
--tokenizer_max_length=77 \ # IF expects an override of the max token length
|
||||
--text_encoder_use_attention_mask # IF expects attention mask for text embeddings
|
||||
```
|
||||
|
||||
### IF stage II LoRA Dreambooth
|
||||
### Full Dreambooth
|
||||
Due to the size of the optimizer states, we recommend training the full XL IF model with 8bit adam.
|
||||
Using 8bit adam and the rest of the following config, the model can be trained in ~48 GB VRAM.
|
||||
|
||||
`--validation_images`: These images are upscaled during validation steps.
|
||||
|
||||
`--class_labels_conditioning=timesteps`: Pass additional conditioning to the UNet needed for stage II.
|
||||
|
||||
`--learning_rate=1e-6`: Lower learning rate than stage I.
|
||||
|
||||
`--resolution=256`: The upscaler expects higher resolution inputs
|
||||
|
||||
```sh
|
||||
export MODEL_NAME="DeepFloyd/IF-II-L-v1.0"
|
||||
export INSTANCE_DIR="dog"
|
||||
export OUTPUT_DIR="dreambooth_dog_upscale"
|
||||
export VALIDATION_IMAGES="dog_downsized/image_1.png dog_downsized/image_2.png dog_downsized/image_3.png dog_downsized/image_4.png"
|
||||
|
||||
python train_dreambooth_lora.py \
|
||||
--report_to wandb \
|
||||
--pretrained_model_name_or_path=$MODEL_NAME \
|
||||
--instance_data_dir=$INSTANCE_DIR \
|
||||
--output_dir=$OUTPUT_DIR \
|
||||
--instance_prompt="a sks dog" \
|
||||
--resolution=256 \
|
||||
--train_batch_size=4 \
|
||||
--gradient_accumulation_steps=1 \
|
||||
--learning_rate=1e-6 \
|
||||
--max_train_steps=2000 \
|
||||
--validation_prompt="a sks dog" \
|
||||
--validation_epochs=100 \
|
||||
--checkpointing_steps=500 \
|
||||
--pre_compute_text_embeddings \
|
||||
--tokenizer_max_length=77 \
|
||||
--text_encoder_use_attention_mask \
|
||||
--validation_images $VALIDATION_IMAGES \
|
||||
--class_labels_conditioning=timesteps
|
||||
```
|
||||
|
||||
### IF Stage I Full Dreambooth
|
||||
`--skip_save_text_encoder`: When training the full model, this will skip saving the entire T5 with the finetuned model. You can still load the pipeline
|
||||
with a T5 loaded from the original model.
|
||||
|
||||
`use_8bit_adam`: Due to the size of the optimizer states, we recommend training the full XL IF model with 8bit adam.
|
||||
|
||||
`--learning_rate=1e-7`: For full dreambooth, IF requires very low learning rates. With higher learning rates model quality will degrade. Note that it is
|
||||
likely the learning rate can be increased with larger batch sizes.
|
||||
|
||||
Using 8bit adam and a batch size of 4, the model can be trained in ~48 GB VRAM.
|
||||
For full dreambooth, IF requires very low learning rates. With higher learning rates model quality will degrade.
|
||||
|
||||
```sh
|
||||
export MODEL_NAME="DeepFloyd/IF-I-XL-v1.0"
|
||||
@@ -648,60 +549,17 @@ accelerate launch train_dreambooth.py \
|
||||
--instance_data_dir=$INSTANCE_DIR \
|
||||
--output_dir=$OUTPUT_DIR \
|
||||
--instance_prompt="a photo of sks dog" \
|
||||
--resolution=64 \
|
||||
--resolution=64 \ # The input resolution of the IF unet is 64x64
|
||||
--train_batch_size=4 \
|
||||
--gradient_accumulation_steps=1 \
|
||||
--learning_rate=1e-7 \
|
||||
--max_train_steps=150 \
|
||||
--validation_prompt "a photo of sks dog" \
|
||||
--validation_steps 25 \
|
||||
--text_encoder_use_attention_mask \
|
||||
--tokenizer_max_length 77 \
|
||||
--pre_compute_text_embeddings \
|
||||
--use_8bit_adam \
|
||||
--text_encoder_use_attention_mask \ # IF expects attention mask for text embeddings
|
||||
--tokenizer_max_length 77 \ # IF expects an override of the max token length
|
||||
--pre_compute_text_embeddings \ # Pre compute text embeddings to that T5 doesn't have to be kept in memory
|
||||
--use_8bit_adam \ #
|
||||
--set_grads_to_none \
|
||||
--skip_save_text_encoder \
|
||||
--push_to_hub
|
||||
```
|
||||
|
||||
### IF Stage II Full Dreambooth
|
||||
|
||||
`--learning_rate=5e-6`: With a smaller effective batch size of 4, we found that we required learning rates as low as
|
||||
1e-8.
|
||||
|
||||
`--resolution=256`: The upscaler expects higher resolution inputs
|
||||
|
||||
`--train_batch_size=2` and `--gradient_accumulation_steps=6`: We found that full training of stage II particularly with
|
||||
faces required large effective batch sizes.
|
||||
|
||||
```sh
|
||||
export MODEL_NAME="DeepFloyd/IF-II-L-v1.0"
|
||||
export INSTANCE_DIR="dog"
|
||||
export OUTPUT_DIR="dreambooth_dog_upscale"
|
||||
export VALIDATION_IMAGES="dog_downsized/image_1.png dog_downsized/image_2.png dog_downsized/image_3.png dog_downsized/image_4.png"
|
||||
|
||||
accelerate launch train_dreambooth.py \
|
||||
--report_to wandb \
|
||||
--pretrained_model_name_or_path=$MODEL_NAME \
|
||||
--instance_data_dir=$INSTANCE_DIR \
|
||||
--output_dir=$OUTPUT_DIR \
|
||||
--instance_prompt="a sks dog" \
|
||||
--resolution=256 \
|
||||
--train_batch_size=2 \
|
||||
--gradient_accumulation_steps=6 \
|
||||
--learning_rate=5e-6 \
|
||||
--max_train_steps=2000 \
|
||||
--validation_prompt="a sks dog" \
|
||||
--validation_steps=150 \
|
||||
--checkpointing_steps=500 \
|
||||
--pre_compute_text_embeddings \
|
||||
--tokenizer_max_length=77 \
|
||||
--text_encoder_use_attention_mask \
|
||||
--validation_images $VALIDATION_IMAGES \
|
||||
--class_labels_conditioning timesteps \
|
||||
--push_to_hub
|
||||
```
|
||||
|
||||
## Stable Diffusion XL
|
||||
|
||||
We support fine-tuning of the UNet shipped in [Stable Diffusion XL](https://huggingface.co/papers/2307.01952) with DreamBooth and LoRA via the `train_dreambooth_lora_sdxl.py` script. Please refer to the docs [here](https://github.com/huggingface/diffusers/blob/main/examples/dreambooth/README_sdxl.md).
|
||||
--skip_save_text_encoder # do not save the full T5 text encoder with the model
|
||||
```
|
||||
@@ -207,5 +207,3 @@ speed and quality during performance:
|
||||
|
||||
Particularly, `image_guidance_scale` and `guidance_scale` can have a profound impact
|
||||
on the generated ("edited") image (see [here](https://twitter.com/RisingSayak/status/1628392199196151808?s=20) for an example).
|
||||
|
||||
If you're looking for some interesting ways to use the InstructPix2Pix training methodology, we welcome you to check out this blog post: [Instruction-tuning Stable Diffusion with InstructPix2Pix](https://huggingface.co/blog/instruction-tuning-sd).
|
||||
@@ -12,6 +12,8 @@ specific language governing permissions and limitations under the License.
|
||||
|
||||
# Low-Rank Adaptation of Large Language Models (LoRA)
|
||||
|
||||
[[open-in-colab]]
|
||||
|
||||
<Tip warning={true}>
|
||||
|
||||
Currently, LoRA is only supported for the attention layers of the [`UNet2DConditionalModel`]. We also
|
||||
@@ -258,14 +260,6 @@ pipe.load_lora_weights(lora_model_id)
|
||||
image = pipe("A picture of a sks dog in a bucket", num_inference_steps=25).images[0]
|
||||
```
|
||||
|
||||
<Tip>
|
||||
|
||||
If your LoRA parameters involve the UNet as well as the Text Encoder, then passing
|
||||
`cross_attention_kwargs={"scale": 0.5}` will apply the `scale` value to both the UNet
|
||||
and the Text Encoder.
|
||||
|
||||
</Tip>
|
||||
|
||||
Note that the use of [`~diffusers.loaders.LoraLoaderMixin.load_lora_weights`] is preferred to [`~diffusers.loaders.UNet2DConditionLoadersMixin.load_attn_procs`] for loading LoRA parameters. This is because
|
||||
[`~diffusers.loaders.LoraLoaderMixin.load_lora_weights`] can handle the following situations:
|
||||
|
||||
@@ -278,79 +272,4 @@ Note that the use of [`~diffusers.loaders.LoraLoaderMixin.load_lora_weights`] is
|
||||
* LoRA parameters that have separate identifiers for the UNet and the text encoder such as: [`"sayakpaul/dreambooth"`](https://huggingface.co/sayakpaul/dreambooth).
|
||||
|
||||
**Note** that it is possible to provide a local directory path to [`~diffusers.loaders.LoraLoaderMixin.load_lora_weights`] as well as [`~diffusers.loaders.UNet2DConditionLoadersMixin.load_attn_procs`]. To know about the supported inputs,
|
||||
refer to the respective docstrings.
|
||||
|
||||
## Unloading LoRA parameters
|
||||
|
||||
You can call [`~diffusers.loaders.LoraLoaderMixin.unload_lora_weights`] on a pipeline to unload the LoRA parameters.
|
||||
|
||||
## Supporting A1111 themed LoRA checkpoints from Diffusers
|
||||
|
||||
To provide seamless interoperability with A1111 to our users, we support loading A1111 formatted
|
||||
LoRA checkpoints using [`~diffusers.loaders.LoraLoaderMixin.load_lora_weights`] in a limited capacity.
|
||||
In this section, we explain how to load an A1111 formatted LoRA checkpoint from [CivitAI](https://civitai.com/)
|
||||
in Diffusers and perform inference with it.
|
||||
|
||||
First, download a checkpoint. We'll use
|
||||
[this one](https://civitai.com/models/13239/light-and-shadow) for demonstration purposes.
|
||||
|
||||
```bash
|
||||
wget https://civitai.com/api/download/models/15603 -O light_and_shadow.safetensors
|
||||
```
|
||||
|
||||
Next, we initialize a [`~DiffusionPipeline`]:
|
||||
|
||||
```python
|
||||
import torch
|
||||
|
||||
from diffusers import StableDiffusionPipeline, DPMSolverMultistepScheduler
|
||||
|
||||
pipeline = StableDiffusionPipeline.from_pretrained(
|
||||
"gsdf/Counterfeit-V2.5", torch_dtype=torch.float16, safety_checker=None
|
||||
).to("cuda")
|
||||
pipeline.scheduler = DPMSolverMultistepScheduler.from_config(
|
||||
pipeline.scheduler.config, use_karras_sigmas=True
|
||||
)
|
||||
```
|
||||
|
||||
We then load the checkpoint downloaded from CivitAI:
|
||||
|
||||
```python
|
||||
pipeline.load_lora_weights(".", weight_name="light_and_shadow.safetensors")
|
||||
```
|
||||
|
||||
<Tip warning={true}>
|
||||
|
||||
If you're loading a checkpoint in the `safetensors` format, please ensure you have `safetensors` installed.
|
||||
|
||||
</Tip>
|
||||
|
||||
And then it's time for running inference:
|
||||
|
||||
```python
|
||||
prompt = "masterpiece, best quality, 1girl, at dusk"
|
||||
negative_prompt = ("(low quality, worst quality:1.4), (bad anatomy), (inaccurate limb:1.2), "
|
||||
"bad composition, inaccurate eyes, extra digit, fewer digits, (extra arms:1.2), large breasts")
|
||||
|
||||
images = pipeline(prompt=prompt,
|
||||
negative_prompt=negative_prompt,
|
||||
width=512,
|
||||
height=768,
|
||||
num_inference_steps=15,
|
||||
num_images_per_prompt=4,
|
||||
generator=torch.manual_seed(0)
|
||||
).images
|
||||
```
|
||||
|
||||
Below is a comparison between the LoRA and the non-LoRA results:
|
||||
|
||||
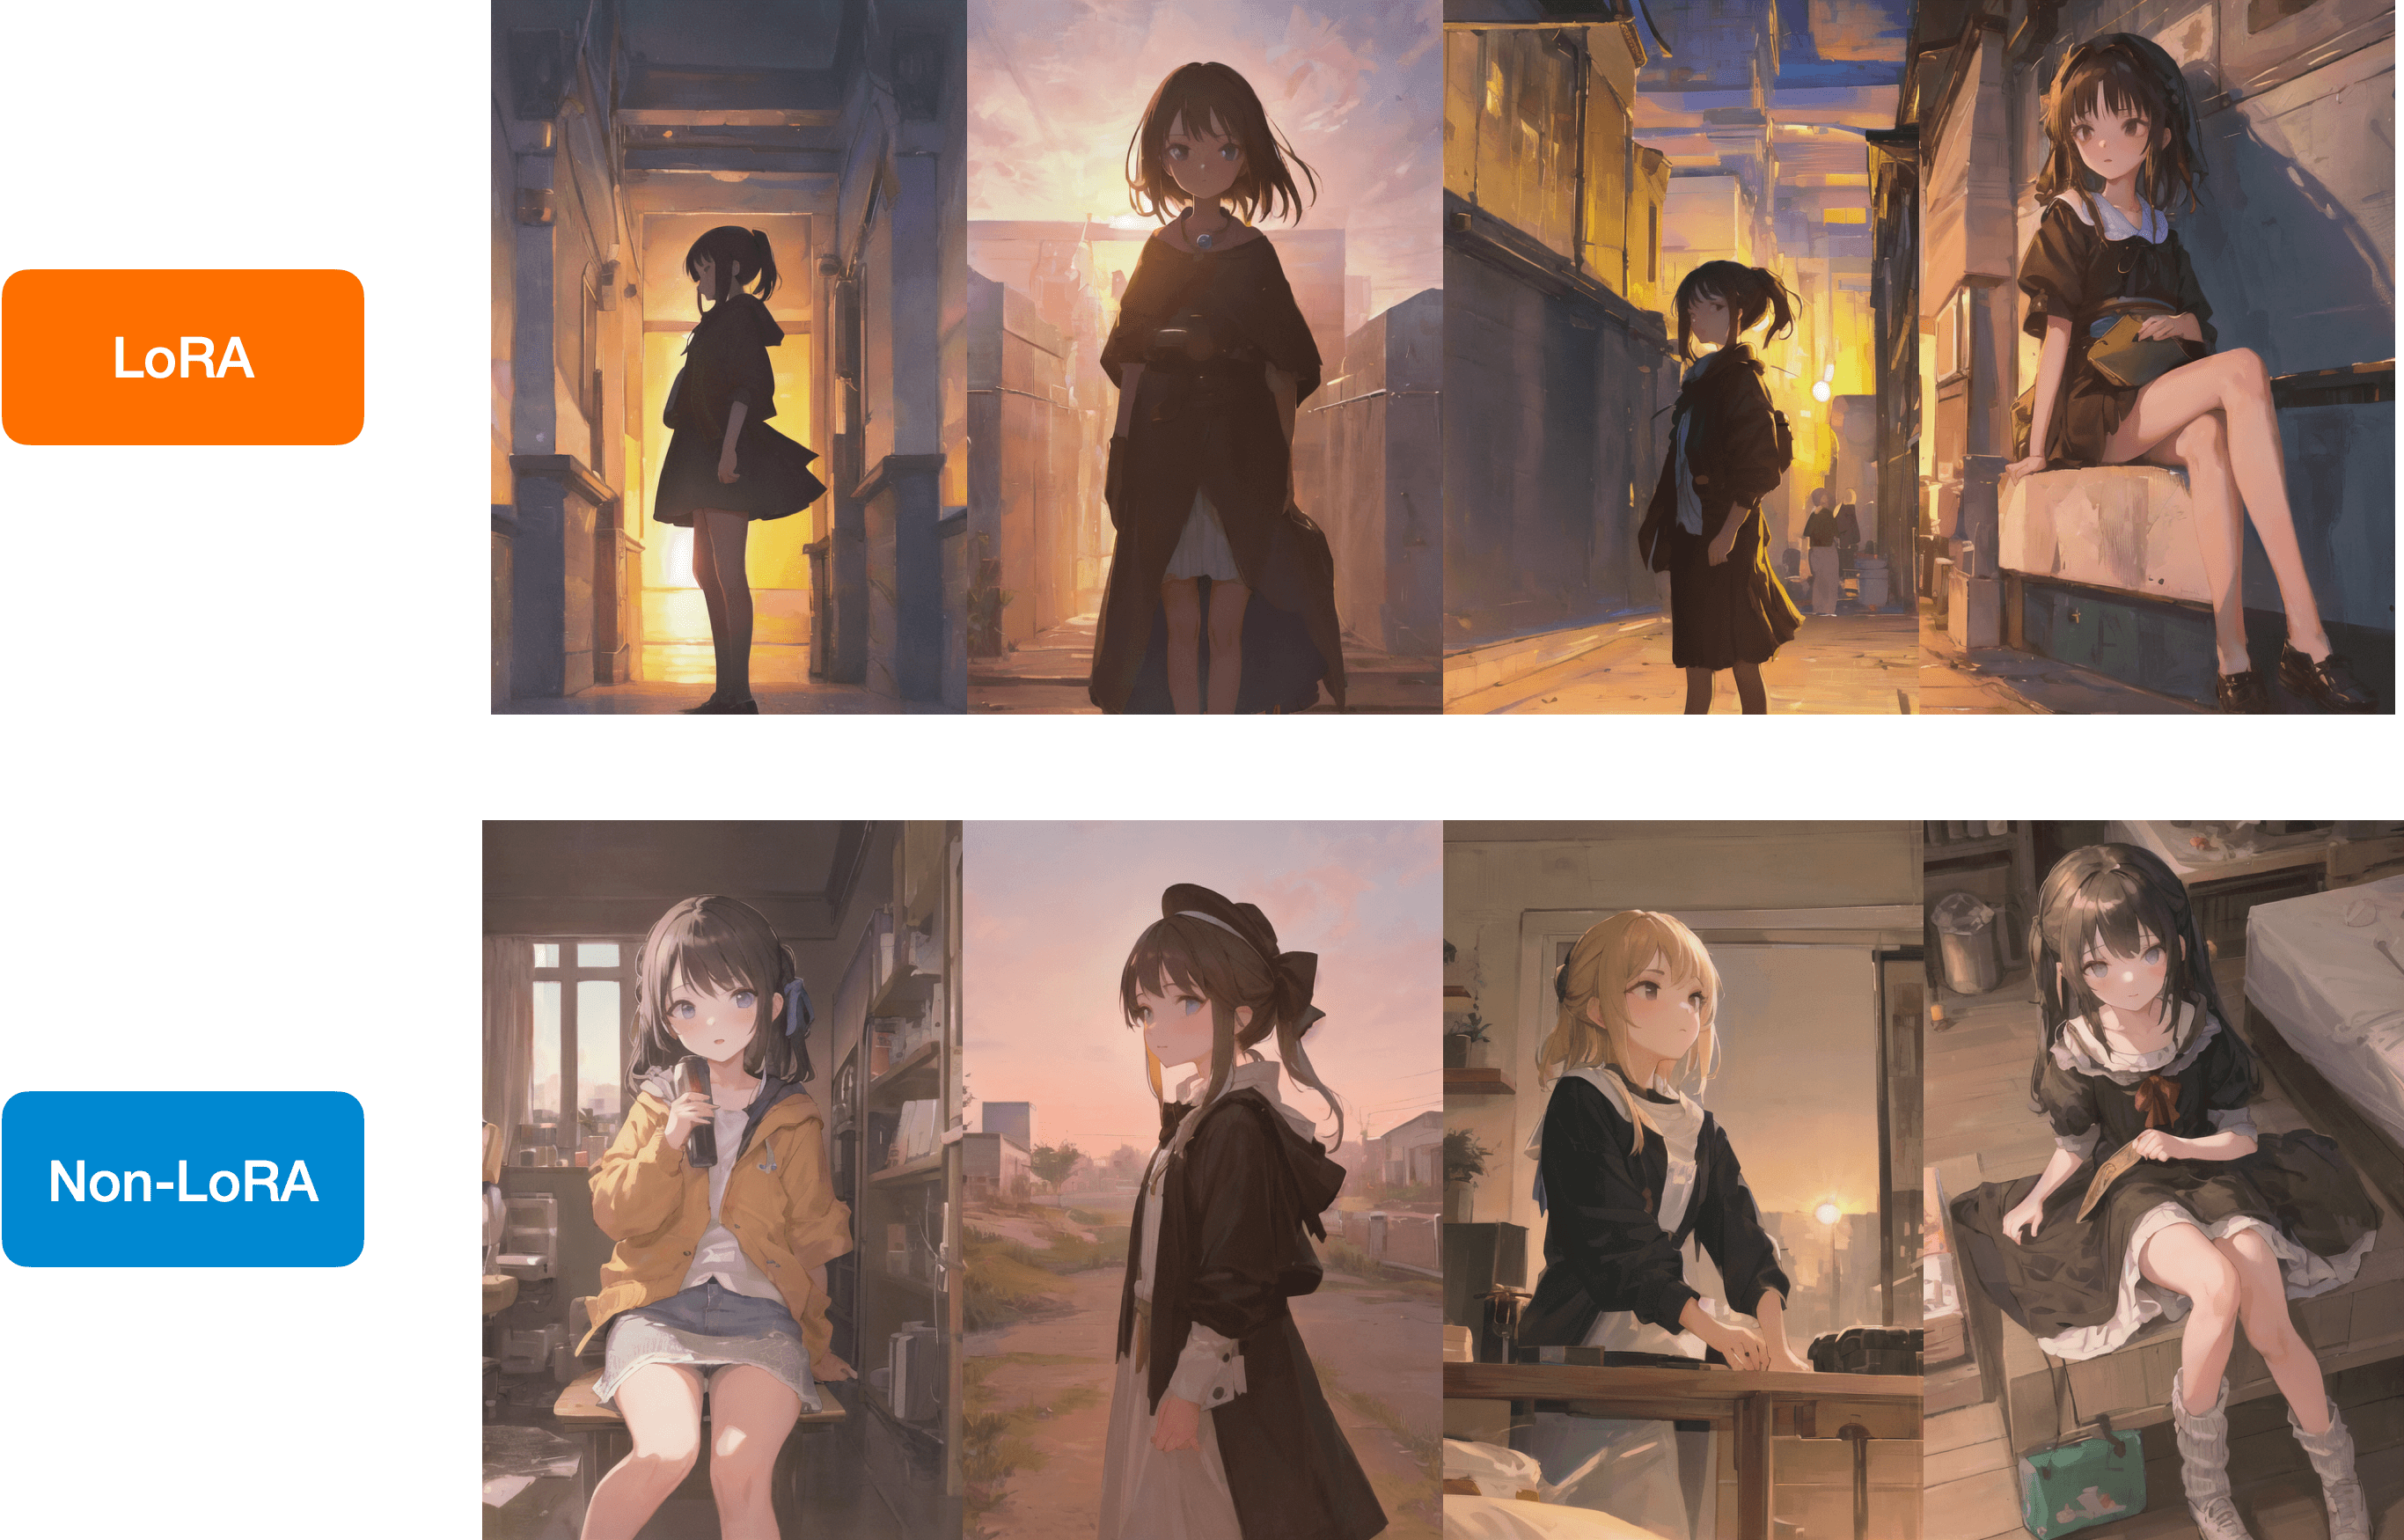
|
||||
|
||||
You have a similar checkpoint stored on the Hugging Face Hub, you can load it
|
||||
directly with [`~diffusers.loaders.LoraLoaderMixin.load_lora_weights`] like so:
|
||||
|
||||
```python
|
||||
lora_model_id = "sayakpaul/civitai-light-shadow-lora"
|
||||
lora_filename = "light_and_shadow.safetensors"
|
||||
pipeline.load_lora_weights(lora_model_id, weight_name=lora_filename)
|
||||
```
|
||||
refer to the respective docstrings.
|
||||
@@ -14,6 +14,8 @@ specific language governing permissions and limitations under the License.
|
||||
|
||||
# Textual Inversion
|
||||
|
||||
[[open-in-colab]]
|
||||
|
||||
[Textual Inversion](https://arxiv.org/abs/2208.01618) is a technique for capturing novel concepts from a small number of example images. While the technique was originally demonstrated with a [latent diffusion model](https://github.com/CompVis/latent-diffusion), it has since been applied to other model variants like [Stable Diffusion](https://huggingface.co/docs/diffusers/main/en/conceptual/stable_diffusion). The learned concepts can be used to better control the images generated from text-to-image pipelines. It learns new "words" in the text encoder's embedding space, which are used within text prompts for personalized image generation.
|
||||
|
||||
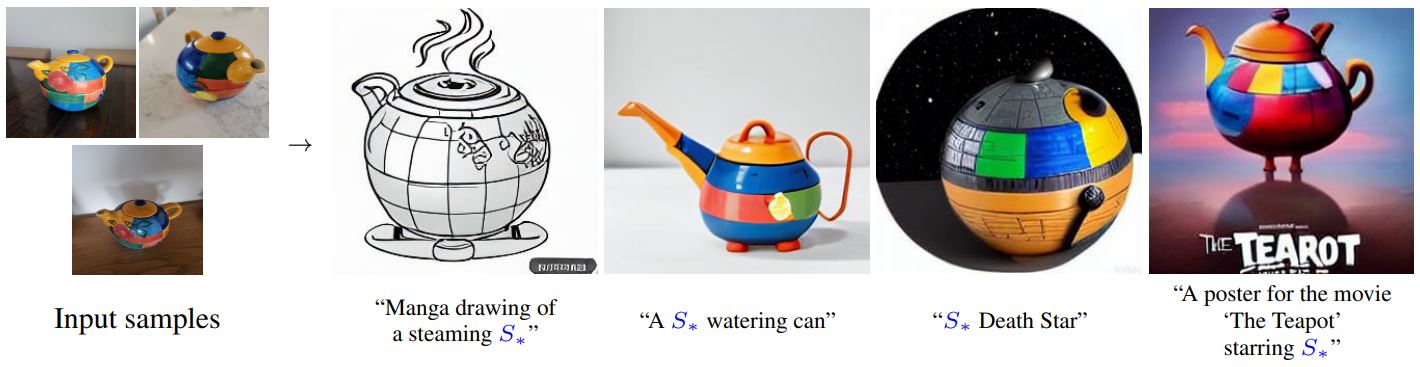
|
||||
|
||||
@@ -26,9 +26,8 @@ This tutorial will teach you how to train a [`UNet2DModel`] from scratch on a su
|
||||
|
||||
Before you begin, make sure you have 🤗 Datasets installed to load and preprocess image datasets, and 🤗 Accelerate, to simplify training on any number of GPUs. The following command will also install [TensorBoard](https://www.tensorflow.org/tensorboard) to visualize training metrics (you can also use [Weights & Biases](https://docs.wandb.ai/) to track your training).
|
||||
|
||||
```py
|
||||
# uncomment to install the necessary libraries in Colab
|
||||
#!pip install diffusers[training]
|
||||
```bash
|
||||
!pip install diffusers[training]
|
||||
```
|
||||
|
||||
We encourage you to share your model with the community, and in order to do that, you'll need to login to your Hugging Face account (create one [here](https://hf.co/join) if you don't already have one!). You can login from a notebook and enter your token when prompted:
|
||||
@@ -313,7 +312,7 @@ Now you can wrap all these components together in a training loop with 🤗 Acce
|
||||
... mixed_precision=config.mixed_precision,
|
||||
... gradient_accumulation_steps=config.gradient_accumulation_steps,
|
||||
... log_with="tensorboard",
|
||||
... project_dir=os.path.join(config.output_dir, "logs"),
|
||||
... logging_dir=os.path.join(config.output_dir, "logs"),
|
||||
... )
|
||||
... if accelerator.is_main_process:
|
||||
... if config.push_to_hub:
|
||||
|
||||
@@ -1,45 +0,0 @@
|
||||
# Control image brightness
|
||||
|
||||
The Stable Diffusion pipeline is mediocre at generating images that are either very bright or dark as explained in the [Common Diffusion Noise Schedules and Sample Steps are Flawed](https://huggingface.co/papers/2305.08891) paper. The solutions proposed in the paper are currently implemented in the [`DDIMScheduler`] which you can use to improve the lighting in your images.
|
||||
|
||||
<Tip>
|
||||
|
||||
💡 Take a look at the paper linked above for more details about the proposed solutions!
|
||||
|
||||
</Tip>
|
||||
|
||||
One of the solutions is to train a model with *v prediction* and *v loss*. Add the following flag to the [`train_text_to_image.py`](https://github.com/huggingface/diffusers/blob/main/examples/text_to_image/train_text_to_image.py) or [`train_text_to_image_lora.py`](https://github.com/huggingface/diffusers/blob/main/examples/text_to_image/train_text_to_image_lora.py) scripts to enable `v_prediction`:
|
||||
|
||||
```bash
|
||||
--prediction_type="v_prediction"
|
||||
```
|
||||
|
||||
For example, let's use the [`ptx0/pseudo-journey-v2`](https://huggingface.co/ptx0/pseudo-journey-v2) checkpoint which has been finetuned with `v_prediction`.
|
||||
|
||||
Next, configure the following parameters in the [`DDIMScheduler`]:
|
||||
|
||||
1. `rescale_betas_zero_snr=True`, rescales the noise schedule to zero terminal signal-to-noise ratio (SNR)
|
||||
2. `timestep_spacing="trailing"`, starts sampling from the last timestep
|
||||
|
||||
```py
|
||||
>>> from diffusers import DiffusionPipeline, DDIMScheduler
|
||||
|
||||
>>> pipeline = DiffusionPipeline.from_pretrained("ptx0/pseudo-journey-v2")
|
||||
# switch the scheduler in the pipeline to use the DDIMScheduler
|
||||
|
||||
>>> pipeline.scheduler = DDIMScheduler.from_config(
|
||||
... pipeline.scheduler.config, rescale_betas_zero_snr=True, timestep_spacing="trailing"
|
||||
... )
|
||||
>>> pipeline.to("cuda")
|
||||
```
|
||||
|
||||
Finally, in your call to the pipeline, set `guidance_rescale` to prevent overexposure:
|
||||
|
||||
```py
|
||||
prompt = "A lion in galaxies, spirals, nebulae, stars, smoke, iridescent, intricate detail, octane render, 8k"
|
||||
image = pipeline(prompt, guidance_rescale=0.7).images[0]
|
||||
```
|
||||
|
||||
<div class="flex justify-center">
|
||||
<img src="https://huggingface.co/datasets/huggingface/documentation-images/resolve/main/diffusers/zero_snr.png"/>
|
||||
</div>
|
||||
@@ -59,7 +59,6 @@ For convenience, we provide a table to denote which methods are inference-only a
|
||||
| [Custom Diffusion](#custom-diffusion) | ❌ | ✅ | |
|
||||
| [Model Editing](#model-editing) | ✅ | ❌ | |
|
||||
| [DiffEdit](#diffedit) | ✅ | ❌ | |
|
||||
| [T2I-Adapter](#t2i-adapter) | ✅ | ❌ | |
|
||||
|
||||
## Instruct Pix2Pix
|
||||
|
||||
@@ -216,13 +215,4 @@ To know more details, check out the [official doc](../api/pipelines/stable_diffu
|
||||
[DiffEdit](../api/pipelines/stable_diffusion/diffedit) allows for semantic editing of input images along with
|
||||
input prompts while preserving the original input images as much as possible.
|
||||
|
||||
To know more details, check out the [official doc](../api/pipelines/stable_diffusion/model_editing).
|
||||
## T2I-Adapter
|
||||
|
||||
[Paper](https://arxiv.org/abs/2302.08453)
|
||||
|
||||
[T2I-Adapter](../api/pipelines/stable_diffusion/adapter) is an auxiliary network which adds an extra condition.
|
||||
There are 8 canonical pre-trained adapters trained on different conditionings such as edge detection, sketch,
|
||||
depth maps, and semantic segmentations.
|
||||
|
||||
See [here](../api/pipelines/stable_diffusion/adapter) for more information on how to use it.
|
||||
To know more details, check out the [official doc](../api/pipelines/stable_diffusion/model_editing).
|
||||
@@ -12,8 +12,6 @@ specific language governing permissions and limitations under the License.
|
||||
|
||||
# Community pipelines
|
||||
|
||||
[[open-in-colab]]
|
||||
|
||||
> **For more information about community pipelines, please have a look at [this issue](https://github.com/huggingface/diffusers/issues/841).**
|
||||
|
||||
**Community** examples consist of both inference and training examples that have been added by the community.
|
||||
|
||||
@@ -12,8 +12,6 @@ specific language governing permissions and limitations under the License.
|
||||
|
||||
# Load community pipelines
|
||||
|
||||
[[open-in-colab]]
|
||||
|
||||
Community pipelines are any [`DiffusionPipeline`] class that are different from the original implementation as specified in their paper (for example, the [`StableDiffusionControlNetPipeline`] corresponds to the [Text-to-Image Generation with ControlNet Conditioning](https://arxiv.org/abs/2302.05543) paper). They provide additional functionality or extend the original implementation of a pipeline.
|
||||
|
||||
There are many cool community pipelines like [Speech to Image](https://github.com/huggingface/diffusers/tree/main/examples/community#speech-to-image) or [Composable Stable Diffusion](https://github.com/huggingface/diffusers/tree/main/examples/community#composable-stable-diffusion), and you can find all the official community pipelines [here](https://github.com/huggingface/diffusers/tree/main/examples/community).
|
||||
|
||||
@@ -18,9 +18,8 @@ The [`StableDiffusionImg2ImgPipeline`] lets you pass a text prompt and an initia
|
||||
|
||||
Before you begin, make sure you have all the necessary libraries installed:
|
||||
|
||||
```py
|
||||
# uncomment to install the necessary libraries in Colab
|
||||
#!pip install diffusers transformers ftfy accelerate
|
||||
```bash
|
||||
!pip install diffusers transformers ftfy accelerate
|
||||
```
|
||||
|
||||
Get started by creating a [`StableDiffusionImg2ImgPipeline`] with a pretrained Stable Diffusion model like [`nitrosocke/Ghibli-Diffusion`](https://huggingface.co/nitrosocke/Ghibli-Diffusion).
|
||||
|
||||
@@ -12,8 +12,6 @@ specific language governing permissions and limitations under the License.
|
||||
|
||||
# Load pipelines, models, and schedulers
|
||||
|
||||
[[open-in-colab]]
|
||||
|
||||
Having an easy way to use a diffusion system for inference is essential to 🧨 Diffusers. Diffusion systems often consist of multiple components like parameterized models, tokenizers, and schedulers that interact in complex ways. That is why we designed the [`DiffusionPipeline`] to wrap the complexity of the entire diffusion system into an easy-to-use API, while remaining flexible enough to be adapted for other use cases, such as loading each component individually as building blocks to assemble your own diffusion system.
|
||||
|
||||
Everything you need for inference or training is accessible with the `from_pretrained()` method.
|
||||
@@ -174,7 +172,7 @@ A checkpoint variant is usually a checkpoint where it's weights are:
|
||||
|
||||
</Tip>
|
||||
|
||||
Otherwise, a variant is **identical** to the original checkpoint. They have exactly the same serialization format (like [Safetensors](./using_safetensors)), model structure, and weights have identical tensor shapes.
|
||||
Otherwise, a variant is **identical** to the original checkpoint. They have exactly the same serialization format (like [Safetensors](./using-diffusers/using_safetensors)), model structure, and weights have identical tensor shapes.
|
||||
|
||||
| **checkpoint type** | **weight name** | **argument for loading weights** |
|
||||
|---------------------|-------------------------------------|----------------------------------|
|
||||
@@ -190,7 +188,6 @@ There are two important arguments to know for loading variants:
|
||||
|
||||
```python
|
||||
from diffusers import DiffusionPipeline
|
||||
import torch
|
||||
|
||||
# load fp16 variant
|
||||
stable_diffusion = DiffusionPipeline.from_pretrained(
|
||||
|
||||
@@ -12,8 +12,6 @@ specific language governing permissions and limitations under the License.
|
||||
|
||||
# Load different Stable Diffusion formats
|
||||
|
||||
[[open-in-colab]]
|
||||
|
||||
Stable Diffusion models are available in different formats depending on the framework they're trained and saved with, and where you download them from. Converting these formats for use in 🤗 Diffusers allows you to use all the features supported by the library, such as [using different schedulers](schedulers) for inference, [building your custom pipeline](write_own_pipeline), and a variety of techniques and methods for [optimizing inference speed](./optimization/opt_overview).
|
||||
|
||||
<Tip>
|
||||
@@ -26,7 +24,7 @@ This guide will show you how to convert other Stable Diffusion formats to be com
|
||||
|
||||
## PyTorch .ckpt
|
||||
|
||||
The checkpoint - or `.ckpt` - format is commonly used to store and save models. The `.ckpt` file contains the entire model and is typically several GBs in size. While you can load and use a `.ckpt` file directly with the [`~StableDiffusionPipeline.from_single_file`] method, it is generally better to convert the `.ckpt` file to 🤗 Diffusers so both formats are available.
|
||||
The checkpoint - or `.ckpt` - format is commonly used to store and save models. The `.ckpt` file contains the entire model and is typically several GBs in size. While you can load and use a `.ckpt` file directly with the [`~StableDiffusionPipeline.from_ckpt`] method, it is generally better to convert the `.ckpt` file to 🤗 Diffusers so both formats are available.
|
||||
|
||||
There are two options for converting a `.ckpt` file; use a Space to convert the checkpoint or convert the `.ckpt` file with a script.
|
||||
|
||||
@@ -125,70 +123,4 @@ pipeline.to("cuda")
|
||||
placeholder_token = "<my-funny-cat-token>"
|
||||
prompt = f"two {placeholder_token} getting married, photorealistic, high quality"
|
||||
image = pipeline(prompt, num_inference_steps=50).images[0]
|
||||
```
|
||||
|
||||
## A1111 LoRA files
|
||||
|
||||
[Automatic1111](https://github.com/AUTOMATIC1111/stable-diffusion-webui) (A1111) is a popular web UI for Stable Diffusion that supports model sharing platforms like [Civitai](https://civitai.com/). Models trained with the Low-Rank Adaptation (LoRA) technique are especially popular because they're fast to train and have a much smaller file size than a fully finetuned model. 🤗 Diffusers supports loading A1111 LoRA checkpoints with [`~loaders.LoraLoaderMixin.load_lora_weights`]:
|
||||
|
||||
```py
|
||||
from diffusers import DiffusionPipeline, UniPCMultistepScheduler
|
||||
import torch
|
||||
|
||||
pipeline = DiffusionPipeline.from_pretrained(
|
||||
"andite/anything-v4.0", torch_dtype=torch.float16, safety_checker=None
|
||||
).to("cuda")
|
||||
pipeline.scheduler = UniPCMultistepScheduler.from_config(pipeline.scheduler.config)
|
||||
```
|
||||
|
||||
Download a LoRA checkpoint from Civitai; this example uses the [Howls Moving Castle,Interior/Scenery LoRA (Ghibli Stlye)](https://civitai.com/models/14605?modelVersionId=19998) checkpoint, but feel free to try out any LoRA checkpoint!
|
||||
|
||||
```py
|
||||
# uncomment to download the safetensor weights
|
||||
#!wget https://civitai.com/api/download/models/19998 -O howls_moving_castle.safetensors
|
||||
```
|
||||
|
||||
Load the LoRA checkpoint into the pipeline with the [`~loaders.LoraLoaderMixin.load_lora_weights`] method:
|
||||
|
||||
```py
|
||||
pipeline.load_lora_weights(".", weight_name="howls_moving_castle.safetensors")
|
||||
```
|
||||
|
||||
Now you can use the pipeline to generate images:
|
||||
|
||||
```py
|
||||
prompt = "masterpiece, illustration, ultra-detailed, cityscape, san francisco, golden gate bridge, california, bay area, in the snow, beautiful detailed starry sky"
|
||||
negative_prompt = "lowres, cropped, worst quality, low quality, normal quality, artifacts, signature, watermark, username, blurry, more than one bridge, bad architecture"
|
||||
|
||||
images = pipeline(
|
||||
prompt=prompt,
|
||||
negative_prompt=negative_prompt,
|
||||
width=512,
|
||||
height=512,
|
||||
num_inference_steps=25,
|
||||
num_images_per_prompt=4,
|
||||
generator=torch.manual_seed(0),
|
||||
).images
|
||||
```
|
||||
|
||||
Finally, create a helper function to display the images:
|
||||
|
||||
```py
|
||||
from PIL import Image
|
||||
|
||||
|
||||
def image_grid(imgs, rows=2, cols=2):
|
||||
w, h = imgs[0].size
|
||||
grid = Image.new("RGB", size=(cols * w, rows * h))
|
||||
|
||||
for i, img in enumerate(imgs):
|
||||
grid.paste(img, box=(i % cols * w, i // cols * h))
|
||||
return grid
|
||||
|
||||
|
||||
image_grid(images)
|
||||
```
|
||||
|
||||
<div class="flex justify-center">
|
||||
<img src="https://huggingface.co/datasets/huggingface/documentation-images/resolve/main/diffusers/a1111-lora-sf.png"/>
|
||||
</div>
|
||||
```
|
||||
@@ -12,8 +12,6 @@ specific language governing permissions and limitations under the License.
|
||||
|
||||
# Create reproducible pipelines
|
||||
|
||||
[[open-in-colab]]
|
||||
|
||||
Reproducibility is important for testing, replicating results, and can even be used to [improve image quality](reusing_seeds). However, the randomness in diffusion models is a desired property because it allows the pipeline to generate different images every time it is run. While you can't expect to get the exact same results across platforms, you can expect results to be reproducible across releases and platforms within a certain tolerance range. Even then, tolerance varies depending on the diffusion pipeline and checkpoint.
|
||||
|
||||
This is why it's important to understand how to control sources of randomness in diffusion models or use deterministic algorithms.
|
||||
@@ -113,7 +111,7 @@ print(np.abs(image).sum())
|
||||
|
||||
The result is not the same even though you're using an identical seed because the GPU uses a different random number generator than the CPU.
|
||||
|
||||
To circumvent this problem, 🧨 Diffusers has a [`~diffusers.utils.randn_tensor`] function for creating random noise on the CPU, and then moving the tensor to a GPU if necessary. The `randn_tensor` function is used everywhere inside the pipeline, allowing the user to **always** pass a CPU `Generator` even if the pipeline is run on a GPU.
|
||||
To circumvent this problem, 🧨 Diffusers has a [`randn_tensor`](#diffusers.utils.randn_tensor) function for creating random noise on the CPU, and then moving the tensor to a GPU if necessary. The `randn_tensor` function is used everywhere inside the pipeline, allowing the user to **always** pass a CPU `Generator` even if the pipeline is run on a GPU.
|
||||
|
||||
You'll see the results are much closer now!
|
||||
|
||||
@@ -149,6 +147,9 @@ susceptible to precision error propagation. Don't expect similar results across
|
||||
different GPU hardware or PyTorch versions. In this case, you'll need to run
|
||||
exactly the same hardware and PyTorch version for full reproducibility.
|
||||
|
||||
### randn_tensor
|
||||
[[autodoc]] diffusers.utils.randn_tensor
|
||||
|
||||
## Deterministic algorithms
|
||||
|
||||
You can also configure PyTorch to use deterministic algorithms to create a reproducible pipeline. However, you should be aware that deterministic algorithms may be slower than nondeterministic ones and you may observe a decrease in performance. But if reproducibility is important to you, then this is the way to go!
|
||||
|
||||
@@ -12,8 +12,6 @@ specific language governing permissions and limitations under the License.
|
||||
|
||||
# Improve image quality with deterministic generation
|
||||
|
||||
[[open-in-colab]]
|
||||
|
||||
A common way to improve the quality of generated images is with *deterministic batch generation*, generate a batch of images and select one image to improve with a more detailed prompt in a second round of inference. The key is to pass a list of [`torch.Generator`](https://pytorch.org/docs/stable/generated/torch.Generator.html#generator)'s to the pipeline for batched image generation, and tie each `Generator` to a seed so you can reuse it for an image.
|
||||
|
||||
Let's use [`runwayml/stable-diffusion-v1-5`](runwayml/stable-diffusion-v1-5) for example, and generate several versions of the following prompt:
|
||||
|
||||
@@ -12,8 +12,6 @@ specific language governing permissions and limitations under the License.
|
||||
|
||||
# Schedulers
|
||||
|
||||
[[open-in-colab]]
|
||||
|
||||
Diffusion pipelines are inherently a collection of diffusion models and schedulers that are partly independent from each other. This means that one is able to switch out parts of the pipeline to better customize
|
||||
a pipeline to one's use case. The best example of this is the [Schedulers](../api/schedulers/overview.mdx).
|
||||
|
||||
|
||||
@@ -14,10 +14,9 @@ Note that JAX is not exclusive to TPUs, but it shines on that hardware because e
|
||||
|
||||
First make sure diffusers is installed.
|
||||
|
||||
```py
|
||||
# uncomment to install the necessary libraries in Colab
|
||||
#!pip install jax==0.3.25 jaxlib==0.3.25 flax transformers ftfy
|
||||
#!pip install diffusers
|
||||
```bash
|
||||
!pip install jax==0.3.25 jaxlib==0.3.25 flax transformers ftfy
|
||||
!pip install diffusers
|
||||
```
|
||||
|
||||
```python
|
||||
|
||||
@@ -1,14 +1,11 @@
|
||||
# Load safetensors
|
||||
|
||||
[[open-in-colab]]
|
||||
|
||||
[safetensors](https://github.com/huggingface/safetensors) is a safe and fast file format for storing and loading tensors. Typically, PyTorch model weights are saved or *pickled* into a `.bin` file with Python's [`pickle`](https://docs.python.org/3/library/pickle.html) utility. However, `pickle` is not secure and pickled files may contain malicious code that can be executed. safetensors is a secure alternative to `pickle`, making it ideal for sharing model weights.
|
||||
|
||||
This guide will show you how you load `.safetensor` files, and how to convert Stable Diffusion model weights stored in other formats to `.safetensor`. Before you start, make sure you have safetensors installed:
|
||||
|
||||
```py
|
||||
# uncomment to install the necessary libraries in Colab
|
||||
#!pip install safetensors
|
||||
```bash
|
||||
!pip install safetensors
|
||||
```
|
||||
|
||||
If you look at the [`runwayml/stable-diffusion-v1-5`](https://huggingface.co/runwayml/stable-diffusion-v1-5/tree/main) repository, you'll see weights inside the `text_encoder`, `unet` and `vae` subfolders are stored in the `.safetensors` format. By default, 🤗 Diffusers automatically loads these `.safetensors` files from their subfolders if they're available in the model repository.
|
||||
@@ -21,12 +18,12 @@ from diffusers import DiffusionPipeline
|
||||
pipeline = DiffusionPipeline.from_pretrained("runwayml/stable-diffusion-v1-5", use_safetensors=True)
|
||||
```
|
||||
|
||||
However, model weights are not necessarily stored in separate subfolders like in the example above. Sometimes, all the weights are stored in a single `.safetensors` file. In this case, if the weights are Stable Diffusion weights, you can load the file directly with the [`~diffusers.loaders.FromSingleFileMixin.from_single_file`] method:
|
||||
However, model weights are not necessarily stored in separate subfolders like in the example above. Sometimes, all the weights are stored in a single `.safetensors` file. In this case, if the weights are Stable Diffusion weights, you can load the file directly with the [`~diffusers.loaders.FromCkptMixin.from_ckpt`] method:
|
||||
|
||||
```py
|
||||
from diffusers import StableDiffusionPipeline
|
||||
|
||||
pipeline = StableDiffusionPipeline.from_single_file(
|
||||
pipeline = StableDiffusionPipeline.from_ckpt(
|
||||
"https://huggingface.co/WarriorMama777/OrangeMixs/blob/main/Models/AbyssOrangeMix/AbyssOrangeMix.safetensors"
|
||||
)
|
||||
```
|
||||
|
||||
@@ -12,8 +12,6 @@ specific language governing permissions and limitations under the License.
|
||||
|
||||
# Weighting prompts
|
||||
|
||||
[[open-in-colab]]
|
||||
|
||||
Text-guided diffusion models generate images based on a given text prompt. The text prompt
|
||||
can include multiple concepts that the model should generate and it's often desirable to weight
|
||||
certain parts of the prompt more or less.
|
||||
@@ -96,15 +94,5 @@ a try!
|
||||
If your favorite pipeline does not have a `prompt_embeds` input, please make sure to open an issue, the
|
||||
diffusers team tries to be as responsive as possible.
|
||||
|
||||
Compel 1.1.6 adds a utility class to simplify using textual inversions. Instantiate a `DiffusersTextualInversionManager` and pass it to Compel init:
|
||||
|
||||
```
|
||||
textual_inversion_manager = DiffusersTextualInversionManager(pipe)
|
||||
compel = Compel(
|
||||
tokenizer=pipe.tokenizer,
|
||||
text_encoder=pipe.text_encoder,
|
||||
textual_inversion_manager=textual_inversion_manager)
|
||||
```
|
||||
|
||||
Also, please check out the documentation of the [compel](https://github.com/damian0815/compel) library for
|
||||
more information.
|
||||
|
||||
@@ -42,63 +42,63 @@ To recreate the pipeline with the model and scheduler separately, let's write ou
|
||||
|
||||
1. Load the model and scheduler:
|
||||
|
||||
```py
|
||||
>>> from diffusers import DDPMScheduler, UNet2DModel
|
||||
```py
|
||||
>>> from diffusers import DDPMScheduler, UNet2DModel
|
||||
|
||||
>>> scheduler = DDPMScheduler.from_pretrained("google/ddpm-cat-256")
|
||||
>>> model = UNet2DModel.from_pretrained("google/ddpm-cat-256").to("cuda")
|
||||
```
|
||||
>>> scheduler = DDPMScheduler.from_pretrained("google/ddpm-cat-256")
|
||||
>>> model = UNet2DModel.from_pretrained("google/ddpm-cat-256").to("cuda")
|
||||
```
|
||||
|
||||
2. Set the number of timesteps to run the denoising process for:
|
||||
|
||||
```py
|
||||
>>> scheduler.set_timesteps(50)
|
||||
```
|
||||
```py
|
||||
>>> scheduler.set_timesteps(50)
|
||||
```
|
||||
|
||||
3. Setting the scheduler timesteps creates a tensor with evenly spaced elements in it, 50 in this example. Each element corresponds to a timestep at which the model denoises an image. When you create the denoising loop later, you'll iterate over this tensor to denoise an image:
|
||||
|
||||
```py
|
||||
>>> scheduler.timesteps
|
||||
tensor([980, 960, 940, 920, 900, 880, 860, 840, 820, 800, 780, 760, 740, 720,
|
||||
700, 680, 660, 640, 620, 600, 580, 560, 540, 520, 500, 480, 460, 440,
|
||||
420, 400, 380, 360, 340, 320, 300, 280, 260, 240, 220, 200, 180, 160,
|
||||
140, 120, 100, 80, 60, 40, 20, 0])
|
||||
```
|
||||
|
||||
4. Create some random noise with the same shape as the desired output:
|
||||
|
||||
```py
|
||||
>>> import torch
|
||||
```py
|
||||
>>> import torch
|
||||
|
||||
>>> sample_size = model.config.sample_size
|
||||
>>> noise = torch.randn((1, 3, sample_size, sample_size)).to("cuda")
|
||||
```
|
||||
>>> sample_size = model.config.sample_size
|
||||
>>> noise = torch.randn((1, 3, sample_size, sample_size)).to("cuda")
|
||||
```
|
||||
|
||||
5. Now write a loop to iterate over the timesteps. At each timestep, the model does a [`UNet2DModel.forward`] pass and returns the noisy residual. The scheduler's [`~DDPMScheduler.step`] method takes the noisy residual, timestep, and input and it predicts the image at the previous timestep. This output becomes the next input to the model in the denoising loop, and it'll repeat until it reaches the end of the `timesteps` array.
|
||||
4. Now write a loop to iterate over the timesteps. At each timestep, the model does a [`UNet2DModel.forward`] pass and returns the noisy residual. The scheduler's [`~DDPMScheduler.step`] method takes the noisy residual, timestep, and input and it predicts the image at the previous timestep. This output becomes the next input to the model in the denoising loop, and it'll repeat until it reaches the end of the `timesteps` array.
|
||||
|
||||
```py
|
||||
>>> input = noise
|
||||
```py
|
||||
>>> input = noise
|
||||
|
||||
>>> for t in scheduler.timesteps:
|
||||
... with torch.no_grad():
|
||||
... noisy_residual = model(input, t).sample
|
||||
... previous_noisy_sample = scheduler.step(noisy_residual, t, input).prev_sample
|
||||
... input = previous_noisy_sample
|
||||
```
|
||||
>>> for t in scheduler.timesteps:
|
||||
... with torch.no_grad():
|
||||
... noisy_residual = model(input, t).sample
|
||||
... previous_noisy_sample = scheduler.step(noisy_residual, t, input).prev_sample
|
||||
... input = previous_noisy_sample
|
||||
```
|
||||
|
||||
This is the entire denoising process, and you can use this same pattern to write any diffusion system.
|
||||
This is the entire denoising process, and you can use this same pattern to write any diffusion system.
|
||||
|
||||
6. The last step is to convert the denoised output into an image:
|
||||
5. The last step is to convert the denoised output into an image:
|
||||
|
||||
```py
|
||||
>>> from PIL import Image
|
||||
>>> import numpy as np
|
||||
```py
|
||||
>>> from PIL import Image
|
||||
>>> import numpy as np
|
||||
|
||||
>>> image = (input / 2 + 0.5).clamp(0, 1)
|
||||
>>> image = image.cpu().permute(0, 2, 3, 1).numpy()[0]
|
||||
>>> image = Image.fromarray((image * 255).round().astype("uint8"))
|
||||
>>> image
|
||||
```
|
||||
>>> image = (input / 2 + 0.5).clamp(0, 1)
|
||||
>>> image = image.cpu().permute(0, 2, 3, 1).numpy()[0]
|
||||
>>> image = Image.fromarray((image * 255).round().astype("uint8"))
|
||||
>>> image
|
||||
```
|
||||
|
||||
In the next section, you'll put your skills to the test and breakdown the more complex Stable Diffusion pipeline. The steps are more or less the same. You'll initialize the necessary components, and set the number of timesteps to create a `timestep` array. The `timestep` array is used in the denoising loop, and for each element in this array, the model predicts a less noisy image. The denoising loop iterates over the `timestep`'s, and at each timestep, it outputs a noisy residual and the scheduler uses it to predict a less noisy image at the previous timestep. This process is repeated until you reach the end of the `timestep` array.
|
||||
|
||||
@@ -286,5 +286,5 @@ This is really what 🧨 Diffusers is designed for: to make it intuitive and eas
|
||||
|
||||
For your next steps, feel free to:
|
||||
|
||||
* Learn how to [build and contribute a pipeline](contribute_pipeline) to 🧨 Diffusers. We can't wait and see what you'll come up with!
|
||||
* Explore [existing pipelines](../api/pipelines/overview) in the library, and see if you can deconstruct and build a pipeline from scratch using the models and schedulers separately.
|
||||
* Learn how to [build and contribute a pipeline](using-diffusers/#contribute_pipeline) to 🧨 Diffusers. We can't wait and see what you'll come up with!
|
||||
* Explore [existing pipelines](./api/pipelines/overview) in the library, and see if you can deconstruct and build a pipeline from scratch using the models and schedulers separately.
|
||||
|
||||
@@ -8,69 +8,14 @@
|
||||
- local: installation
|
||||
title: "설치"
|
||||
title: "시작하기"
|
||||
- sections:
|
||||
- local: tutorials/tutorial_overview
|
||||
title: 개요
|
||||
- local: using-diffusers/write_own_pipeline
|
||||
title: 모델과 스케줄러 이해하기
|
||||
- local: tutorials/basic_training
|
||||
title: Diffusion 모델 학습하기
|
||||
title: Tutorials
|
||||
|
||||
- sections:
|
||||
- sections:
|
||||
- local: in_translation
|
||||
title: 개요
|
||||
- local: using-diffusers/loading
|
||||
title: 파이프라인, 모델, 스케줄러 불러오기
|
||||
- local: using-diffusers/schedulers
|
||||
title: 다른 스케줄러들을 가져오고 비교하기
|
||||
- local: using-diffusers/custom_pipeline_overview
|
||||
title: 커뮤니티 파이프라인 불러오기
|
||||
- local: using-diffusers/using_safetensors
|
||||
title: 세이프텐서 불러오기
|
||||
- local: using-diffusers/other-formats
|
||||
title: 다른 형식의 Stable Diffusion 불러오기
|
||||
title: 불러오기 & 허브
|
||||
- sections:
|
||||
- local: using-diffusers/pipeline_overview
|
||||
title: 개요
|
||||
- local: using-diffusers/unconditional_image_generation
|
||||
- local: in_translation
|
||||
title: Unconditional 이미지 생성
|
||||
- local: in_translation
|
||||
title: Text-to-image 생성
|
||||
- local: using-diffusers/img2img
|
||||
title: Text-guided image-to-image
|
||||
- local: using-diffusers/inpaint
|
||||
title: Text-guided 이미지 인페인팅
|
||||
- local: using-diffusers/depth2img
|
||||
title: Text-guided depth-to-image
|
||||
- local: in_translation
|
||||
title: Textual inversion
|
||||
- local: in_translation
|
||||
title: 여러 GPU를 사용한 분산 추론
|
||||
- local: using-diffusers/reusing_seeds
|
||||
title: Deterministic 생성으로 이미지 퀄리티 높이기
|
||||
- local: in_translation
|
||||
title: 재현 가능한 파이프라인 생성하기
|
||||
- local: using-diffusers/custom_pipeline_examples
|
||||
title: 커뮤니티 파이프라인들
|
||||
- local: in_translation
|
||||
title: 커뮤티니 파이프라인에 기여하는 방법
|
||||
- local: in_translation
|
||||
title: JAX/Flax에서의 Stable Diffusion
|
||||
- local: in_translation
|
||||
title: Weighting Prompts
|
||||
title: 추론을 위한 파이프라인
|
||||
- sections:
|
||||
- local: training/overview
|
||||
title: 개요
|
||||
- local: in_translation
|
||||
title: 학습을 위한 데이터셋 생성하기
|
||||
- local: training/adapt_a_model
|
||||
title: 새로운 태스크에 모델 적용하기
|
||||
- local: training/unconditional_training
|
||||
title: Unconditional 이미지 생성
|
||||
- local: training/text_inversion
|
||||
title: Textual Inversion
|
||||
- local: training/dreambooth
|
||||
title: DreamBooth
|
||||
@@ -82,16 +27,13 @@
|
||||
title: ControlNet
|
||||
- local: in_translation
|
||||
title: InstructPix2Pix 학습
|
||||
- local: in_translation
|
||||
title: Custom Diffusion
|
||||
title: Training
|
||||
title: Diffusers 사용하기
|
||||
title: 학습
|
||||
- sections:
|
||||
- local: optimization/opt_overview
|
||||
- local: in_translation
|
||||
title: 개요
|
||||
- local: optimization/fp16
|
||||
title: 메모리와 속도
|
||||
- local: optimization/torch2.0
|
||||
- local: in_translation
|
||||
title: Torch2.0 지원
|
||||
- local: optimization/xformers
|
||||
title: xFormers
|
||||
@@ -99,12 +41,8 @@
|
||||
title: ONNX
|
||||
- local: optimization/open_vino
|
||||
title: OpenVINO
|
||||
- local: in_translation
|
||||
title: Core ML
|
||||
- local: optimization/mps
|
||||
title: MPS
|
||||
- local: optimization/habana
|
||||
title: Habana Gaudi
|
||||
- local: in_translation
|
||||
title: Token Merging
|
||||
title: 최적화/특수 하드웨어
|
||||
title: 최적화/특수 하드웨어
|
||||
@@ -59,7 +59,7 @@ torch.backends.cuda.matmul.allow_tf32 = True
|
||||
|
||||
## 반정밀도 가중치
|
||||
|
||||
더 많은 GPU 메모리를 절약하고 더 빠른 속도를 얻기 위해 모델 가중치를 반정밀도(half precision)로 직접 불러오고 실행할 수 있습니다.
|
||||
더 많은 GPU 메모리를 절약하고 더 빠른 속도를 얻기 위해 모델 가중치를 반정밀도(half precision)로 직접 로드하고 실행할 수 있습니다.
|
||||
여기에는 `fp16`이라는 브랜치에 저장된 float16 버전의 가중치를 불러오고, 그 때 `float16` 유형을 사용하도록 PyTorch에 지시하는 작업이 포함됩니다.
|
||||
|
||||
```Python
|
||||
|
||||
@@ -1,17 +0,0 @@
|
||||
<!--Copyright 2023 The HuggingFace Team. All rights reserved.
|
||||
|
||||
Licensed under the Apache License, Version 2.0 (the "License"); you may not use this file except in compliance with
|
||||
the License. You may obtain a copy of the License at
|
||||
|
||||
http://www.apache.org/licenses/LICENSE-2.0
|
||||
|
||||
Unless required by applicable law or agreed to in writing, software distributed under the License is distributed on
|
||||
an "AS IS" BASIS, WITHOUT WARRANTIES OR CONDITIONS OF ANY KIND, either express or implied. See the License for the
|
||||
specific language governing permissions and limitations under the License.
|
||||
-->
|
||||
|
||||
# 개요
|
||||
|
||||
노이즈가 많은 출력에서 적은 출력으로 만드는 과정으로 고품질 생성 모델의 출력을 만드는 각각의 반복되는 스텝은 많은 계산이 필요합니다. 🧨 Diffuser의 목표 중 하나는 모든 사람이 이 기술을 널리 이용할 수 있도록 하는 것이며, 여기에는 소비자 및 특수 하드웨어에서 빠른 추론을 가능하게 하는 것을 포함합니다.
|
||||
|
||||
이 섹션에서는 추론 속도를 최적화하고 메모리 소비를 줄이기 위한 반정밀(half-precision) 가중치 및 sliced attention과 같은 팁과 요령을 다룹니다. 또한 [`torch.compile`](https://pytorch.org/tutorials/intermediate/torch_compile_tutorial.html) 또는 [ONNX Runtime](https://onnxruntime.ai/docs/)을 사용하여 PyTorch 코드의 속도를 높이고, [xFormers](https://facebookresearch.github.io/xformers/)를 사용하여 memory-efficient attention을 활성화하는 방법을 배울 수 있습니다. Apple Silicon, Intel 또는 Habana 프로세서와 같은 특정 하드웨어에서 추론을 실행하기 위한 가이드도 있습니다.
|
||||
@@ -1,445 +0,0 @@
|
||||
<!--Copyright 2023 The HuggingFace Team. All rights reserved.
|
||||
|
||||
Licensed under the Apache License, Version 2.0 (the "License"); you may not use this file except in compliance with
|
||||
the License. You may obtain a copy of the License at
|
||||
|
||||
http://www.apache.org/licenses/LICENSE-2.0
|
||||
|
||||
Unless required by applicable law or agreed to in writing, software distributed under the License is distributed on
|
||||
an "AS IS" BASIS, WITHOUT WARRANTIES OR CONDITIONS OF ANY KIND, either express or implied. See the License for the
|
||||
specific language governing permissions and limitations under the License.
|
||||
-->
|
||||
|
||||
# Diffusers에서의 PyTorch 2.0 가속화 지원
|
||||
|
||||
`0.13.0` 버전부터 Diffusers는 [PyTorch 2.0](https://pytorch.org/get-started/pytorch-2.0/)에서의 최신 최적화를 지원합니다. 이는 다음을 포함됩니다.
|
||||
1. momory-efficient attention을 사용한 가속화된 트랜스포머 지원 - `xformers`같은 추가적인 dependencies 필요 없음
|
||||
2. 추가 성능 향상을 위한 개별 모델에 대한 컴파일 기능 [torch.compile](https://pytorch.org/tutorials/intermediate/torch_compile_tutorial.html) 지원
|
||||
|
||||
|
||||
## 설치
|
||||
가속화된 어텐션 구현과 및 `torch.compile()`을 사용하기 위해, pip에서 최신 버전의 PyTorch 2.0을 설치되어 있고 diffusers 0.13.0. 버전 이상인지 확인하세요. 아래 설명된 바와 같이, PyTorch 2.0이 활성화되어 있을 때 diffusers는 최적화된 어텐션 프로세서([`AttnProcessor2_0`](https://github.com/huggingface/diffusers/blob/1a5797c6d4491a879ea5285c4efc377664e0332d/src/diffusers/models/attention_processor.py#L798))를 사용합니다.
|
||||
|
||||
```bash
|
||||
pip install --upgrade torch diffusers
|
||||
```
|
||||
|
||||
## 가속화된 트랜스포머와 `torch.compile` 사용하기.
|
||||
|
||||
|
||||
1. **가속화된 트랜스포머 구현**
|
||||
|
||||
PyTorch 2.0에는 [`torch.nn.functional.scaled_dot_product_attention`](https://pytorch.org/docs/master/generated/torch.nn.functional.scaled_dot_product_attention) 함수를 통해 최적화된 memory-efficient attention의 구현이 포함되어 있습니다. 이는 입력 및 GPU 유형에 따라 여러 최적화를 자동으로 활성화합니다. 이는 [xFormers](https://github.com/facebookresearch/xformers)의 `memory_efficient_attention`과 유사하지만 기본적으로 PyTorch에 내장되어 있습니다.
|
||||
|
||||
이러한 최적화는 PyTorch 2.0이 설치되어 있고 `torch.nn.functional.scaled_dot_product_attention`을 사용할 수 있는 경우 Diffusers에서 기본적으로 활성화됩니다. 이를 사용하려면 `torch 2.0`을 설치하고 파이프라인을 사용하기만 하면 됩니다. 예를 들어:
|
||||
|
||||
```Python
|
||||
import torch
|
||||
from diffusers import DiffusionPipeline
|
||||
|
||||
pipe = DiffusionPipeline.from_pretrained("runwayml/stable-diffusion-v1-5", torch_dtype=torch.float16)
|
||||
pipe = pipe.to("cuda")
|
||||
|
||||
prompt = "a photo of an astronaut riding a horse on mars"
|
||||
image = pipe(prompt).images[0]
|
||||
```
|
||||
|
||||
이를 명시적으로 활성화하려면(필수는 아님) 아래와 같이 수행할 수 있습니다.
|
||||
|
||||
```diff
|
||||
import torch
|
||||
from diffusers import DiffusionPipeline
|
||||
+ from diffusers.models.attention_processor import AttnProcessor2_0
|
||||
|
||||
pipe = DiffusionPipeline.from_pretrained("runwayml/stable-diffusion-v1-5", torch_dtype=torch.float16).to("cuda")
|
||||
+ pipe.unet.set_attn_processor(AttnProcessor2_0())
|
||||
|
||||
prompt = "a photo of an astronaut riding a horse on mars"
|
||||
image = pipe(prompt).images[0]
|
||||
```
|
||||
|
||||
이 실행 과정은 `xFormers`만큼 빠르고 메모리적으로 효율적이어야 합니다. 자세한 내용은 [벤치마크](#benchmark)에서 확인하세요.
|
||||
|
||||
파이프라인을 보다 deterministic으로 만들거나 파인 튜닝된 모델을 [Core ML](https://huggingface.co/docs/diffusers/v0.16.0/en/optimization/coreml#how-to-run-stable-diffusion-with-core-ml)과 같은 다른 형식으로 변환해야 하는 경우 바닐라 어텐션 프로세서 ([`AttnProcessor`](https://github.com/huggingface/diffusers/blob/1a5797c6d4491a879ea5285c4efc377664e0332d/src/diffusers/models/attention_processor.py#L402))로 되돌릴 수 있습니다. 일반 어텐션 프로세서를 사용하려면 [`~diffusers.UNet2DConditionModel.set_default_attn_processor`] 함수를 사용할 수 있습니다:
|
||||
|
||||
```Python
|
||||
import torch
|
||||
from diffusers import DiffusionPipeline
|
||||
from diffusers.models.attention_processor import AttnProcessor
|
||||
|
||||
pipe = DiffusionPipeline.from_pretrained("runwayml/stable-diffusion-v1-5", torch_dtype=torch.float16).to("cuda")
|
||||
pipe.unet.set_default_attn_processor()
|
||||
|
||||
prompt = "a photo of an astronaut riding a horse on mars"
|
||||
image = pipe(prompt).images[0]
|
||||
```
|
||||
|
||||
2. **torch.compile**
|
||||
|
||||
추가적인 속도 향상을 위해 새로운 `torch.compile` 기능을 사용할 수 있습니다. 파이프라인의 UNet은 일반적으로 계산 비용이 가장 크기 때문에 나머지 하위 모델(텍스트 인코더와 VAE)은 그대로 두고 `unet`을 `torch.compile`로 래핑합니다. 자세한 내용과 다른 옵션은 [torch 컴파일 문서](https://pytorch.org/tutorials/intermediate/torch_compile_tutorial.html)를 참조하세요.
|
||||
|
||||
```python
|
||||
pipe.unet = torch.compile(pipe.unet, mode="reduce-overhead", fullgraph=True)
|
||||
images = pipe(prompt, num_inference_steps=steps, num_images_per_prompt=batch_size).images
|
||||
```
|
||||
|
||||
GPU 유형에 따라 `compile()`은 가속화된 트랜스포머 최적화를 통해 **5% - 300%**의 _추가 성능 향상_을 얻을 수 있습니다. 그러나 컴파일은 Ampere(A100, 3090), Ada(4090) 및 Hopper(H100)와 같은 최신 GPU 아키텍처에서 더 많은 성능 향상을 가져올 수 있음을 참고하세요.
|
||||
|
||||
컴파일은 완료하는 데 약간의 시간이 걸리므로, 파이프라인을 한 번 준비한 다음 동일한 유형의 추론 작업을 여러 번 수행해야 하는 상황에 가장 적합합니다. 다른 이미지 크기에서 컴파일된 파이프라인을 호출하면 시간적 비용이 많이 들 수 있는 컴파일 작업이 다시 트리거됩니다.
|
||||
|
||||
|
||||
## 벤치마크
|
||||
|
||||
PyTorch 2.0의 효율적인 어텐션 구현과 `torch.compile`을 사용하여 가장 많이 사용되는 5개의 파이프라인에 대해 다양한 GPU와 배치 크기에 걸쳐 포괄적인 벤치마크를 수행했습니다. 여기서는 [`torch.compile()`이 최적으로 활용되도록 하는](https://github.com/huggingface/diffusers/pull/3313) `diffusers 0.17.0.dev0`을 사용했습니다.
|
||||
|
||||
### 벤치마킹 코드
|
||||
|
||||
#### Stable Diffusion text-to-image
|
||||
|
||||
```python
|
||||
from diffusers import DiffusionPipeline
|
||||
import torch
|
||||
|
||||
path = "runwayml/stable-diffusion-v1-5"
|
||||
|
||||
run_compile = True # Set True / False
|
||||
|
||||
pipe = DiffusionPipeline.from_pretrained(path, torch_dtype=torch.float16)
|
||||
pipe = pipe.to("cuda")
|
||||
pipe.unet.to(memory_format=torch.channels_last)
|
||||
|
||||
if run_compile:
|
||||
print("Run torch compile")
|
||||
pipe.unet = torch.compile(pipe.unet, mode="reduce-overhead", fullgraph=True)
|
||||
|
||||
prompt = "ghibli style, a fantasy landscape with castles"
|
||||
|
||||
for _ in range(3):
|
||||
images = pipe(prompt=prompt).images
|
||||
```
|
||||
|
||||
#### Stable Diffusion image-to-image
|
||||
|
||||
```python
|
||||
from diffusers import StableDiffusionImg2ImgPipeline
|
||||
import requests
|
||||
import torch
|
||||
from PIL import Image
|
||||
from io import BytesIO
|
||||
|
||||
url = "https://raw.githubusercontent.com/CompVis/stable-diffusion/main/assets/stable-samples/img2img/sketch-mountains-input.jpg"
|
||||
|
||||
response = requests.get(url)
|
||||
init_image = Image.open(BytesIO(response.content)).convert("RGB")
|
||||
init_image = init_image.resize((512, 512))
|
||||
|
||||
path = "runwayml/stable-diffusion-v1-5"
|
||||
|
||||
run_compile = True # Set True / False
|
||||
|
||||
pipe = StableDiffusionImg2ImgPipeline.from_pretrained(path, torch_dtype=torch.float16)
|
||||
pipe = pipe.to("cuda")
|
||||
pipe.unet.to(memory_format=torch.channels_last)
|
||||
|
||||
if run_compile:
|
||||
print("Run torch compile")
|
||||
pipe.unet = torch.compile(pipe.unet, mode="reduce-overhead", fullgraph=True)
|
||||
|
||||
prompt = "ghibli style, a fantasy landscape with castles"
|
||||
|
||||
for _ in range(3):
|
||||
image = pipe(prompt=prompt, image=init_image).images[0]
|
||||
```
|
||||
|
||||
#### Stable Diffusion - inpainting
|
||||
|
||||
```python
|
||||
from diffusers import StableDiffusionInpaintPipeline
|
||||
import requests
|
||||
import torch
|
||||
from PIL import Image
|
||||
from io import BytesIO
|
||||
|
||||
url = "https://raw.githubusercontent.com/CompVis/stable-diffusion/main/assets/stable-samples/img2img/sketch-mountains-input.jpg"
|
||||
|
||||
def download_image(url):
|
||||
response = requests.get(url)
|
||||
return Image.open(BytesIO(response.content)).convert("RGB")
|
||||
|
||||
|
||||
img_url = "https://raw.githubusercontent.com/CompVis/latent-diffusion/main/data/inpainting_examples/overture-creations-5sI6fQgYIuo.png"
|
||||
mask_url = "https://raw.githubusercontent.com/CompVis/latent-diffusion/main/data/inpainting_examples/overture-creations-5sI6fQgYIuo_mask.png"
|
||||
|
||||
init_image = download_image(img_url).resize((512, 512))
|
||||
mask_image = download_image(mask_url).resize((512, 512))
|
||||
|
||||
path = "runwayml/stable-diffusion-inpainting"
|
||||
|
||||
run_compile = True # Set True / False
|
||||
|
||||
pipe = StableDiffusionInpaintPipeline.from_pretrained(path, torch_dtype=torch.float16)
|
||||
pipe = pipe.to("cuda")
|
||||
pipe.unet.to(memory_format=torch.channels_last)
|
||||
|
||||
if run_compile:
|
||||
print("Run torch compile")
|
||||
pipe.unet = torch.compile(pipe.unet, mode="reduce-overhead", fullgraph=True)
|
||||
|
||||
prompt = "ghibli style, a fantasy landscape with castles"
|
||||
|
||||
for _ in range(3):
|
||||
image = pipe(prompt=prompt, image=init_image, mask_image=mask_image).images[0]
|
||||
```
|
||||
|
||||
#### ControlNet
|
||||
|
||||
```python
|
||||
from diffusers import StableDiffusionControlNetPipeline, ControlNetModel
|
||||
import requests
|
||||
import torch
|
||||
from PIL import Image
|
||||
from io import BytesIO
|
||||
|
||||
url = "https://raw.githubusercontent.com/CompVis/stable-diffusion/main/assets/stable-samples/img2img/sketch-mountains-input.jpg"
|
||||
|
||||
response = requests.get(url)
|
||||
init_image = Image.open(BytesIO(response.content)).convert("RGB")
|
||||
init_image = init_image.resize((512, 512))
|
||||
|
||||
path = "runwayml/stable-diffusion-v1-5"
|
||||
|
||||
run_compile = True # Set True / False
|
||||
controlnet = ControlNetModel.from_pretrained("lllyasviel/sd-controlnet-canny", torch_dtype=torch.float16)
|
||||
pipe = StableDiffusionControlNetPipeline.from_pretrained(
|
||||
path, controlnet=controlnet, torch_dtype=torch.float16
|
||||
)
|
||||
|
||||
pipe = pipe.to("cuda")
|
||||
pipe.unet.to(memory_format=torch.channels_last)
|
||||
pipe.controlnet.to(memory_format=torch.channels_last)
|
||||
|
||||
if run_compile:
|
||||
print("Run torch compile")
|
||||
pipe.unet = torch.compile(pipe.unet, mode="reduce-overhead", fullgraph=True)
|
||||
pipe.controlnet = torch.compile(pipe.controlnet, mode="reduce-overhead", fullgraph=True)
|
||||
|
||||
prompt = "ghibli style, a fantasy landscape with castles"
|
||||
|
||||
for _ in range(3):
|
||||
image = pipe(prompt=prompt, image=init_image).images[0]
|
||||
```
|
||||
|
||||
#### IF text-to-image + upscaling
|
||||
|
||||
```python
|
||||
from diffusers import DiffusionPipeline
|
||||
import torch
|
||||
|
||||
run_compile = True # Set True / False
|
||||
|
||||
pipe = DiffusionPipeline.from_pretrained("DeepFloyd/IF-I-M-v1.0", variant="fp16", text_encoder=None, torch_dtype=torch.float16)
|
||||
pipe.to("cuda")
|
||||
pipe_2 = DiffusionPipeline.from_pretrained("DeepFloyd/IF-II-M-v1.0", variant="fp16", text_encoder=None, torch_dtype=torch.float16)
|
||||
pipe_2.to("cuda")
|
||||
pipe_3 = DiffusionPipeline.from_pretrained("stabilityai/stable-diffusion-x4-upscaler", torch_dtype=torch.float16)
|
||||
pipe_3.to("cuda")
|
||||
|
||||
|
||||
pipe.unet.to(memory_format=torch.channels_last)
|
||||
pipe_2.unet.to(memory_format=torch.channels_last)
|
||||
pipe_3.unet.to(memory_format=torch.channels_last)
|
||||
|
||||
if run_compile:
|
||||
pipe.unet = torch.compile(pipe.unet, mode="reduce-overhead", fullgraph=True)
|
||||
pipe_2.unet = torch.compile(pipe_2.unet, mode="reduce-overhead", fullgraph=True)
|
||||
pipe_3.unet = torch.compile(pipe_3.unet, mode="reduce-overhead", fullgraph=True)
|
||||
|
||||
prompt = "the blue hulk"
|
||||
|
||||
prompt_embeds = torch.randn((1, 2, 4096), dtype=torch.float16)
|
||||
neg_prompt_embeds = torch.randn((1, 2, 4096), dtype=torch.float16)
|
||||
|
||||
for _ in range(3):
|
||||
image = pipe(prompt_embeds=prompt_embeds, negative_prompt_embeds=neg_prompt_embeds, output_type="pt").images
|
||||
image_2 = pipe_2(image=image, prompt_embeds=prompt_embeds, negative_prompt_embeds=neg_prompt_embeds, output_type="pt").images
|
||||
image_3 = pipe_3(prompt=prompt, image=image, noise_level=100).images
|
||||
```
|
||||
|
||||
PyTorch 2.0 및 `torch.compile()`로 얻을 수 있는 가능한 속도 향상에 대해, [Stable Diffusion text-to-image pipeline](StableDiffusionPipeline)에 대한 상대적인 속도 향상을 보여주는 차트를 5개의 서로 다른 GPU 제품군(배치 크기 4)에 대해 나타냅니다:
|
||||
|
||||
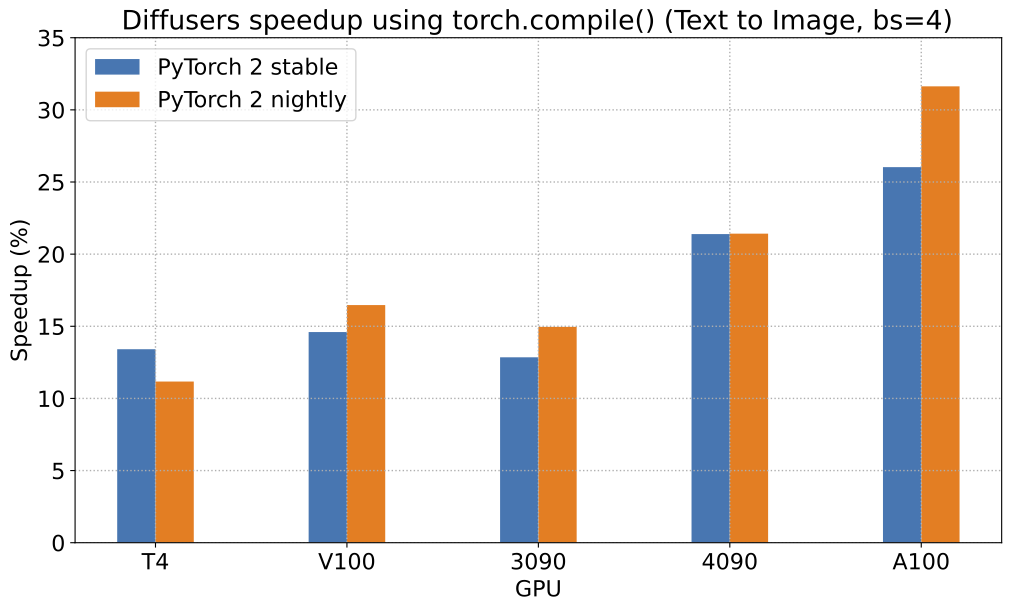
|
||||
|
||||
To give you an even better idea of how this speed-up holds for the other pipelines presented above, consider the following
|
||||
plot that shows the benchmarking numbers from an A100 across three different batch sizes
|
||||
(with PyTorch 2.0 nightly and `torch.compile()`):
|
||||
이 속도 향상이 위에 제시된 다른 파이프라인에 대해서도 어떻게 유지되는지 더 잘 이해하기 위해, 세 가지의 다른 배치 크기에 걸쳐 A100의 벤치마킹(PyTorch 2.0 nightly 및 `torch.compile() 사용) 수치를 보여주는 차트를 보입니다:
|
||||
|
||||
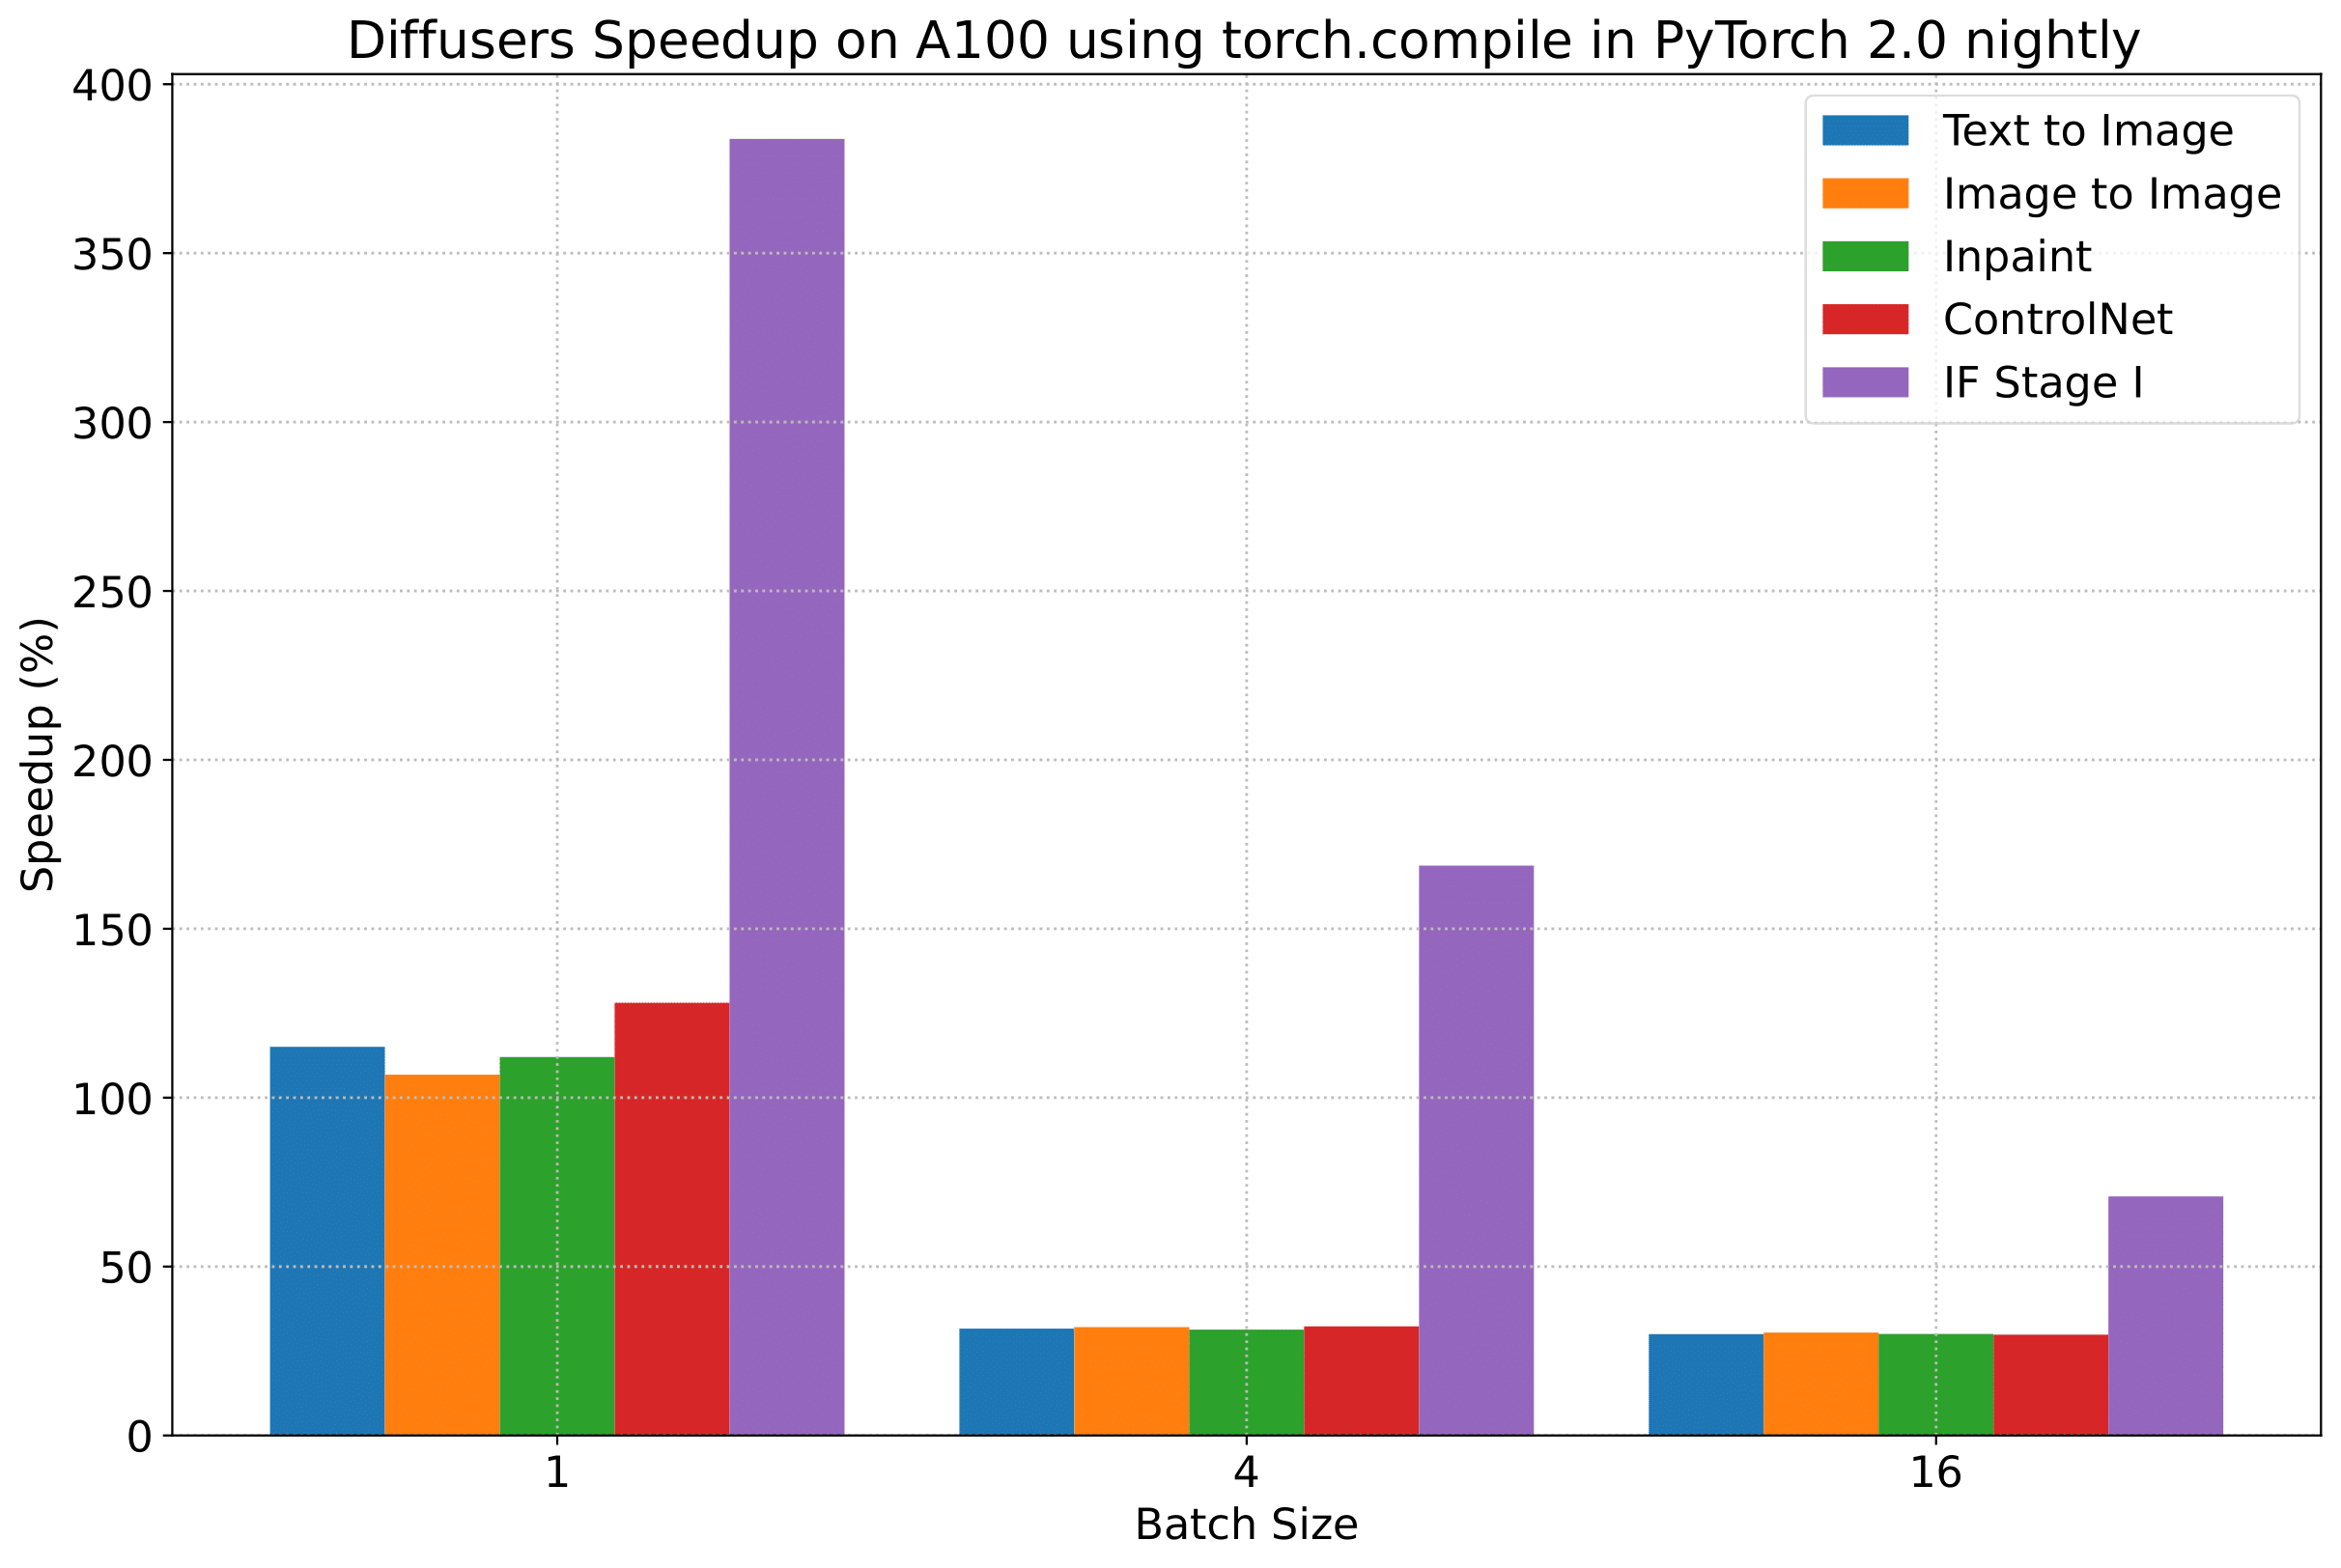
|
||||
|
||||
_(위 차트의 벤치마크 메트릭은 **초당 iteration 수(iterations/second)**입니다)_
|
||||
|
||||
그러나 투명성을 위해 모든 벤치마킹 수치를 공개합니다!
|
||||
|
||||
다음 표들에서는, **_초당 처리되는 iteration_** 수 측면에서의 결과를 보여줍니다.
|
||||
|
||||
### A100 (batch size: 1)
|
||||
|
||||
| **Pipeline** | **torch 2.0 - <br>no compile** | **torch nightly - <br>no compile** | **torch 2.0 - <br>compile** | **torch nightly - <br>compile** |
|
||||
|:---:|:---:|:---:|:---:|:---:|
|
||||
| SD - txt2img | 21.66 | 23.13 | 44.03 | 49.74 |
|
||||
| SD - img2img | 21.81 | 22.40 | 43.92 | 46.32 |
|
||||
| SD - inpaint | 22.24 | 23.23 | 43.76 | 49.25 |
|
||||
| SD - controlnet | 15.02 | 15.82 | 32.13 | 36.08 |
|
||||
| IF | 20.21 / <br>13.84 / <br>24.00 | 20.12 / <br>13.70 / <br>24.03 | ❌ | 97.34 / <br>27.23 / <br>111.66 |
|
||||
|
||||
### A100 (batch size: 4)
|
||||
|
||||
| **Pipeline** | **torch 2.0 - <br>no compile** | **torch nightly - <br>no compile** | **torch 2.0 - <br>compile** | **torch nightly - <br>compile** |
|
||||
|:---:|:---:|:---:|:---:|:---:|
|
||||
| SD - txt2img | 11.6 | 13.12 | 14.62 | 17.27 |
|
||||
| SD - img2img | 11.47 | 13.06 | 14.66 | 17.25 |
|
||||
| SD - inpaint | 11.67 | 13.31 | 14.88 | 17.48 |
|
||||
| SD - controlnet | 8.28 | 9.38 | 10.51 | 12.41 |
|
||||
| IF | 25.02 | 18.04 | ❌ | 48.47 |
|
||||
|
||||
### A100 (batch size: 16)
|
||||
|
||||
| **Pipeline** | **torch 2.0 - <br>no compile** | **torch nightly - <br>no compile** | **torch 2.0 - <br>compile** | **torch nightly - <br>compile** |
|
||||
|:---:|:---:|:---:|:---:|:---:|
|
||||
| SD - txt2img | 3.04 | 3.6 | 3.83 | 4.68 |
|
||||
| SD - img2img | 2.98 | 3.58 | 3.83 | 4.67 |
|
||||
| SD - inpaint | 3.04 | 3.66 | 3.9 | 4.76 |
|
||||
| SD - controlnet | 2.15 | 2.58 | 2.74 | 3.35 |
|
||||
| IF | 8.78 | 9.82 | ❌ | 16.77 |
|
||||
|
||||
### V100 (batch size: 1)
|
||||
|
||||
| **Pipeline** | **torch 2.0 - <br>no compile** | **torch nightly - <br>no compile** | **torch 2.0 - <br>compile** | **torch nightly - <br>compile** |
|
||||
|:---:|:---:|:---:|:---:|:---:|
|
||||
| SD - txt2img | 18.99 | 19.14 | 20.95 | 22.17 |
|
||||
| SD - img2img | 18.56 | 19.18 | 20.95 | 22.11 |
|
||||
| SD - inpaint | 19.14 | 19.06 | 21.08 | 22.20 |
|
||||
| SD - controlnet | 13.48 | 13.93 | 15.18 | 15.88 |
|
||||
| IF | 20.01 / <br>9.08 / <br>23.34 | 19.79 / <br>8.98 / <br>24.10 | ❌ | 55.75 / <br>11.57 / <br>57.67 |
|
||||
|
||||
### V100 (batch size: 4)
|
||||
|
||||
| **Pipeline** | **torch 2.0 - <br>no compile** | **torch nightly - <br>no compile** | **torch 2.0 - <br>compile** | **torch nightly - <br>compile** |
|
||||
|:---:|:---:|:---:|:---:|:---:|
|
||||
| SD - txt2img | 5.96 | 5.89 | 6.83 | 6.86 |
|
||||
| SD - img2img | 5.90 | 5.91 | 6.81 | 6.82 |
|
||||
| SD - inpaint | 5.99 | 6.03 | 6.93 | 6.95 |
|
||||
| SD - controlnet | 4.26 | 4.29 | 4.92 | 4.93 |
|
||||
| IF | 15.41 | 14.76 | ❌ | 22.95 |
|
||||
|
||||
### V100 (batch size: 16)
|
||||
|
||||
| **Pipeline** | **torch 2.0 - <br>no compile** | **torch nightly - <br>no compile** | **torch 2.0 - <br>compile** | **torch nightly - <br>compile** |
|
||||
|:---:|:---:|:---:|:---:|:---:|
|
||||
| SD - txt2img | 1.66 | 1.66 | 1.92 | 1.90 |
|
||||
| SD - img2img | 1.65 | 1.65 | 1.91 | 1.89 |
|
||||
| SD - inpaint | 1.69 | 1.69 | 1.95 | 1.93 |
|
||||
| SD - controlnet | 1.19 | 1.19 | OOM after warmup | 1.36 |
|
||||
| IF | 5.43 | 5.29 | ❌ | 7.06 |
|
||||
|
||||
### T4 (batch size: 1)
|
||||
|
||||
| **Pipeline** | **torch 2.0 - <br>no compile** | **torch nightly - <br>no compile** | **torch 2.0 - <br>compile** | **torch nightly - <br>compile** |
|
||||
|:---:|:---:|:---:|:---:|:---:|
|
||||
| SD - txt2img | 6.9 | 6.95 | 7.3 | 7.56 |
|
||||
| SD - img2img | 6.84 | 6.99 | 7.04 | 7.55 |
|
||||
| SD - inpaint | 6.91 | 6.7 | 7.01 | 7.37 |
|
||||
| SD - controlnet | 4.89 | 4.86 | 5.35 | 5.48 |
|
||||
| IF | 17.42 / <br>2.47 / <br>18.52 | 16.96 / <br>2.45 / <br>18.69 | ❌ | 24.63 / <br>2.47 / <br>23.39 |
|
||||
|
||||
### T4 (batch size: 4)
|
||||
|
||||
| **Pipeline** | **torch 2.0 - <br>no compile** | **torch nightly - <br>no compile** | **torch 2.0 - <br>compile** | **torch nightly - <br>compile** |
|
||||
|:---:|:---:|:---:|:---:|:---:|
|
||||
| SD - txt2img | 1.79 | 1.79 | 2.03 | 1.99 |
|
||||
| SD - img2img | 1.77 | 1.77 | 2.05 | 2.04 |
|
||||
| SD - inpaint | 1.81 | 1.82 | 2.09 | 2.09 |
|
||||
| SD - controlnet | 1.34 | 1.27 | 1.47 | 1.46 |
|
||||
| IF | 5.79 | 5.61 | ❌ | 7.39 |
|
||||
|
||||
### T4 (batch size: 16)
|
||||
|
||||
| **Pipeline** | **torch 2.0 - <br>no compile** | **torch nightly - <br>no compile** | **torch 2.0 - <br>compile** | **torch nightly - <br>compile** |
|
||||
|:---:|:---:|:---:|:---:|:---:|
|
||||
| SD - txt2img | 2.34s | 2.30s | OOM after 2nd iteration | 1.99s |
|
||||
| SD - img2img | 2.35s | 2.31s | OOM after warmup | 2.00s |
|
||||
| SD - inpaint | 2.30s | 2.26s | OOM after 2nd iteration | 1.95s |
|
||||
| SD - controlnet | OOM after 2nd iteration | OOM after 2nd iteration | OOM after warmup | OOM after warmup |
|
||||
| IF * | 1.44 | 1.44 | ❌ | 1.94 |
|
||||
|
||||
### RTX 3090 (batch size: 1)
|
||||
|
||||
| **Pipeline** | **torch 2.0 - <br>no compile** | **torch nightly - <br>no compile** | **torch 2.0 - <br>compile** | **torch nightly - <br>compile** |
|
||||
|:---:|:---:|:---:|:---:|:---:|
|
||||
| SD - txt2img | 22.56 | 22.84 | 23.84 | 25.69 |
|
||||
| SD - img2img | 22.25 | 22.61 | 24.1 | 25.83 |
|
||||
| SD - inpaint | 22.22 | 22.54 | 24.26 | 26.02 |
|
||||
| SD - controlnet | 16.03 | 16.33 | 17.38 | 18.56 |
|
||||
| IF | 27.08 / <br>9.07 / <br>31.23 | 26.75 / <br>8.92 / <br>31.47 | ❌ | 68.08 / <br>11.16 / <br>65.29 |
|
||||
|
||||
### RTX 3090 (batch size: 4)
|
||||
|
||||
| **Pipeline** | **torch 2.0 - <br>no compile** | **torch nightly - <br>no compile** | **torch 2.0 - <br>compile** | **torch nightly - <br>compile** |
|
||||
|:---:|:---:|:---:|:---:|:---:|
|
||||
| SD - txt2img | 6.46 | 6.35 | 7.29 | 7.3 |
|
||||
| SD - img2img | 6.33 | 6.27 | 7.31 | 7.26 |
|
||||
| SD - inpaint | 6.47 | 6.4 | 7.44 | 7.39 |
|
||||
| SD - controlnet | 4.59 | 4.54 | 5.27 | 5.26 |
|
||||
| IF | 16.81 | 16.62 | ❌ | 21.57 |
|
||||
|
||||
### RTX 3090 (batch size: 16)
|
||||
|
||||
| **Pipeline** | **torch 2.0 - <br>no compile** | **torch nightly - <br>no compile** | **torch 2.0 - <br>compile** | **torch nightly - <br>compile** |
|
||||
|:---:|:---:|:---:|:---:|:---:|
|
||||
| SD - txt2img | 1.7 | 1.69 | 1.93 | 1.91 |
|
||||
| SD - img2img | 1.68 | 1.67 | 1.93 | 1.9 |
|
||||
| SD - inpaint | 1.72 | 1.71 | 1.97 | 1.94 |
|
||||
| SD - controlnet | 1.23 | 1.22 | 1.4 | 1.38 |
|
||||
| IF | 5.01 | 5.00 | ❌ | 6.33 |
|
||||
|
||||
### RTX 4090 (batch size: 1)
|
||||
|
||||
| **Pipeline** | **torch 2.0 - <br>no compile** | **torch nightly - <br>no compile** | **torch 2.0 - <br>compile** | **torch nightly - <br>compile** |
|
||||
|:---:|:---:|:---:|:---:|:---:|
|
||||
| SD - txt2img | 40.5 | 41.89 | 44.65 | 49.81 |
|
||||
| SD - img2img | 40.39 | 41.95 | 44.46 | 49.8 |
|
||||
| SD - inpaint | 40.51 | 41.88 | 44.58 | 49.72 |
|
||||
| SD - controlnet | 29.27 | 30.29 | 32.26 | 36.03 |
|
||||
| IF | 69.71 / <br>18.78 / <br>85.49 | 69.13 / <br>18.80 / <br>85.56 | ❌ | 124.60 / <br>26.37 / <br>138.79 |
|
||||
|
||||
### RTX 4090 (batch size: 4)
|
||||
|
||||
| **Pipeline** | **torch 2.0 - <br>no compile** | **torch nightly - <br>no compile** | **torch 2.0 - <br>compile** | **torch nightly - <br>compile** |
|
||||
|:---:|:---:|:---:|:---:|:---:|
|
||||
| SD - txt2img | 12.62 | 12.84 | 15.32 | 15.59 |
|
||||
| SD - img2img | 12.61 | 12,.79 | 15.35 | 15.66 |
|
||||
| SD - inpaint | 12.65 | 12.81 | 15.3 | 15.58 |
|
||||
| SD - controlnet | 9.1 | 9.25 | 11.03 | 11.22 |
|
||||
| IF | 31.88 | 31.14 | ❌ | 43.92 |
|
||||
|
||||
### RTX 4090 (batch size: 16)
|
||||
|
||||
| **Pipeline** | **torch 2.0 - <br>no compile** | **torch nightly - <br>no compile** | **torch 2.0 - <br>compile** | **torch nightly - <br>compile** |
|
||||
|:---:|:---:|:---:|:---:|:---:|
|
||||
| SD - txt2img | 3.17 | 3.2 | 3.84 | 3.85 |
|
||||
| SD - img2img | 3.16 | 3.2 | 3.84 | 3.85 |
|
||||
| SD - inpaint | 3.17 | 3.2 | 3.85 | 3.85 |
|
||||
| SD - controlnet | 2.23 | 2.3 | 2.7 | 2.75 |
|
||||
| IF | 9.26 | 9.2 | ❌ | 13.31 |
|
||||
|
||||
## 참고
|
||||
|
||||
* Follow [this PR](https://github.com/huggingface/diffusers/pull/3313) for more details on the environment used for conducting the benchmarks.
|
||||
* For the IF pipeline and batch sizes > 1, we only used a batch size of >1 in the first IF pipeline for text-to-image generation and NOT for upscaling. So, that means the two upscaling pipelines received a batch size of 1.
|
||||
|
||||
*Thanks to [Horace He](https://github.com/Chillee) from the PyTorch team for their support in improving our support of `torch.compile()` in Diffusers.*
|
||||
|
||||
* 벤치마크 수행에 사용된 환경에 대한 자세한 내용은 [이 PR](https://github.com/huggingface/diffusers/pull/3313)을 참조하세요.
|
||||
* IF 파이프라인와 배치 크기 > 1의 경우 첫 번째 IF 파이프라인에서 text-to-image 생성을 위한 배치 크기 > 1만 사용했으며 업스케일링에는 사용하지 않았습니다. 즉, 두 개의 업스케일링 파이프라인이 배치 크기 1임을 의미합니다.
|
||||
|
||||
*Diffusers에서 `torch.compile()` 지원을 개선하는 데 도움을 준 PyTorch 팀의 [Horace He](https://github.com/Chillee)에게 감사드립니다.*
|
||||
@@ -1,54 +0,0 @@
|
||||
<!--Copyright 2023 The HuggingFace Team. All rights reserved.
|
||||
|
||||
Licensed under the Apache License, Version 2.0 (the "License"); you may not use this file except in compliance with
|
||||
the License. You may obtain a copy of the License at
|
||||
|
||||
http://www.apache.org/licenses/LICENSE-2.0
|
||||
|
||||
Unless required by applicable law or agreed to in writing, software distributed under the License is distributed on
|
||||
an "AS IS" BASIS, WITHOUT WARRANTIES OR CONDITIONS OF ANY KIND, either express or implied. See the License for the
|
||||
specific language governing permissions and limitations under the License.
|
||||
-->
|
||||
|
||||
# 새로운 작업에 대한 모델을 적용하기
|
||||
|
||||
많은 diffusion 시스템은 같은 구성 요소들을 공유하므로 한 작업에 대해 사전학습된 모델을 완전히 다른 작업에 적용할 수 있습니다.
|
||||
|
||||
이 인페인팅을 위한 가이드는 사전학습된 [`UNet2DConditionModel`]의 아키텍처를 초기화하고 수정하여 사전학습된 text-to-image 모델을 어떻게 인페인팅에 적용하는지를 알려줄 것입니다.
|
||||
|
||||
## UNet2DConditionModel 파라미터 구성
|
||||
|
||||
[`UNet2DConditionModel`]은 [input sample](https://huggingface.co/docs/diffusers/v0.16.0/en/api/models#diffusers.UNet2DConditionModel.in_channels)에서 4개의 채널을 기본적으로 허용합니다. 예를 들어, [`runwayml/stable-diffusion-v1-5`](https://huggingface.co/runwayml/stable-diffusion-v1-5)와 같은 사전학습된 text-to-image 모델을 불러오고 `in_channels`의 수를 확인합니다:
|
||||
|
||||
```py
|
||||
from diffusers import StableDiffusionPipeline
|
||||
|
||||
pipeline = StableDiffusionPipeline.from_pretrained("runwayml/stable-diffusion-v1-5")
|
||||
pipeline.unet.config["in_channels"]
|
||||
4
|
||||
```
|
||||
|
||||
인페인팅은 입력 샘플에 9개의 채널이 필요합니다. [`runwayml/stable-diffusion-inpainting`](https://huggingface.co/runwayml/stable-diffusion-inpainting)와 같은 사전학습된 인페인팅 모델에서 이 값을 확인할 수 있습니다:
|
||||
|
||||
```py
|
||||
from diffusers import StableDiffusionPipeline
|
||||
|
||||
pipeline = StableDiffusionPipeline.from_pretrained("runwayml/stable-diffusion-inpainting")
|
||||
pipeline.unet.config["in_channels"]
|
||||
9
|
||||
```
|
||||
|
||||
인페인팅에 대한 text-to-image 모델을 적용하기 위해, `in_channels` 수를 4에서 9로 수정해야 할 것입니다.
|
||||
|
||||
사전학습된 text-to-image 모델의 가중치와 [`UNet2DConditionModel`]을 초기화하고 `in_channels`를 9로 수정해 주세요. `in_channels`의 수를 수정하면 크기가 달라지기 때문에 크기가 안 맞는 오류를 피하기 위해 `ignore_mismatched_sizes=True` 및 `low_cpu_mem_usage=False`를 설정해야 합니다.
|
||||
|
||||
```py
|
||||
from diffusers import UNet2DConditionModel
|
||||
|
||||
model_id = "runwayml/stable-diffusion-v1-5"
|
||||
unet = UNet2DConditionModel.from_pretrained(
|
||||
model_id, subfolder="unet", in_channels=9, low_cpu_mem_usage=False, ignore_mismatched_sizes=True
|
||||
)
|
||||
```
|
||||
|
||||
Text-to-image 모델로부터 다른 구성 요소의 사전학습된 가중치는 체크포인트로부터 초기화되지만 `unet`의 입력 채널 가중치 (`conv_in.weight`)는 랜덤하게 초기화됩니다. 그렇지 않으면 모델이 노이즈를 리턴하기 때문에 인페인팅의 모델을 파인튜닝 할 때 중요합니다.
|
||||
@@ -273,7 +273,7 @@ from diffusers import DiffusionPipeline, UNet2DConditionModel
|
||||
from transformers import CLIPTextModel
|
||||
import torch
|
||||
|
||||
# 학습에 사용된 것과 동일한 인수(model, revision)로 파이프라인을 불러옵니다.
|
||||
# 학습에 사용된 것과 동일한 인수(model, revision)로 파이프라인을 로드합니다.
|
||||
model_id = "CompVis/stable-diffusion-v1-4"
|
||||
|
||||
unet = UNet2DConditionModel.from_pretrained("/sddata/dreambooth/daruma-v2-1/checkpoint-100/unet")
|
||||
@@ -294,7 +294,7 @@ If you have **`"accelerate<0.16.0"`** installed, you need to convert it to an in
|
||||
from accelerate import Accelerator
|
||||
from diffusers import DiffusionPipeline
|
||||
|
||||
# 학습에 사용된 것과 동일한 인수(model, revision)로 파이프라인을 불러옵니다.
|
||||
# 학습에 사용된 것과 동일한 인수(model, revision)로 파이프라인을 로드합니다.
|
||||
model_id = "CompVis/stable-diffusion-v1-4"
|
||||
pipeline = DiffusionPipeline.from_pretrained(model_id)
|
||||
|
||||
|
||||
@@ -102,7 +102,7 @@ accelerate launch train_dreambooth_lora.py \
|
||||
>>> pipe = StableDiffusionPipeline.from_pretrained(model_base, torch_dtype=torch.float16)
|
||||
```
|
||||
|
||||
*기본 모델의 가중치 위에* 파인튜닝된 DreamBooth 모델에서 LoRA 가중치를 불러온 다음, 더 빠른 추론을 위해 파이프라인을 GPU로 이동합니다. LoRA 가중치를 프리징된 사전 훈련된 모델 가중치와 병합할 때, 선택적으로 'scale' 매개변수로 어느 정도의 가중치를 병합할 지 조절할 수 있습니다:
|
||||
*기본 모델의 가중치 위에* 파인튜닝된 DreamBooth 모델에서 LoRA 가중치를 로드한 다음, 더 빠른 추론을 위해 파이프라인을 GPU로 이동합니다. LoRA 가중치를 프리징된 사전 훈련된 모델 가중치와 병합할 때, 선택적으로 'scale' 매개변수로 어느 정도의 가중치를 병합할 지 조절할 수 있습니다:
|
||||
|
||||
<Tip>
|
||||
|
||||
|
||||
@@ -1,73 +0,0 @@
|
||||
<!--Copyright 2023 The HuggingFace Team. All rights reserved.
|
||||
|
||||
Licensed under the Apache License, Version 2.0 (the "License"); you may not use this file except in compliance with
|
||||
the License. You may obtain a copy of the License at
|
||||
|
||||
http://www.apache.org/licenses/LICENSE-2.0
|
||||
|
||||
Unless required by applicable law or agreed to in writing, software distributed under the License is distributed on
|
||||
an "AS IS" BASIS, WITHOUT WARRANTIES OR CONDITIONS OF ANY KIND, either express or implied. See the License for the
|
||||
specific language governing permissions and limitations under the License.
|
||||
-->
|
||||
|
||||
# 🧨 Diffusers 학습 예시
|
||||
|
||||
이번 챕터에서는 다양한 유즈케이스들에 대한 예제 코드들을 통해 어떻게하면 효과적으로 `diffusers` 라이브러리를 사용할 수 있을까에 대해 알아보도록 하겠습니다.
|
||||
|
||||
**Note**: 혹시 오피셜한 예시코드를 찾고 있다면, [여기](https://github.com/huggingface/diffusers/tree/main/src/diffusers/pipelines)를 참고해보세요!
|
||||
|
||||
여기서 다룰 예시들은 다음을 지향합니다.
|
||||
|
||||
- **손쉬운 디펜던시 설치** (Self-contained) : 여기서 사용될 예시 코드들의 디펜던시 패키지들은 전부 `pip install` 명령어를 통해 설치 가능한 패키지들입니다. 또한 친절하게 `requirements.txt` 파일에 해당 패키지들이 명시되어 있어, `pip install -r requirements.txt`로 간편하게 해당 디펜던시들을 설치할 수 있습니다. 예시: [train_unconditional.py](https://github.com/huggingface/diffusers/blob/main/examples/unconditional_image_generation/train_unconditional.py), [requirements.txt](https://github.com/huggingface/diffusers/blob/main/examples/unconditional_image_generation/requirements.txt)
|
||||
- **손쉬운 수정** (Easy-to-tweak) : 저희는 가능하면 많은 유즈 케이스들을 제공하고자 합니다. 하지만 예시는 결국 그저 예시라는 점들 기억해주세요. 여기서 제공되는 예시코드들을 그저 단순히 복사-붙혀넣기하는 식으로는 여러분이 마주한 문제들을 손쉽게 해결할 순 없을 것입니다. 다시 말해 어느 정도는 여러분의 상황과 니즈에 맞춰 코드를 일정 부분 고쳐나가야 할 것입니다. 따라서 대부분의 학습 예시들은 데이터의 전처리 과정과 학습 과정에 대한 코드들을 함께 제공함으로써, 사용자가 니즈에 맞게 손쉬운 수정할 수 있도록 돕고 있습니다.
|
||||
- **입문자 친화적인** (Beginner-friendly) : 이번 챕터는 diffusion 모델과 `diffusers` 라이브러리에 대한 전반적인 이해를 돕기 위해 작성되었습니다. 따라서 diffusion 모델에 대한 최신 SOTA (state-of-the-art) 방법론들 가운데서도, 입문자에게는 많이 어려울 수 있다고 판단되면, 해당 방법론들은 여기서 다루지 않으려고 합니다.
|
||||
- **하나의 태스크만 포함할 것**(One-purpose-only): 여기서 다룰 예시들은 하나의 태스크만 포함하고 있어야 합니다. 물론 이미지 초해상화(super-resolution)와 이미지 보정(modification)과 같은 유사한 모델링 프로세스를 갖는 태스크들이 존재하겠지만, 하나의 예제에 하나의 태스크만을 담는 것이 더 이해하기 용이하다고 판단했기 때문입니다.
|
||||
|
||||
|
||||
|
||||
저희는 diffusion 모델의 대표적인 태스크들을 다루는 공식 예제를 제공하고 있습니다. *공식* 예제는 현재 진행형으로 `diffusers` 관리자들(maintainers)에 의해 관리되고 있습니다. 또한 저희는 앞서 정의한 저희의 철학을 엄격하게 따르고자 노력하고 있습니다. 혹시 여러분께서 이러한 예시가 반드시 필요하다고 생각되신다면, 언제든지 [Feature Request](https://github.com/huggingface/diffusers/issues/new?assignees=&labels=&template=feature_request.md&title=) 혹은 직접 [Pull Request](https://github.com/huggingface/diffusers/compare)를 주시기 바랍니다. 저희는 언제나 환영입니다!
|
||||
|
||||
학습 예시들은 다양한 태스크들에 대해 diffusion 모델을 사전학습(pretrain)하거나 파인튜닝(fine-tuning)하는 법을 보여줍니다. 현재 다음과 같은 예제들을 지원하고 있습니다.
|
||||
|
||||
- [Unconditional Training](./unconditional_training)
|
||||
- [Text-to-Image Training](./text2image)
|
||||
- [Text Inversion](./text_inversion)
|
||||
- [Dreambooth](./dreambooth)
|
||||
|
||||
memory-efficient attention 연산을 수행하기 위해, 가능하면 [xFormers](../optimization/xformers)를 설치해주시기 바랍니다. 이를 통해 학습 속도를 늘리고 메모리에 대한 부담을 줄일 수 있습니다.
|
||||
|
||||
| Task | 🤗 Accelerate | 🤗 Datasets | Colab
|
||||
|---|---|:---:|:---:|
|
||||
| [**Unconditional Image Generation**](./unconditional_training) | ✅ | ✅ | [](https://colab.research.google.com/github/huggingface/notebooks/blob/main/diffusers/training_example.ipynb)
|
||||
| [**Text-to-Image fine-tuning**](./text2image) | ✅ | ✅ |
|
||||
| [**Textual Inversion**](./text_inversion) | ✅ | - | [](https://colab.research.google.com/github/huggingface/notebooks/blob/main/diffusers/sd_textual_inversion_training.ipynb)
|
||||
| [**Dreambooth**](./dreambooth) | ✅ | - | [](https://colab.research.google.com/github/huggingface/notebooks/blob/main/diffusers/sd_dreambooth_training.ipynb)
|
||||
| [**Training with LoRA**](./lora) | ✅ | - | - |
|
||||
| [**ControlNet**](./controlnet) | ✅ | ✅ | - |
|
||||
| [**InstructPix2Pix**](./instructpix2pix) | ✅ | ✅ | - |
|
||||
| [**Custom Diffusion**](./custom_diffusion) | ✅ | ✅ | - |
|
||||
|
||||
|
||||
## 커뮤니티
|
||||
|
||||
공식 예제 외에도 **커뮤니티 예제** 역시 제공하고 있습니다. 해당 예제들은 우리의 커뮤니티에 의해 관리됩니다. 커뮤니티 예쩨는 학습 예시나 추론 파이프라인으로 구성될 수 있습니다. 이러한 커뮤니티 예시들의 경우, 앞서 정의했던 철학들을 좀 더 관대하게 적용하고 있습니다. 또한 이러한 커뮤니티 예시들의 경우, 모든 이슈들에 대한 유지보수를 보장할 수는 없습니다.
|
||||
|
||||
유용하긴 하지만, 아직은 대중적이지 못하거나 저희의 철학에 부합하지 않는 예제들은 [community examples](https://github.com/huggingface/diffusers/tree/main/examples/community) 폴더에 담기게 됩니다.
|
||||
|
||||
**Note**: 커뮤니티 예제는 `diffusers`에 기여(contribution)를 희망하는 분들에게 [아주 좋은 기여 수단](https://github.com/huggingface/diffusers/issues?q=is%3Aopen+is%3Aissue+label%3A%22good+first+issue%22)이 될 수 있습니다.
|
||||
|
||||
## 주목할 사항들
|
||||
|
||||
최신 버전의 예시 코드들의 성공적인 구동을 보장하기 위해서는, 반드시 **소스코드를 통해 `diffusers`를 설치해야 하며,** 해당 예시 코드들이 요구하는 디펜던시들 역시 설치해야 합니다. 이를 위해 새로운 가상 환경을 구축하고 다음의 명령어를 실행해야 합니다.
|
||||
|
||||
```bash
|
||||
git clone https://github.com/huggingface/diffusers
|
||||
cd diffusers
|
||||
pip install .
|
||||
```
|
||||
|
||||
그 다음 `cd` 명령어를 통해 해당 예제 디렉토리에 접근해서 다음 명령어를 실행하면 됩니다.
|
||||
|
||||
```bash
|
||||
pip install -r requirements.txt
|
||||
```
|
||||
@@ -1,275 +0,0 @@
|
||||
<!--Copyright 2023 The HuggingFace Team. All rights reserved.
|
||||
|
||||
Licensed under the Apache License, Version 2.0 (the "License"); you may not use this file except in compliance with
|
||||
the License. You may obtain a copy of the License at
|
||||
|
||||
http://www.apache.org/licenses/LICENSE-2.0
|
||||
|
||||
Unless required by applicable law or agreed to in writing, software distributed under the License is distributed on
|
||||
an "AS IS" BASIS, WITHOUT WARRANTIES OR CONDITIONS OF ANY KIND, either express or implied. See the License for the
|
||||
specific language governing permissions and limitations under the License.
|
||||
-->
|
||||
|
||||
|
||||
|
||||
# Textual-Inversion
|
||||
|
||||
[[open-in-colab]]
|
||||
|
||||
[textual-inversion](https://arxiv.org/abs/2208.01618)은 소수의 예시 이미지에서 새로운 콘셉트를 포착하는 기법입니다. 이 기술은 원래 [Latent Diffusion](https://github.com/CompVis/latent-diffusion)에서 시연되었지만, 이후 [Stable Diffusion](https://huggingface.co/docs/diffusers/main/en/conceptual/stable_diffusion)과 같은 유사한 다른 모델에도 적용되었습니다. 학습된 콘셉트는 text-to-image 파이프라인에서 생성된 이미지를 더 잘 제어하는 데 사용할 수 있습니다. 이 모델은 텍스트 인코더의 임베딩 공간에서 새로운 '단어'를 학습하여 개인화된 이미지 생성을 위한 텍스트 프롬프트 내에서 사용됩니다.
|
||||
|
||||

|
||||
<small>By using just 3-5 images you can teach new concepts to a model such as Stable Diffusion for personalized image generation <a href="https://github.com/rinongal/textual_inversion">(image source)</a>.</small>
|
||||
|
||||
이 가이드에서는 textual-inversion으로 [`runwayml/stable-diffusion-v1-5`](https://huggingface.co/runwayml/stable-diffusion-v1-5) 모델을 학습하는 방법을 설명합니다. 이 가이드에서 사용된 모든 textual-inversion 학습 스크립트는 [여기](https://github.com/huggingface/diffusers/tree/main/examples/textual_inversion)에서 확인할 수 있습니다. 내부적으로 어떻게 작동하는지 자세히 살펴보고 싶으시다면 해당 링크를 참조해주시기 바랍니다.
|
||||
|
||||
<Tip>
|
||||
|
||||
[Stable Diffusion Textual Inversion Concepts Library](https://huggingface.co/sd-concepts-library)에는 커뮤니티에서 제작한 학습된 textual-inversion 모델들이 있습니다. 시간이 지남에 따라 더 많은 콘셉트들이 추가되어 유용한 리소스로 성장할 것입니다!
|
||||
|
||||
</Tip>
|
||||
|
||||
시작하기 전에 학습을 위한 의존성 라이브러리들을 설치해야 합니다:
|
||||
|
||||
```bash
|
||||
pip install diffusers accelerate transformers
|
||||
```
|
||||
|
||||
의존성 라이브러리들의 설치가 완료되면, [🤗Accelerate](https://github.com/huggingface/accelerate/) 환경을 초기화시킵니다.
|
||||
|
||||
```bash
|
||||
accelerate config
|
||||
```
|
||||
|
||||
별도의 설정없이, 기본 🤗Accelerate 환경을 설정하려면 다음과 같이 하세요:
|
||||
|
||||
```bash
|
||||
accelerate config default
|
||||
```
|
||||
|
||||
또는 사용 중인 환경이 노트북과 같은 대화형 셸을 지원하지 않는다면, 다음과 같이 사용할 수 있습니다:
|
||||
|
||||
```py
|
||||
from accelerate.utils import write_basic_config
|
||||
|
||||
write_basic_config()
|
||||
```
|
||||
|
||||
마지막으로, Memory-Efficient Attention을 통해 메모리 사용량을 줄이기 위해 [xFormers](https://huggingface.co/docs/diffusers/main/en/training/optimization/xformers)를 설치합니다. xFormers를 설치한 후, 학습 스크립트에 `--enable_xformers_memory_efficient_attention` 인자를 추가합니다. xFormers는 Flax에서 지원되지 않습니다.
|
||||
|
||||
## 허브에 모델 업로드하기
|
||||
|
||||
모델을 허브에 저장하려면, 학습 스크립트에 다음 인자를 추가해야 합니다.
|
||||
|
||||
```bash
|
||||
--push_to_hub
|
||||
```
|
||||
|
||||
## 체크포인트 저장 및 불러오기
|
||||
|
||||
학습중에 모델의 체크포인트를 정기적으로 저장하는 것이 좋습니다. 이렇게 하면 어떤 이유로든 학습이 중단된 경우 저장된 체크포인트에서 학습을 다시 시작할 수 있습니다. 학습 스크립트에 다음 인자를 전달하면 500단계마다 전체 학습 상태가 `output_dir`의 하위 폴더에 체크포인트로서 저장됩니다.
|
||||
|
||||
```bash
|
||||
--checkpointing_steps=500
|
||||
```
|
||||
|
||||
저장된 체크포인트에서 학습을 재개하려면, 학습 스크립트와 재개할 특정 체크포인트에 다음 인자를 전달하세요.
|
||||
|
||||
```bash
|
||||
--resume_from_checkpoint="checkpoint-1500"
|
||||
```
|
||||
|
||||
## 파인 튜닝
|
||||
|
||||
학습용 데이터셋으로 [고양이 장난감 데이터셋](https://huggingface.co/datasets/diffusers/cat_toy_example)을 다운로드하여 디렉토리에 저장하세요. 여러분만의 고유한 데이터셋을 사용하고자 한다면, [학습용 데이터셋 만들기](https://huggingface.co/docs/diffusers/training/create_dataset) 가이드를 살펴보시기 바랍니다.
|
||||
|
||||
```py
|
||||
from huggingface_hub import snapshot_download
|
||||
|
||||
local_dir = "./cat"
|
||||
snapshot_download(
|
||||
"diffusers/cat_toy_example", local_dir=local_dir, repo_type="dataset", ignore_patterns=".gitattributes"
|
||||
)
|
||||
```
|
||||
|
||||
모델의 리포지토리 ID(또는 모델 가중치가 포함된 디렉터리 경로)를 `MODEL_NAME` 환경 변수에 할당하고, 해당 값을 [`pretrained_model_name_or_path`](https://huggingface.co/docs/diffusers/en/api/diffusion_pipeline#diffusers.DiffusionPipeline.from_pretrained.pretrained_model_name_or_path) 인자에 전달합니다. 그리고 이미지가 포함된 디렉터리 경로를 `DATA_DIR` 환경 변수에 할당합니다.
|
||||
|
||||
이제 [학습 스크립트](https://github.com/huggingface/diffusers/blob/main/examples/textual_inversion/textual_inversion.py)를 실행할 수 있습니다. 스크립트는 다음 파일을 생성하고 리포지토리에 저장합니다.
|
||||
|
||||
- `learned_embeds.bin`
|
||||
- `token_identifier.txt`
|
||||
- `type_of_concept.txt`.
|
||||
|
||||
<Tip>
|
||||
|
||||
💡V100 GPU 1개를 기준으로 전체 학습에는 최대 1시간이 걸립니다. 학습이 완료되기를 기다리는 동안 궁금한 점이 있으면 아래 섹션에서 [textual-inversion이 어떻게 작동하는지](https://huggingface.co/docs/diffusers/training/text_inversion#how-it-works) 자유롭게 확인하세요 !
|
||||
|
||||
</Tip>
|
||||
|
||||
<frameworkcontent>
|
||||
<pt>
|
||||
```bash
|
||||
export MODEL_NAME="runwayml/stable-diffusion-v1-5"
|
||||
export DATA_DIR="./cat"
|
||||
|
||||
accelerate launch textual_inversion.py \
|
||||
--pretrained_model_name_or_path=$MODEL_NAME \
|
||||
--train_data_dir=$DATA_DIR \
|
||||
--learnable_property="object" \
|
||||
--placeholder_token="<cat-toy>" --initializer_token="toy" \
|
||||
--resolution=512 \
|
||||
--train_batch_size=1 \
|
||||
--gradient_accumulation_steps=4 \
|
||||
--max_train_steps=3000 \
|
||||
--learning_rate=5.0e-04 --scale_lr \
|
||||
--lr_scheduler="constant" \
|
||||
--lr_warmup_steps=0 \
|
||||
--output_dir="textual_inversion_cat" \
|
||||
--push_to_hub
|
||||
```
|
||||
|
||||
<Tip>
|
||||
|
||||
💡학습 성능을 올리기 위해, 플레이스홀더 토큰(`<cat-toy>`)을 (단일한 임베딩 벡터가 아닌) 복수의 임베딩 벡터로 표현하는 것 역시 고려할 있습니다. 이러한 트릭이 모델이 보다 복잡한 이미지의 스타일(앞서 말한 콘셉트)을 더 잘 캡처하는 데 도움이 될 수 있습니다. 복수의 임베딩 벡터 학습을 활성화하려면 다음 옵션을 전달하십시오.
|
||||
|
||||
```bash
|
||||
--num_vectors=5
|
||||
```
|
||||
|
||||
</Tip>
|
||||
</pt>
|
||||
<jax>
|
||||
|
||||
TPU에 액세스할 수 있는 경우, [Flax 학습 스크립트](https://github.com/huggingface/diffusers/blob/main/examples/textual_inversion/textual_inversion_flax.py)를 사용하여 더 빠르게 모델을 학습시켜보세요. (물론 GPU에서도 작동합니다.) 동일한 설정에서 Flax 학습 스크립트는 PyTorch 학습 스크립트보다 최소 70% 더 빨라야 합니다! ⚡️
|
||||
|
||||
시작하기 앞서 Flax에 대한 의존성 라이브러리들을 설치해야 합니다.
|
||||
|
||||
```bash
|
||||
pip install -U -r requirements_flax.txt
|
||||
```
|
||||
|
||||
모델의 리포지토리 ID(또는 모델 가중치가 포함된 디렉터리 경로)를 `MODEL_NAME` 환경 변수에 할당하고, 해당 값을 [`pretrained_model_name_or_path`](https://huggingface.co/docs/diffusers/en/api/diffusion_pipeline#diffusers.DiffusionPipeline.from_pretrained.pretrained_model_name_or_path) 인자에 전달합니다.
|
||||
|
||||
그런 다음 [학습 스크립트](https://github.com/huggingface/diffusers/blob/main/examples/textual_inversion/textual_inversion_flax.py)를 시작할 수 있습니다.
|
||||
|
||||
```bash
|
||||
export MODEL_NAME="duongna/stable-diffusion-v1-4-flax"
|
||||
export DATA_DIR="./cat"
|
||||
|
||||
python textual_inversion_flax.py \
|
||||
--pretrained_model_name_or_path=$MODEL_NAME \
|
||||
--train_data_dir=$DATA_DIR \
|
||||
--learnable_property="object" \
|
||||
--placeholder_token="<cat-toy>" --initializer_token="toy" \
|
||||
--resolution=512 \
|
||||
--train_batch_size=1 \
|
||||
--max_train_steps=3000 \
|
||||
--learning_rate=5.0e-04 --scale_lr \
|
||||
--output_dir="textual_inversion_cat" \
|
||||
--push_to_hub
|
||||
```
|
||||
</jax>
|
||||
</frameworkcontent>
|
||||
|
||||
### 중간 로깅
|
||||
|
||||
모델의 학습 진행 상황을 추적하는 데 관심이 있는 경우, 학습 과정에서 생성된 이미지를 저장할 수 있습니다. 학습 스크립트에 다음 인수를 추가하여 중간 로깅을 활성화합니다.
|
||||
|
||||
- `validation_prompt` : 샘플을 생성하는 데 사용되는 프롬프트(기본값은 `None`으로 설정되며, 이 때 중간 로깅은 비활성화됨)
|
||||
- `num_validation_images` : 생성할 샘플 이미지 수
|
||||
- `validation_steps` : `validation_prompt`로부터 샘플 이미지를 생성하기 전 스텝의 수
|
||||
|
||||
```bash
|
||||
--validation_prompt="A <cat-toy> backpack"
|
||||
--num_validation_images=4
|
||||
--validation_steps=100
|
||||
```
|
||||
|
||||
## 추론
|
||||
|
||||
모델을 학습한 후에는, 해당 모델을 [`StableDiffusionPipeline`]을 사용하여 추론에 사용할 수 있습니다.
|
||||
|
||||
textual-inversion 스크립트는 기본적으로 textual-inversion을 통해 얻어진 임베딩 벡터만을 저장합니다. 해당 임베딩 벡터들은 텍스트 인코더의 임베딩 행렬에 추가되어 있습습니다.
|
||||
|
||||
<frameworkcontent>
|
||||
<pt>
|
||||
<Tip>
|
||||
|
||||
💡 커뮤니티는 [sd-concepts-library](https://huggingface.co/sd-concepts-library) 라는 대규모의 textual-inversion 임베딩 벡터 라이브러리를 만들었습니다. textual-inversion 임베딩을 밑바닥부터 학습하는 대신, 해당 라이브러리에 본인이 찾는 textual-inversion 임베딩이 이미 추가되어 있지 않은지를 확인하는 것도 좋은 방법이 될 것 같습니다.
|
||||
|
||||
</Tip>
|
||||
|
||||
textual-inversion 임베딩 벡터을 불러오기 위해서는, 먼저 해당 임베딩 벡터를 학습할 때 사용한 모델을 불러와야 합니다. 여기서는 [`runwayml/stable-diffusion-v1-5`](https://huggingface.co/docs/diffusers/training/runwayml/stable-diffusion-v1-5) 모델이 사용되었다고 가정하고 불러오겠습니다.
|
||||
|
||||
```python
|
||||
from diffusers import StableDiffusionPipeline
|
||||
import torch
|
||||
|
||||
model_id = "runwayml/stable-diffusion-v1-5"
|
||||
pipe = StableDiffusionPipeline.from_pretrained(model_id, torch_dtype=torch.float16).to("cuda")
|
||||
```
|
||||
|
||||
다음으로 `TextualInversionLoaderMixin.load_textual_inversion` 함수를 통해, textual-inversion 임베딩 벡터를 불러와야 합니다. 여기서 우리는 이전의 `<cat-toy>` 예제의 임베딩을 불러올 것입니다.
|
||||
|
||||
```python
|
||||
pipe.load_textual_inversion("sd-concepts-library/cat-toy")
|
||||
```
|
||||
|
||||
이제 플레이스홀더 토큰(`<cat-toy>`)이 잘 동작하는지를 확인하는 파이프라인을 실행할 수 있습니다.
|
||||
|
||||
```python
|
||||
prompt = "A <cat-toy> backpack"
|
||||
|
||||
image = pipe(prompt, num_inference_steps=50).images[0]
|
||||
image.save("cat-backpack.png")
|
||||
```
|
||||
|
||||
`TextualInversionLoaderMixin.load_textual_inversion`은 Diffusers 형식으로 저장된 텍스트 임베딩 벡터를 로드할 수 있을 뿐만 아니라, [Automatic1111](https://github.com/AUTOMATIC1111/stable-diffusion-webui) 형식으로 저장된 임베딩 벡터도 로드할 수 있습니다. 이렇게 하려면, 먼저 [civitAI](https://civitai.com/models/3036?modelVersionId=8387)에서 임베딩 벡터를 다운로드한 다음 로컬에서 불러와야 합니다.
|
||||
|
||||
```python
|
||||
pipe.load_textual_inversion("./charturnerv2.pt")
|
||||
```
|
||||
</pt>
|
||||
<jax>
|
||||
|
||||
현재 Flax에 대한 `load_textual_inversion` 함수는 없습니다. 따라서 학습 후 textual-inversion 임베딩 벡터가 모델의 일부로서 저장되었는지를 확인해야 합니다. 그런 다음은 다른 Flax 모델과 마찬가지로 실행할 수 있습니다.
|
||||
|
||||
```python
|
||||
import jax
|
||||
import numpy as np
|
||||
from flax.jax_utils import replicate
|
||||
from flax.training.common_utils import shard
|
||||
from diffusers import FlaxStableDiffusionPipeline
|
||||
|
||||
model_path = "path-to-your-trained-model"
|
||||
pipeline, params = FlaxStableDiffusionPipeline.from_pretrained(model_path, dtype=jax.numpy.bfloat16)
|
||||
|
||||
prompt = "A <cat-toy> backpack"
|
||||
prng_seed = jax.random.PRNGKey(0)
|
||||
num_inference_steps = 50
|
||||
|
||||
num_samples = jax.device_count()
|
||||
prompt = num_samples * [prompt]
|
||||
prompt_ids = pipeline.prepare_inputs(prompt)
|
||||
|
||||
# shard inputs and rng
|
||||
params = replicate(params)
|
||||
prng_seed = jax.random.split(prng_seed, jax.device_count())
|
||||
prompt_ids = shard(prompt_ids)
|
||||
|
||||
images = pipeline(prompt_ids, params, prng_seed, num_inference_steps, jit=True).images
|
||||
images = pipeline.numpy_to_pil(np.asarray(images.reshape((num_samples,) + images.shape[-3:])))
|
||||
image.save("cat-backpack.png")
|
||||
```
|
||||
</jax>
|
||||
</frameworkcontent>
|
||||
|
||||
## 작동 방식
|
||||
|
||||
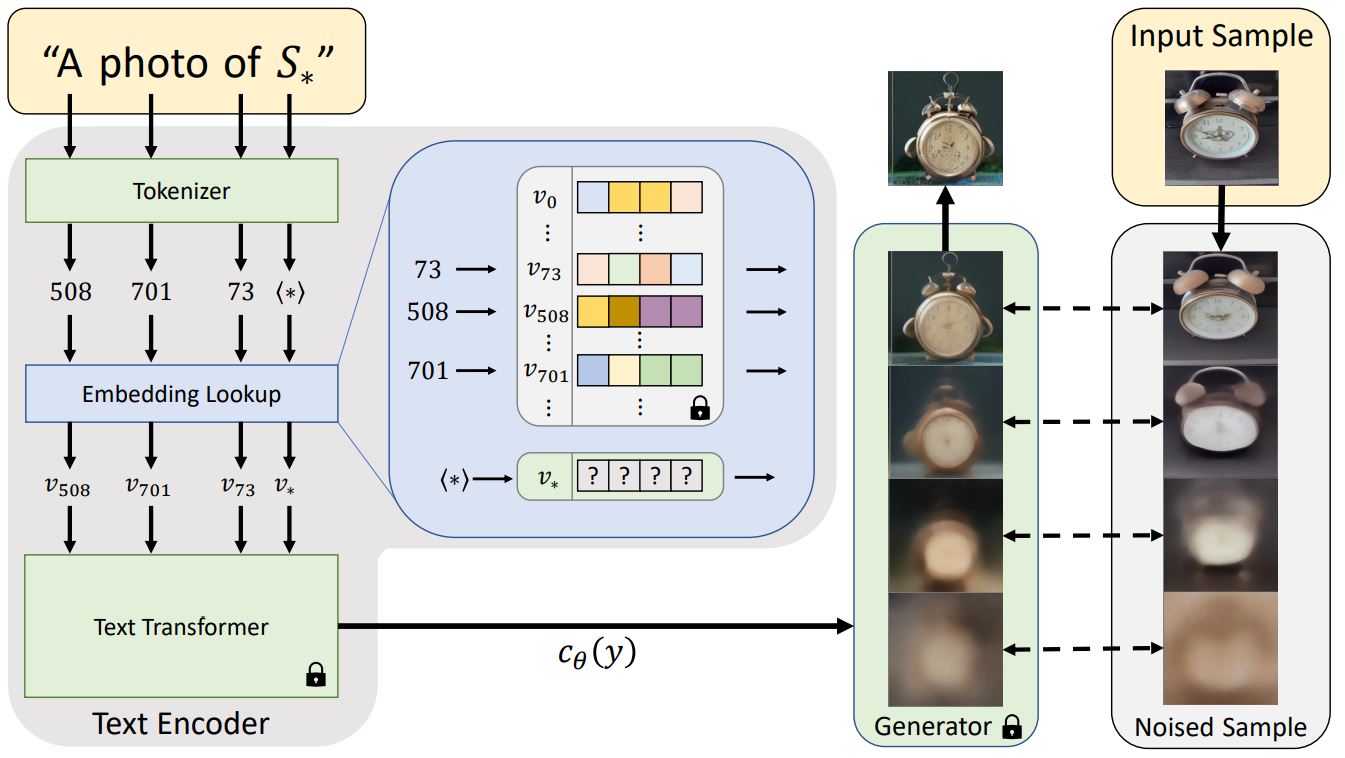
|
||||
<small>Architecture overview from the Textual Inversion <a href="https://textual-inversion.github.io/">blog post.</a></small>
|
||||
|
||||
일반적으로 텍스트 프롬프트는 모델에 전달되기 전에 임베딩으로 토큰화됩니다. textual-inversion은 비슷한 작업을 수행하지만, 위 다이어그램의 특수 토큰 `S*`로부터 새로운 토큰 임베딩 `v*`를 학습합니다. 모델의 아웃풋은 디퓨전 모델을 조정하는 데 사용되며, 디퓨전 모델이 단 몇 개의 예제 이미지에서 신속하고 새로운 콘셉트를 이해하는 데 도움을 줍니다.
|
||||
|
||||
이를 위해 textual-inversion은 제너레이터 모델과 학습용 이미지의 노이즈 버전을 사용합니다. 제너레이터는 노이즈가 적은 버전의 이미지를 예측하려고 시도하며 토큰 임베딩 `v*`은 제너레이터의 성능에 따라 최적화됩니다. 토큰 임베딩이 새로운 콘셉트를 성공적으로 포착하면 디퓨전 모델에 더 유용한 정보를 제공하고 노이즈가 적은 더 선명한 이미지를 생성하는 데 도움이 됩니다. 이러한 최적화 프로세스는 일반적으로 다양한 프롬프트와 이미지에 수천 번에 노출됨으로써 이루어집니다.
|
||||
|
||||
@@ -1,144 +0,0 @@
|
||||
<!--Copyright 2023 The HuggingFace Team. All rights reserved.
|
||||
|
||||
Licensed under the Apache License, Version 2.0 (the "License"); you may not use this file except in compliance with
|
||||
the License. You may obtain a copy of the License at
|
||||
|
||||
http://www.apache.org/licenses/LICENSE-2.0
|
||||
|
||||
Unless required by applicable law or agreed to in writing, software distributed under the License is distributed on
|
||||
an "AS IS" BASIS, WITHOUT WARRANTIES OR CONDITIONS OF ANY KIND, either express or implied. See the License for the
|
||||
specific language governing permissions and limitations under the License.
|
||||
-->
|
||||
|
||||
# Unconditional 이미지 생성
|
||||
|
||||
unconditional 이미지 생성은 text-to-image 또는 image-to-image 모델과 달리 텍스트나 이미지에 대한 조건이 없이 학습 데이터 분포와 유사한 이미지만을 생성합니다.
|
||||
|
||||
<iframe
|
||||
src="https://stevhliu-ddpm-butterflies-128.hf.space"
|
||||
frameborder="0"
|
||||
width="850"
|
||||
height="550"
|
||||
></iframe>
|
||||
|
||||
|
||||
이 가이드에서는 기존에 존재하던 데이터셋과 자신만의 커스텀 데이터셋에 대해 unconditional image generation 모델을 훈련하는 방법을 설명합니다. 훈련 세부 사항에 대해 더 자세히 알고 싶다면 unconditional image generation을 위한 모든 학습 스크립트를 [여기](https://github.com/huggingface/diffusers/tree/main/examples/unconditional_image_generation)에서 확인할 수 있습니다.
|
||||
|
||||
스크립트를 실행하기 전, 먼저 의존성 라이브러리들을 설치해야 합니다.
|
||||
|
||||
```bash
|
||||
pip install diffusers[training] accelerate datasets
|
||||
```
|
||||
|
||||
그 다음 🤗 [Accelerate](https://github.com/huggingface/accelerate/) 환경을 초기화합니다.
|
||||
|
||||
```bash
|
||||
accelerate config
|
||||
```
|
||||
|
||||
별도의 설정 없이 기본 설정으로 🤗 [Accelerate](https://github.com/huggingface/accelerate/) 환경을 초기화해봅시다.
|
||||
|
||||
```bash
|
||||
accelerate config default
|
||||
```
|
||||
|
||||
노트북과 같은 대화형 쉘을 지원하지 않는 환경의 경우, 다음과 같이 사용해볼 수도 있습니다.
|
||||
|
||||
```py
|
||||
from accelerate.utils import write_basic_config
|
||||
|
||||
write_basic_config()
|
||||
```
|
||||
|
||||
## 모델을 허브에 업로드하기
|
||||
|
||||
학습 스크립트에 다음 인자를 추가하여 허브에 모델을 업로드할 수 있습니다.
|
||||
|
||||
```bash
|
||||
--push_to_hub
|
||||
```
|
||||
|
||||
## 체크포인트 저장하고 불러오기
|
||||
|
||||
훈련 중 문제가 발생할 경우를 대비하여 체크포인트를 정기적으로 저장하는 것이 좋습니다. 체크포인트를 저장하려면 학습 스크립트에 다음 인자를 전달합니다:
|
||||
|
||||
```bash
|
||||
--checkpointing_steps=500
|
||||
```
|
||||
|
||||
전체 훈련 상태는 500스텝마다 `output_dir`의 하위 폴더에 저장되며, 학습 스크립트에 `--resume_from_checkpoint` 인자를 전달함으로써 체크포인트를 불러오고 훈련을 재개할 수 있습니다.
|
||||
|
||||
```bash
|
||||
--resume_from_checkpoint="checkpoint-1500"
|
||||
```
|
||||
|
||||
## 파인튜닝
|
||||
|
||||
이제 학습 스크립트를 시작할 준비가 되었습니다! `--dataset_name` 인자에 파인튜닝할 데이터셋 이름을 지정한 다음, `--output_dir` 인자에 지정된 경로로 저장합니다. 본인만의 데이터셋를 사용하려면, [학습용 데이터셋 만들기](create_dataset) 가이드를 참조하세요.
|
||||
|
||||
학습 스크립트는 `diffusion_pytorch_model.bin` 파일을 생성하고, 그것을 당신의 리포지토리에 저장합니다.
|
||||
|
||||
<Tip>
|
||||
|
||||
💡 전체 학습은 V100 GPU 4개를 사용할 경우, 2시간이 소요됩니다.
|
||||
|
||||
</Tip>
|
||||
|
||||
예를 들어, [Oxford Flowers](https://huggingface.co/datasets/huggan/flowers-102-categories) 데이터셋을 사용해 파인튜닝할 경우:
|
||||
|
||||
```bash
|
||||
accelerate launch train_unconditional.py \
|
||||
--dataset_name="huggan/flowers-102-categories" \
|
||||
--resolution=64 \
|
||||
--output_dir="ddpm-ema-flowers-64" \
|
||||
--train_batch_size=16 \
|
||||
--num_epochs=100 \
|
||||
--gradient_accumulation_steps=1 \
|
||||
--learning_rate=1e-4 \
|
||||
--lr_warmup_steps=500 \
|
||||
--mixed_precision=no \
|
||||
--push_to_hub
|
||||
```
|
||||
|
||||
<div class="flex justify-center">
|
||||
<img src="https://user-images.githubusercontent.com/26864830/180248660-a0b143d0-b89a-42c5-8656-2ebf6ece7e52.png"/>
|
||||
</div>
|
||||
[Pokemon](https://huggingface.co/datasets/huggan/pokemon) 데이터셋을 사용할 경우:
|
||||
|
||||
```bash
|
||||
accelerate launch train_unconditional.py \
|
||||
--dataset_name="huggan/pokemon" \
|
||||
--resolution=64 \
|
||||
--output_dir="ddpm-ema-pokemon-64" \
|
||||
--train_batch_size=16 \
|
||||
--num_epochs=100 \
|
||||
--gradient_accumulation_steps=1 \
|
||||
--learning_rate=1e-4 \
|
||||
--lr_warmup_steps=500 \
|
||||
--mixed_precision=no \
|
||||
--push_to_hub
|
||||
```
|
||||
|
||||
<div class="flex justify-center">
|
||||
<img src="https://user-images.githubusercontent.com/26864830/180248200-928953b4-db38-48db-b0c6-8b740fe6786f.png"/>
|
||||
</div>
|
||||
|
||||
### 여러개의 GPU로 훈련하기
|
||||
|
||||
`accelerate`을 사용하면 원활한 다중 GPU 훈련이 가능합니다. `accelerate`을 사용하여 분산 훈련을 실행하려면 [여기](https://huggingface.co/docs/accelerate/basic_tutorials/launch) 지침을 따르세요. 다음은 명령어 예제입니다.
|
||||
|
||||
```bash
|
||||
accelerate launch --mixed_precision="fp16" --multi_gpu train_unconditional.py \
|
||||
--dataset_name="huggan/pokemon" \
|
||||
--resolution=64 --center_crop --random_flip \
|
||||
--output_dir="ddpm-ema-pokemon-64" \
|
||||
--train_batch_size=16 \
|
||||
--num_epochs=100 \
|
||||
--gradient_accumulation_steps=1 \
|
||||
--use_ema \
|
||||
--learning_rate=1e-4 \
|
||||
--lr_warmup_steps=500 \
|
||||
--mixed_precision="fp16" \
|
||||
--logger="wandb" \
|
||||
--push_to_hub
|
||||
```
|
||||
Some files were not shown because too many files have changed in this diff Show More
Reference in New Issue
Block a user